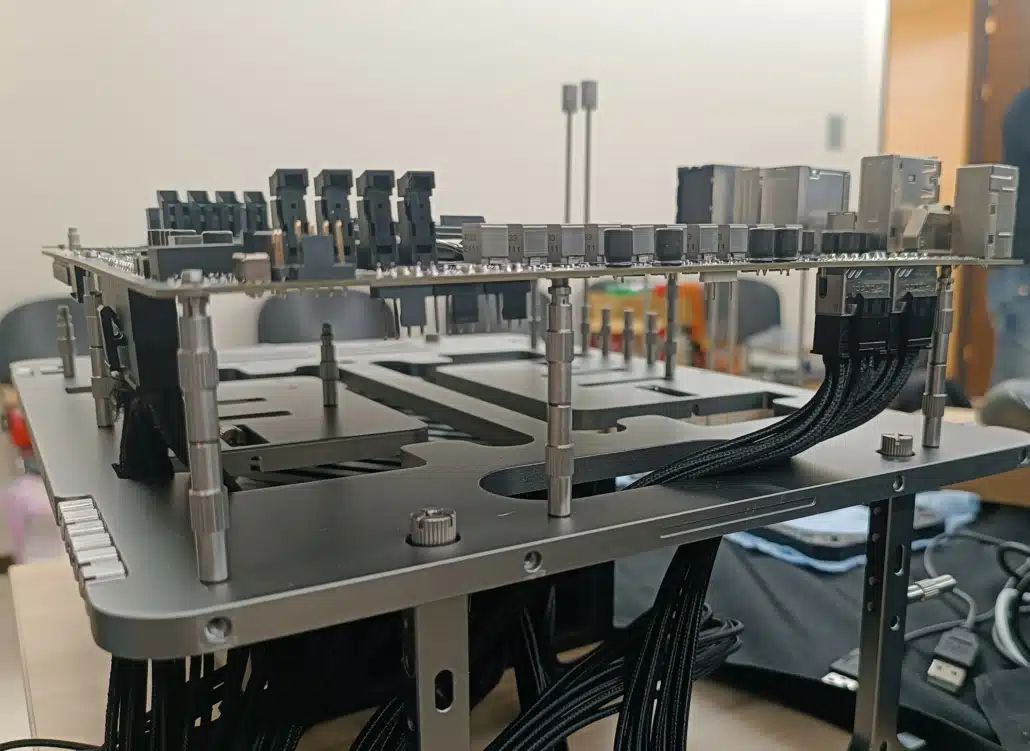
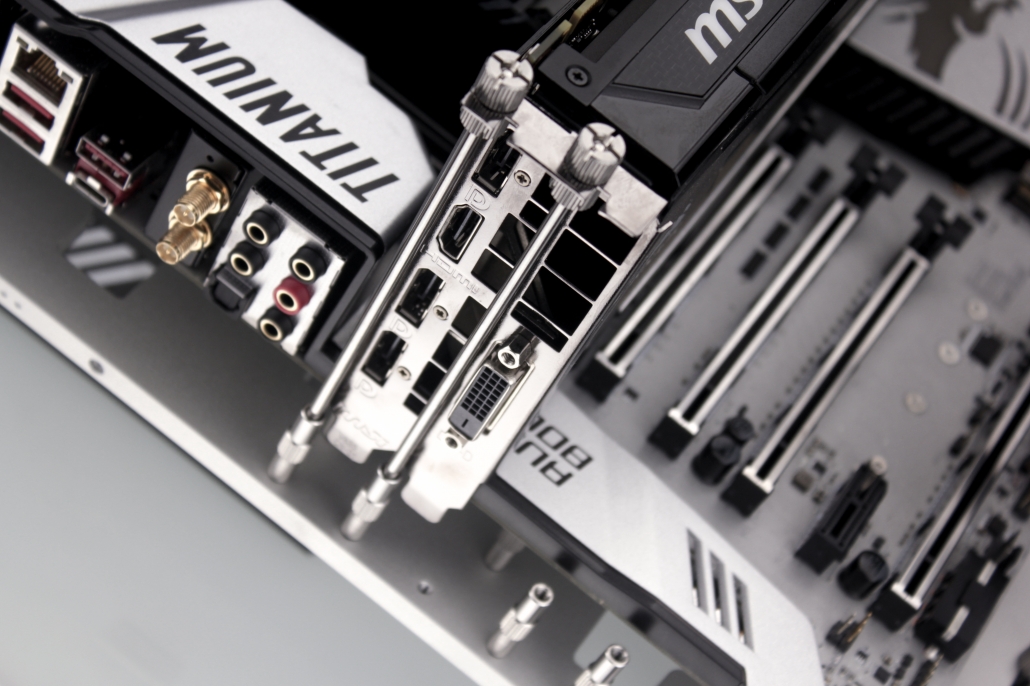
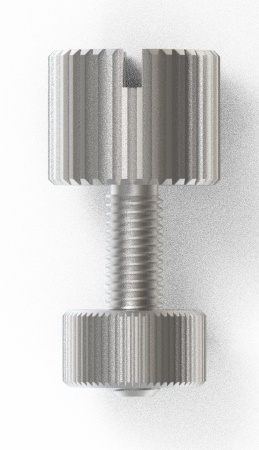
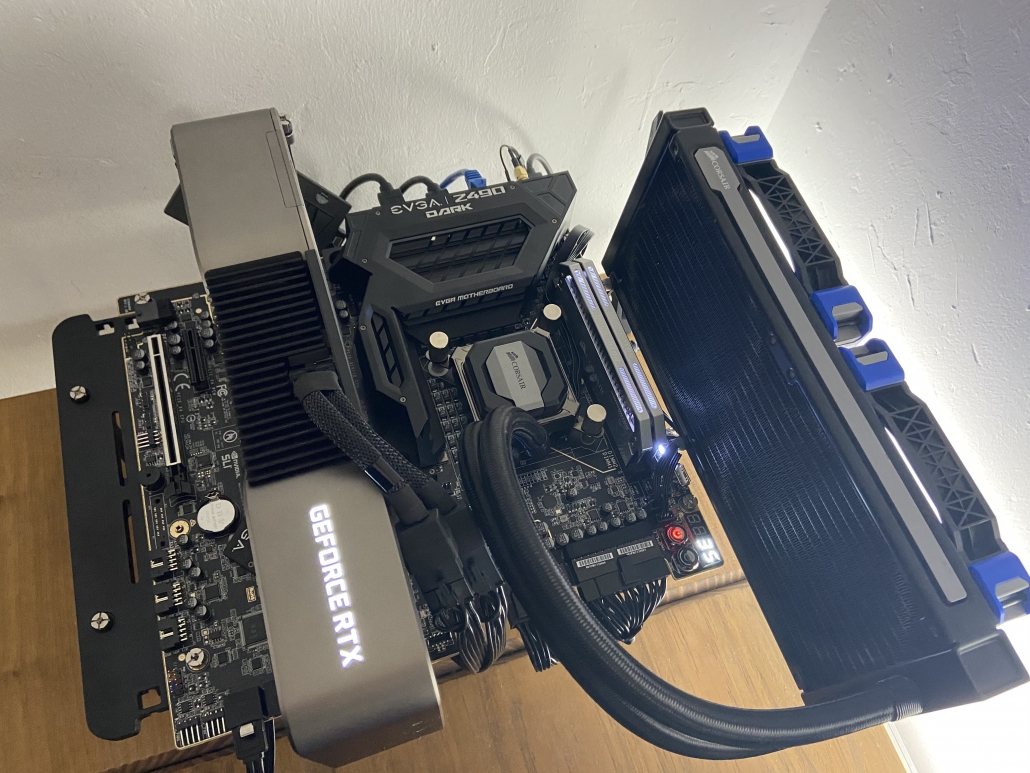
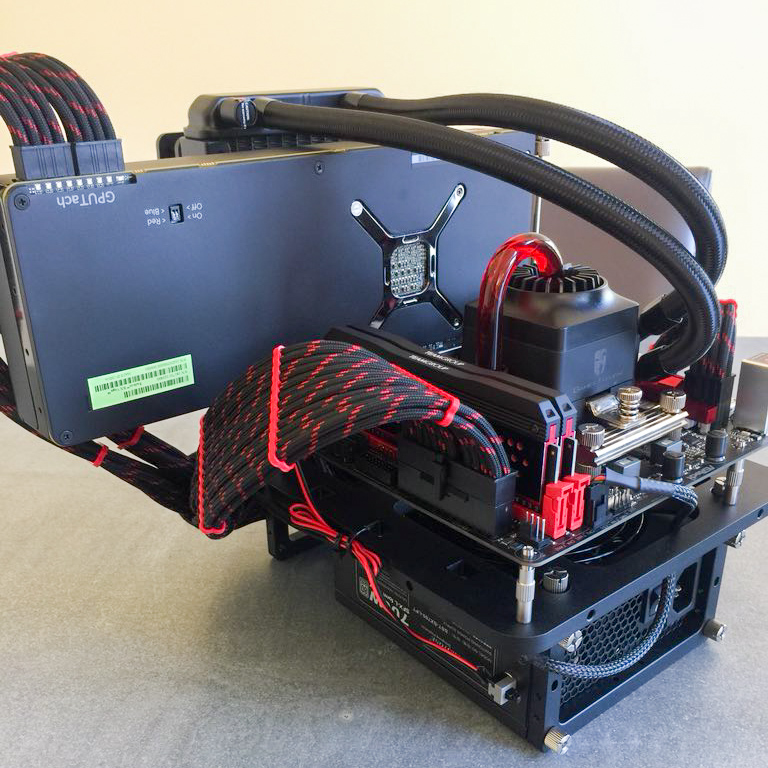
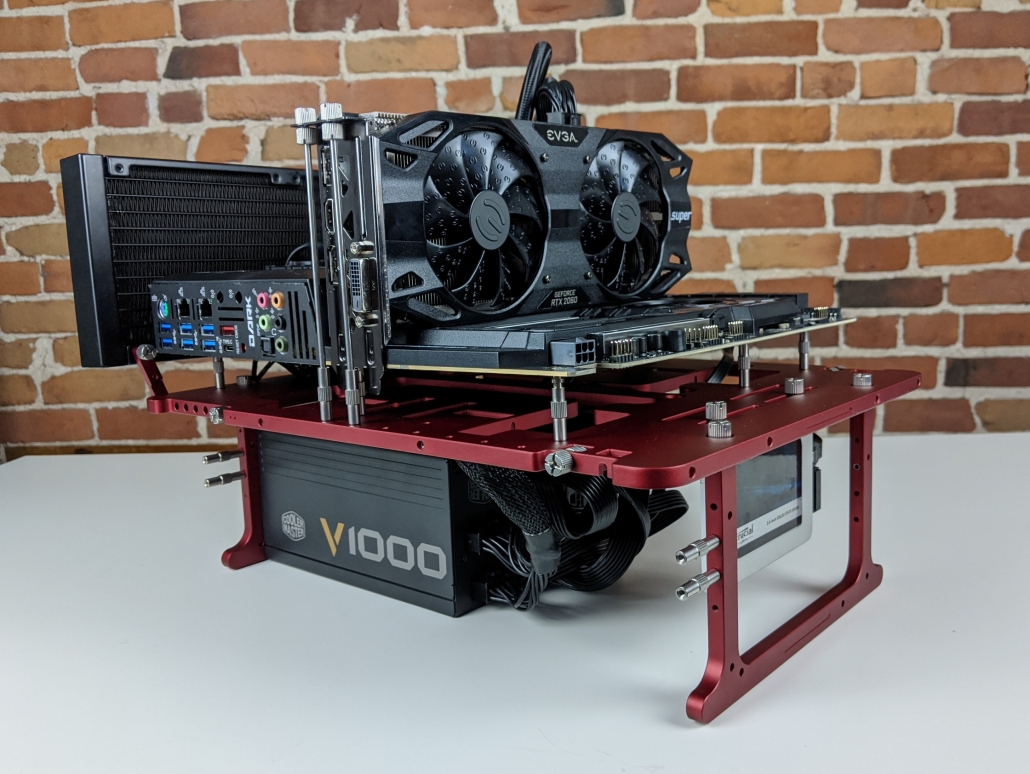
The Open Benchtable officially supports BTF form factor motherboards by double stacking the 25mm motherboard standoffs.
What is BTF?
ASUS BTF motherboards are a new line from ASUS designed specifically for users who want a clean and minimalist aesthetic in their PC builds. BTF stands for “Back To the Future,” and the key feature of these boards is that they hide most of the cables typically cluttering the inside of a computer case.
Here’s what are the benefits of the new standard:
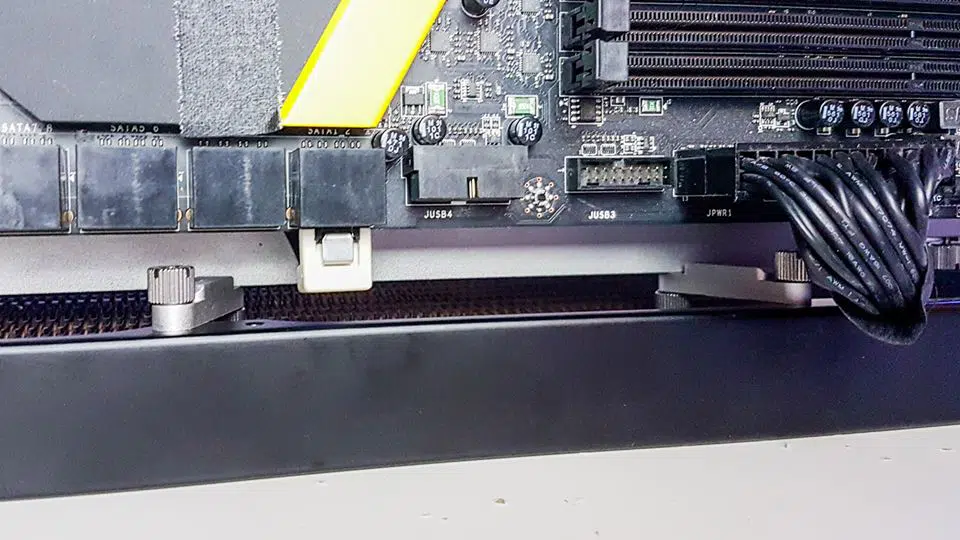
Hidden Connectors: Unlike traditional motherboards, BTF boards have their power, fan, and other connectors on the backside of PCB, facing the back of the case. This lets you route cables behind the motherboard, keeping them hidden from view.
Advanced BTF for Hidden Power Cables: Some motherboards, like the Z790-BTF, take this a step further with a special graphics card slot that can deliver power to the graphics card, eliminating the need for a separate PCIe power cable. This requires a compatible BTF graphics card as well.
ATX and mATX form factors: BTF motherboards are currently available in both ATX and mATX sizes, so you can choose one that fits your case.
The new form factor motherboards are a good option for PC builders who prioritize aesthetics and want a clean, cable-free look for their system. However, it’s important to note that they are a relatively new product and may be more expensive than traditional motherboards. They also require a compatible case and potentially graphics card to achieve the fully hidden cable look.
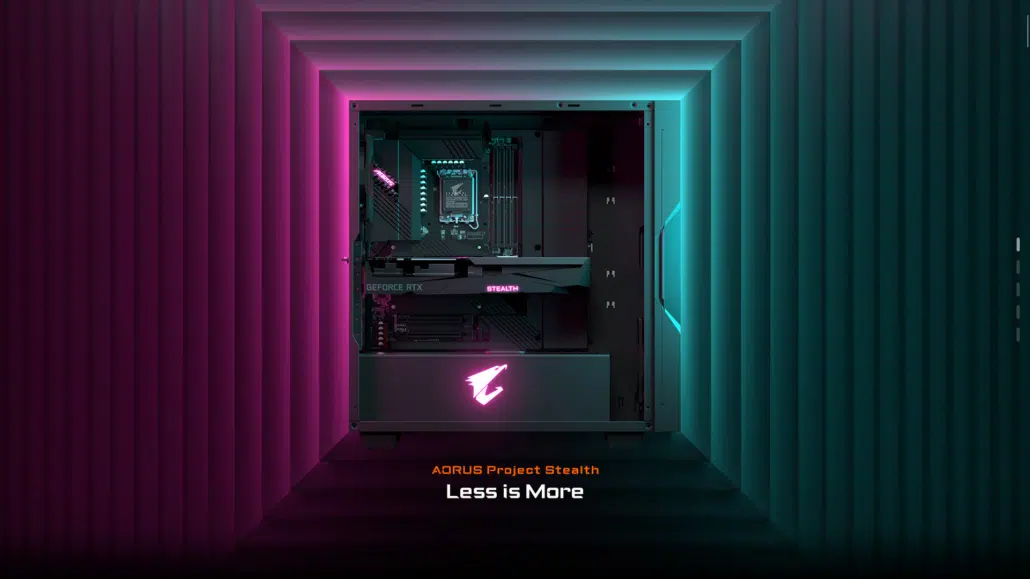
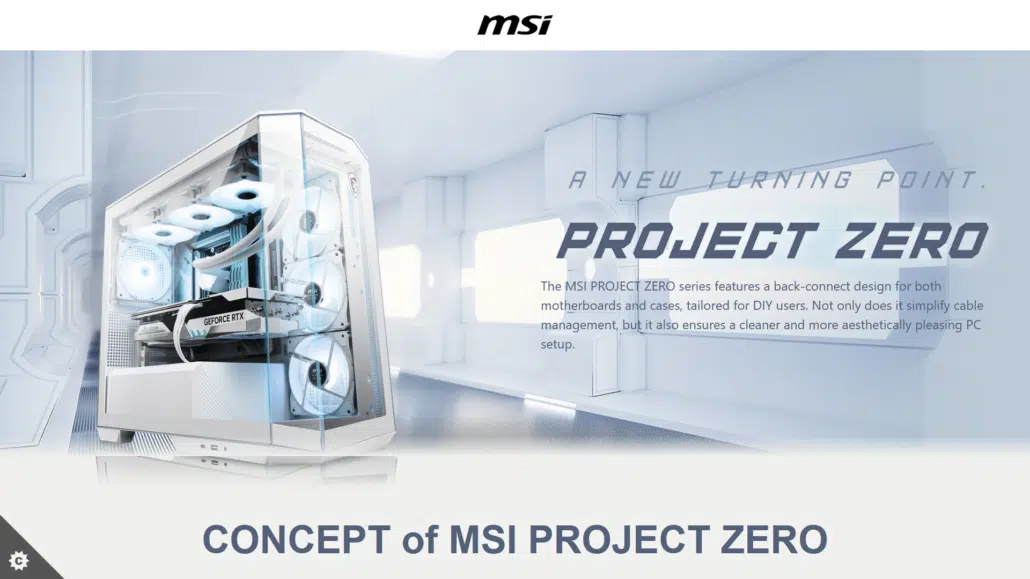
Other motherboard vendors offer similar form factor motherboards which feature backside connectors, for example: GIGABYTE Stealth and MSI Project Zero.
Open Benchtable Compatibility
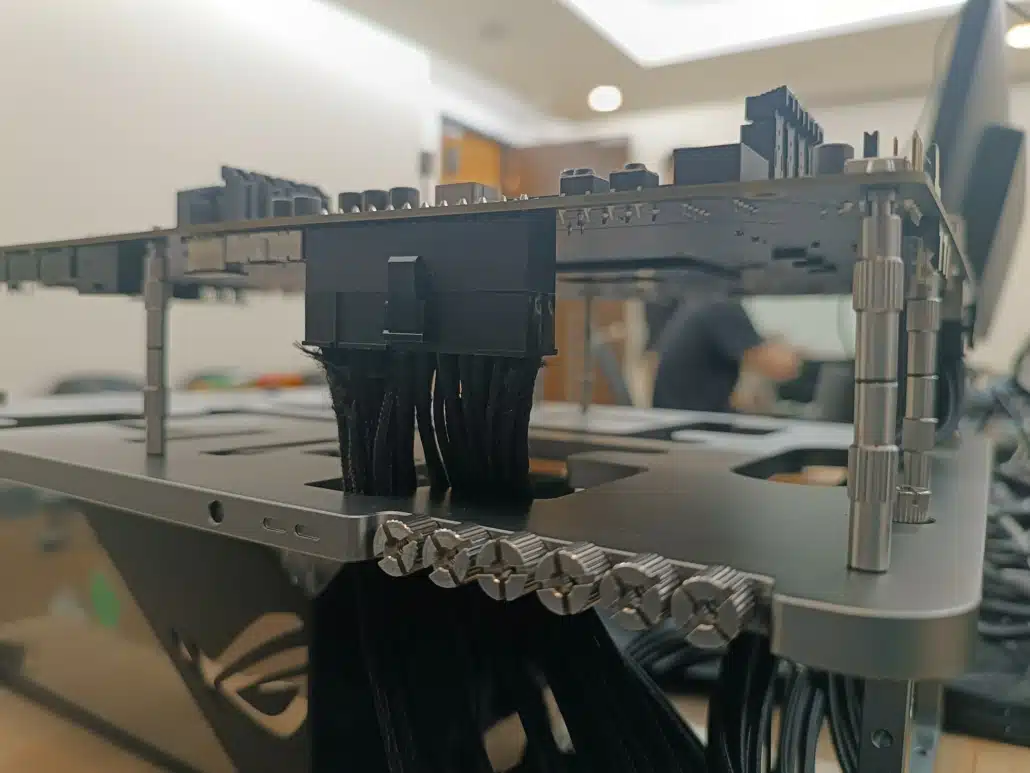
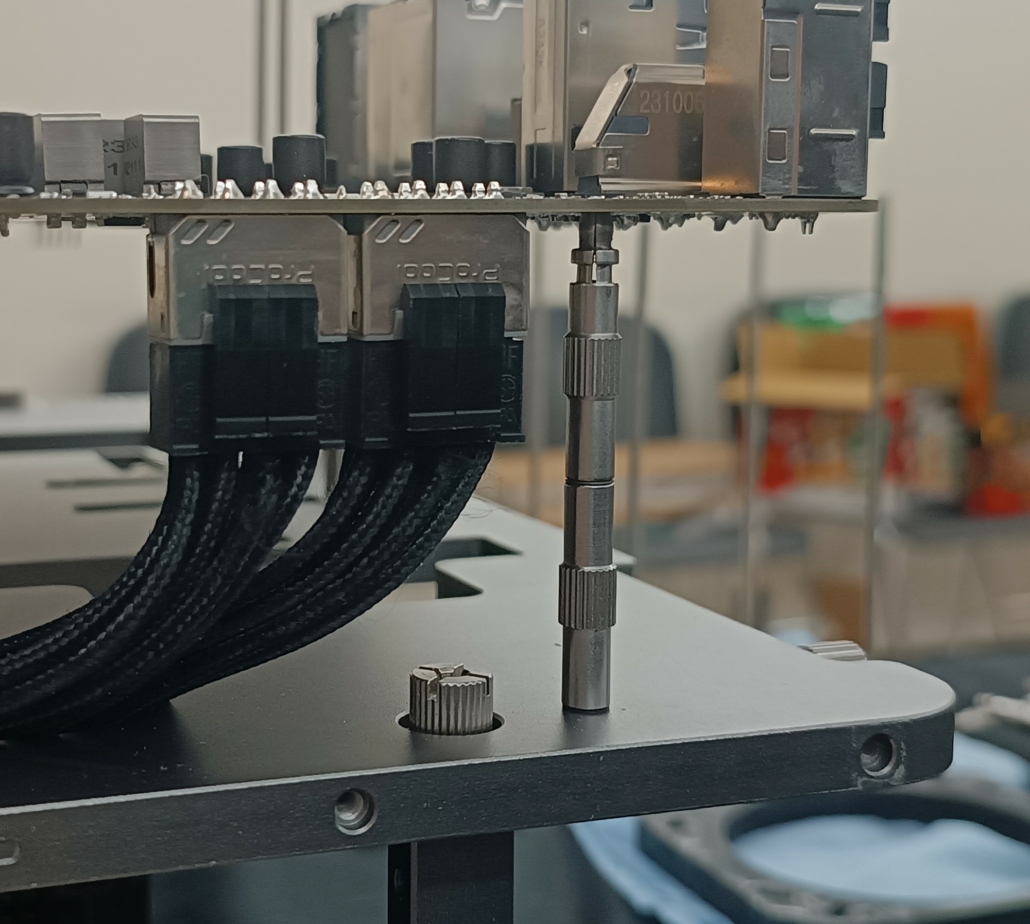
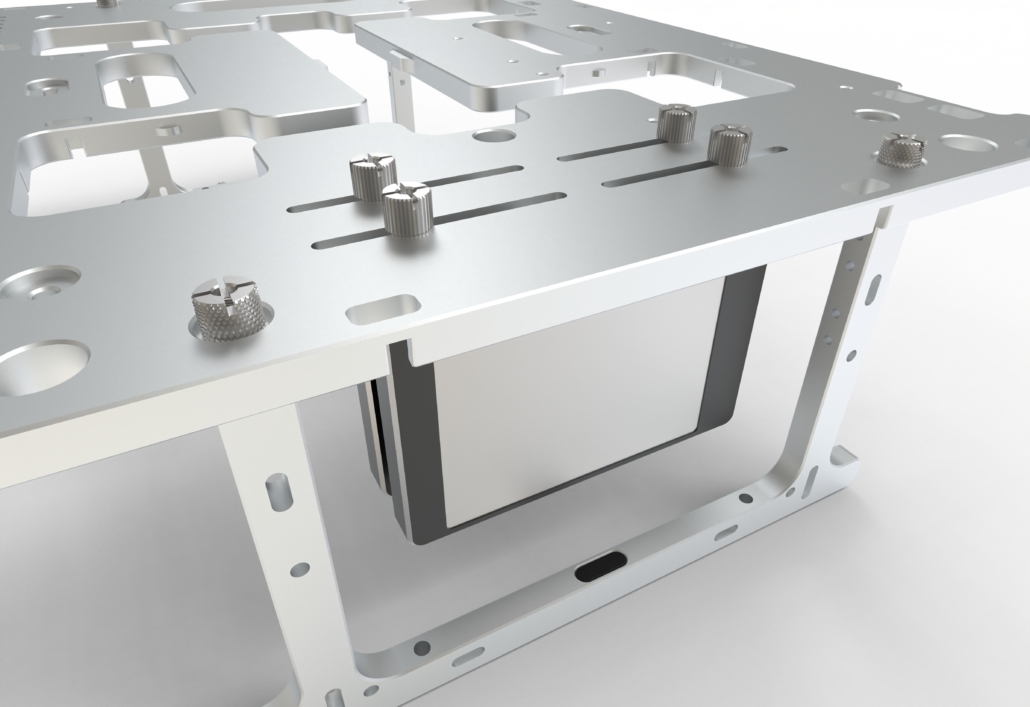
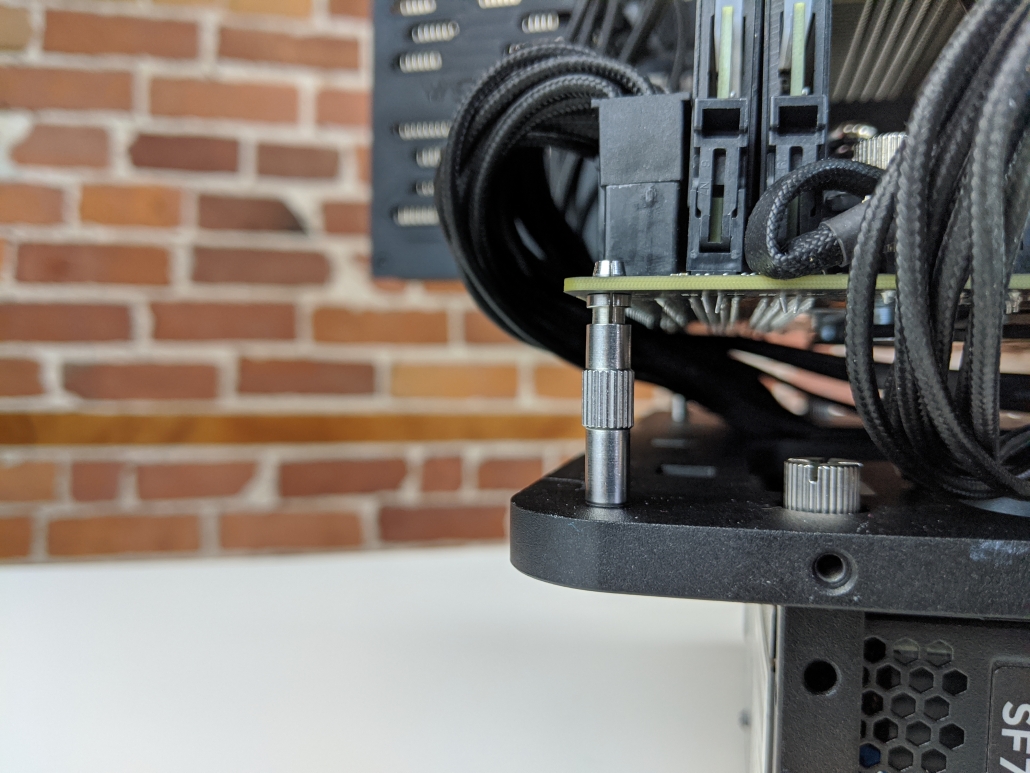
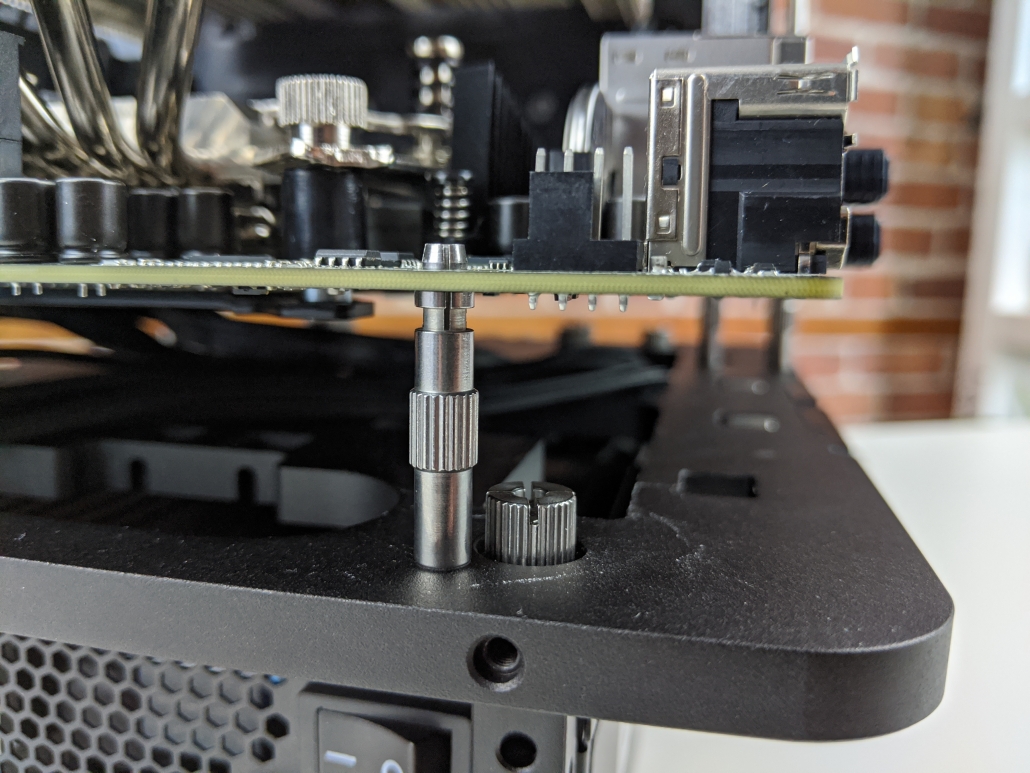
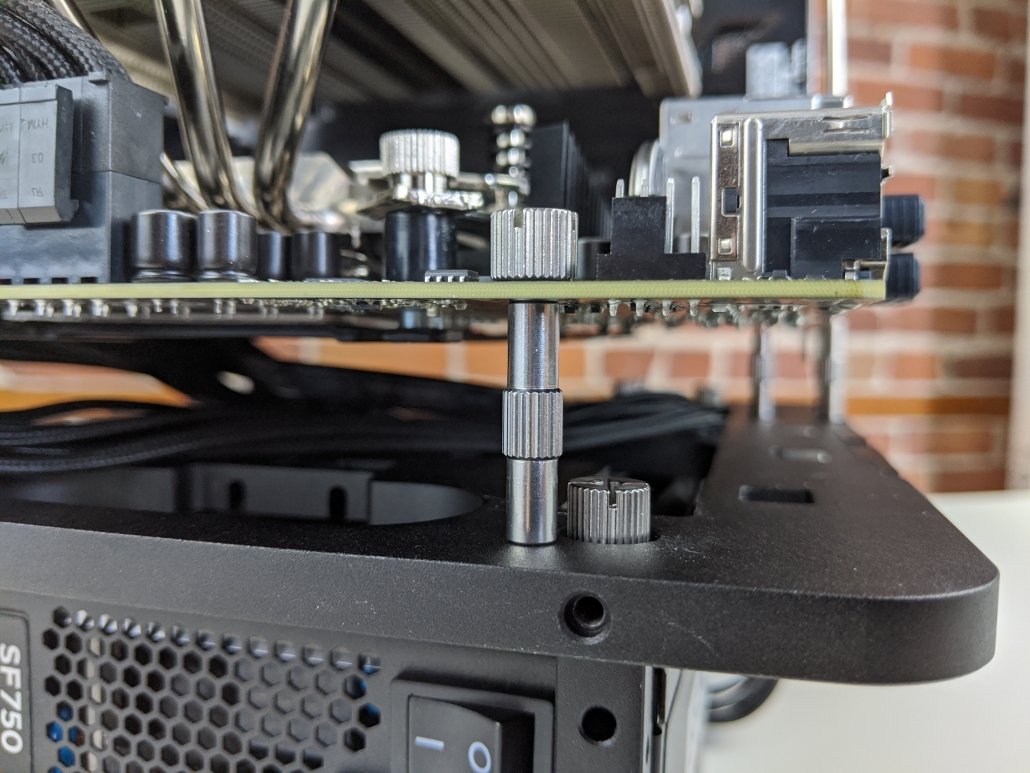
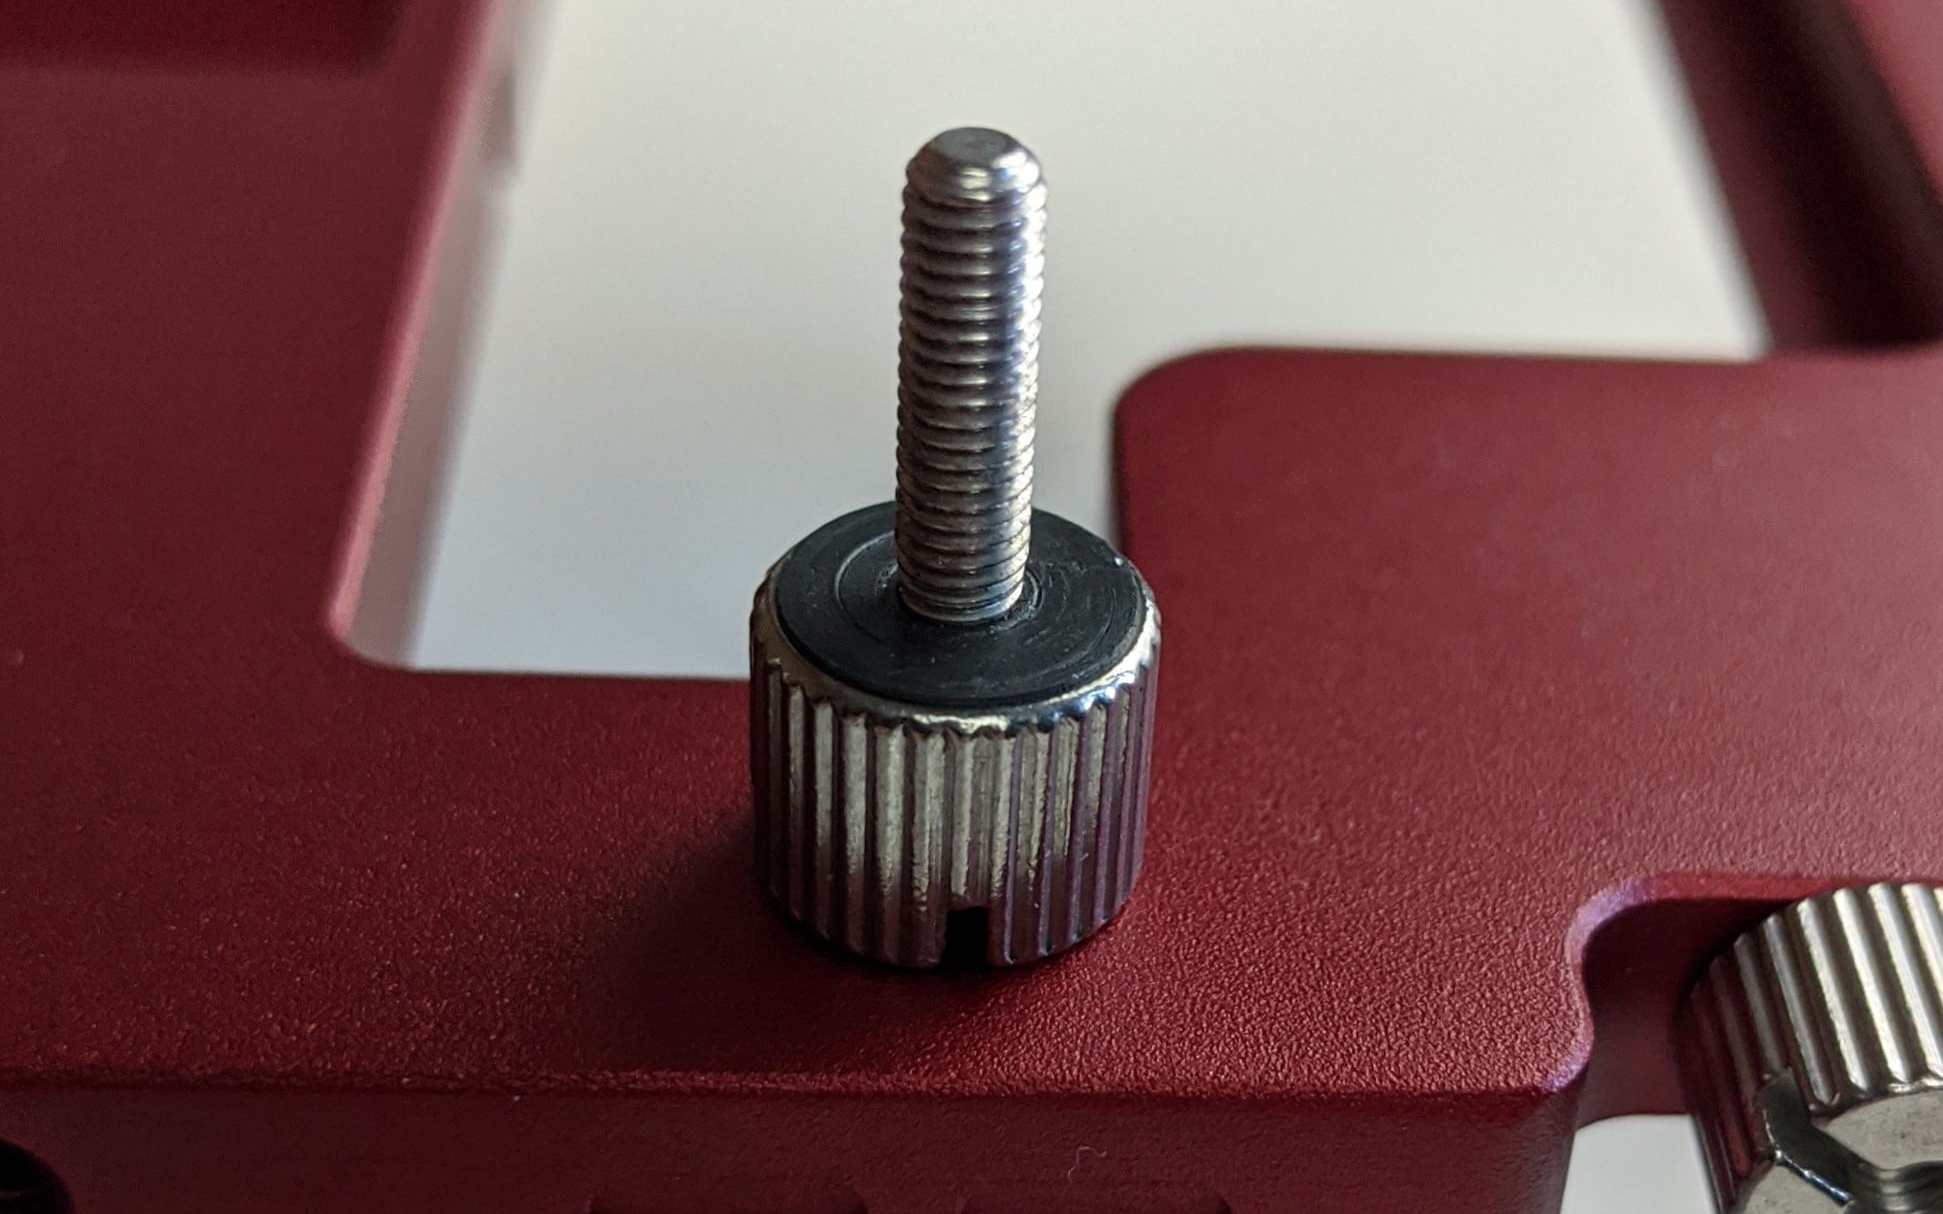
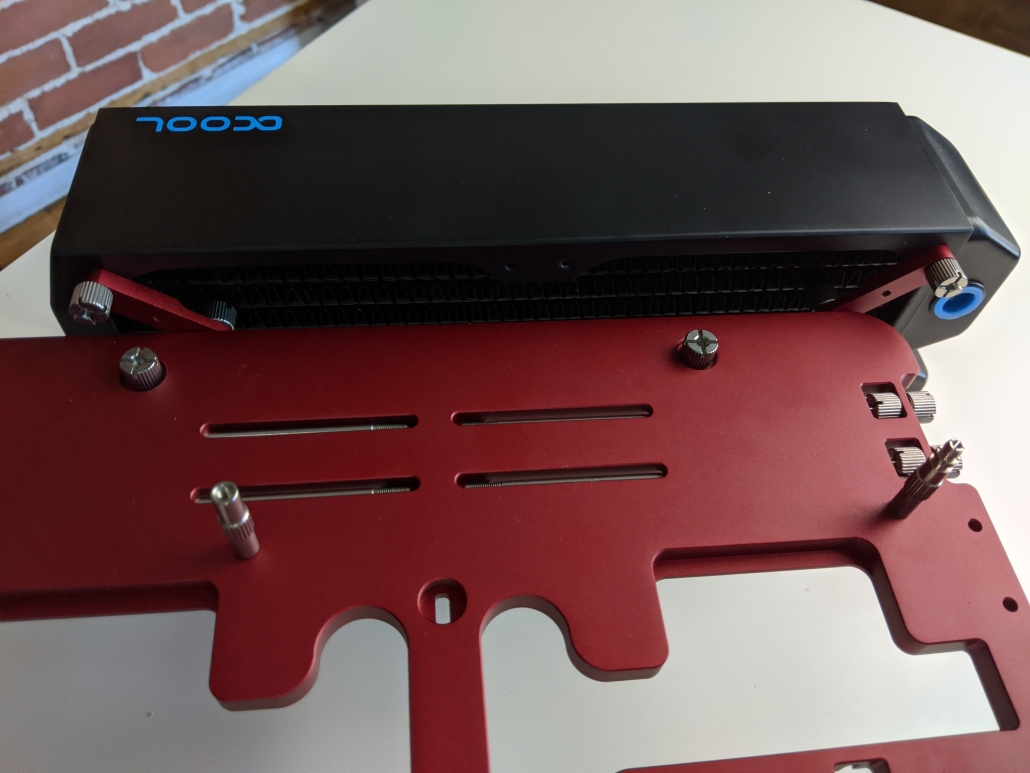
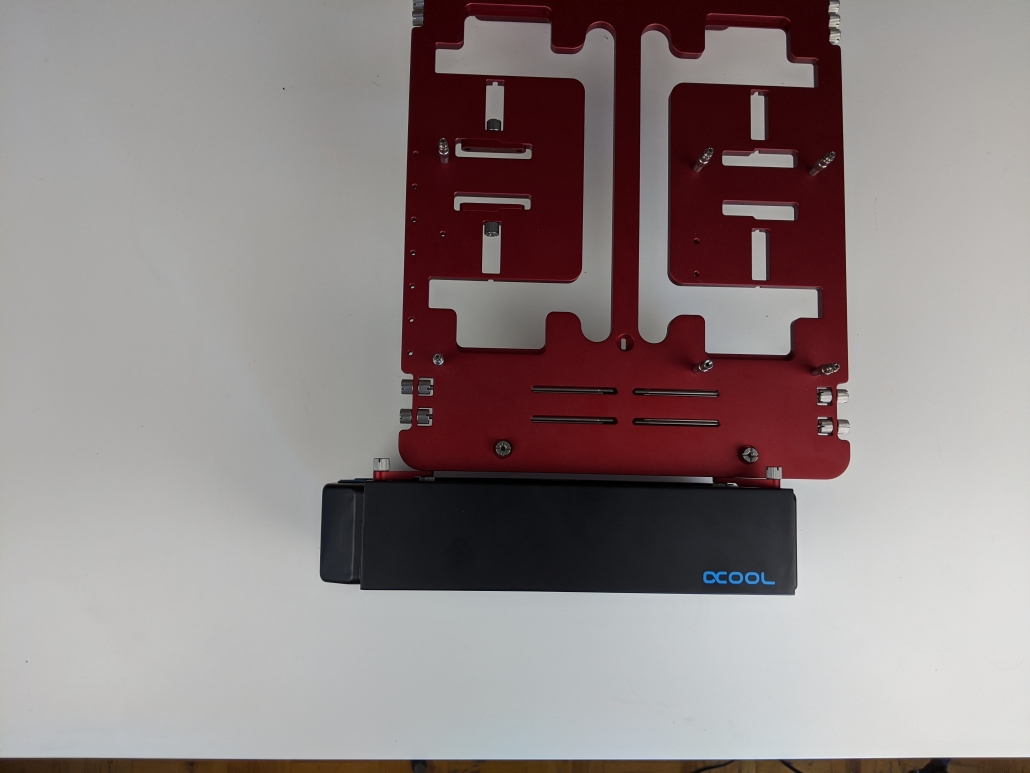
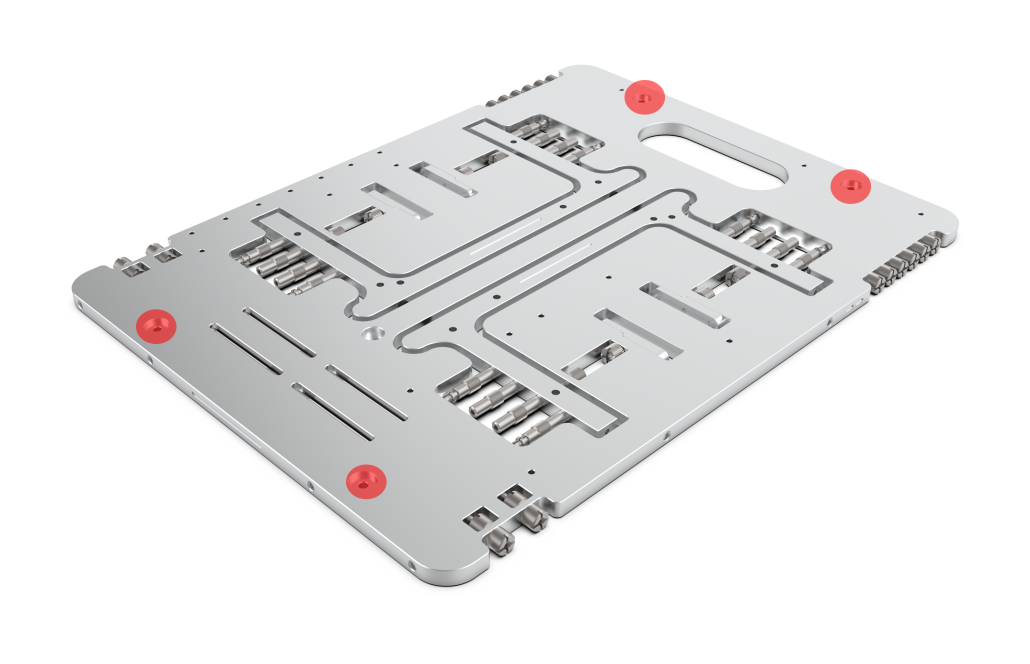
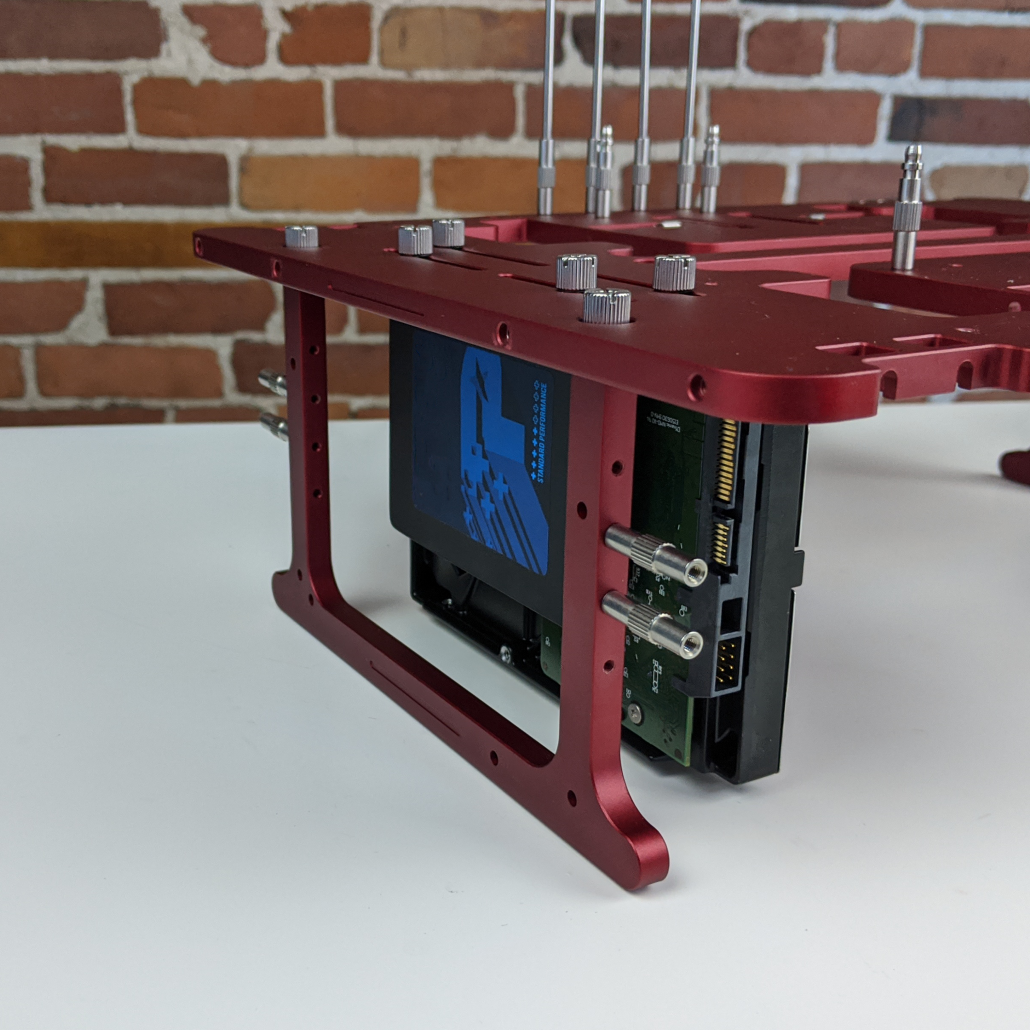
The Open Benchtable motherboard standoffs are 25mm, meaning the space between the backside of the motherboard and the Open Benchtable is 25mm. While that’s sufficient space to mount a BTF form factor motherboard, it is not sufficient to also plug the power supply cables. Hence, the Open Benchtable does not natively support BTF form factor motherboards.
However, a simple solution is to double stack the motherboard stand-offs. This can be done easily by purchasing three OBT Standoff M3 4-Packs. By double stacking the motherboard standoffs, the space between the backside of the motherboard PCB and the Open Benchtable is now 50mm. This is now sufficient space to also safely plug the power supply cables.
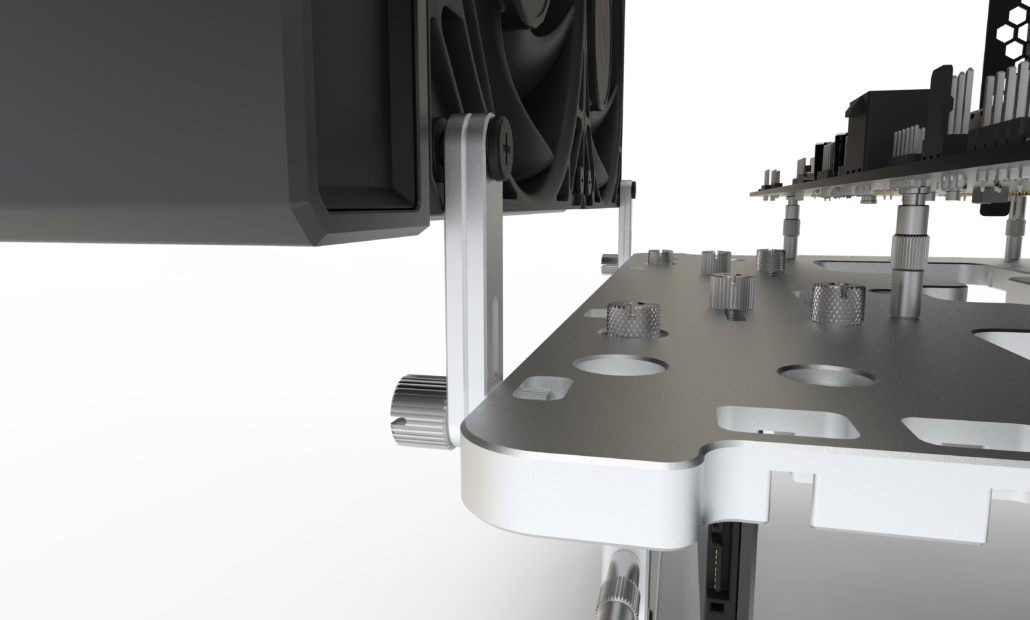
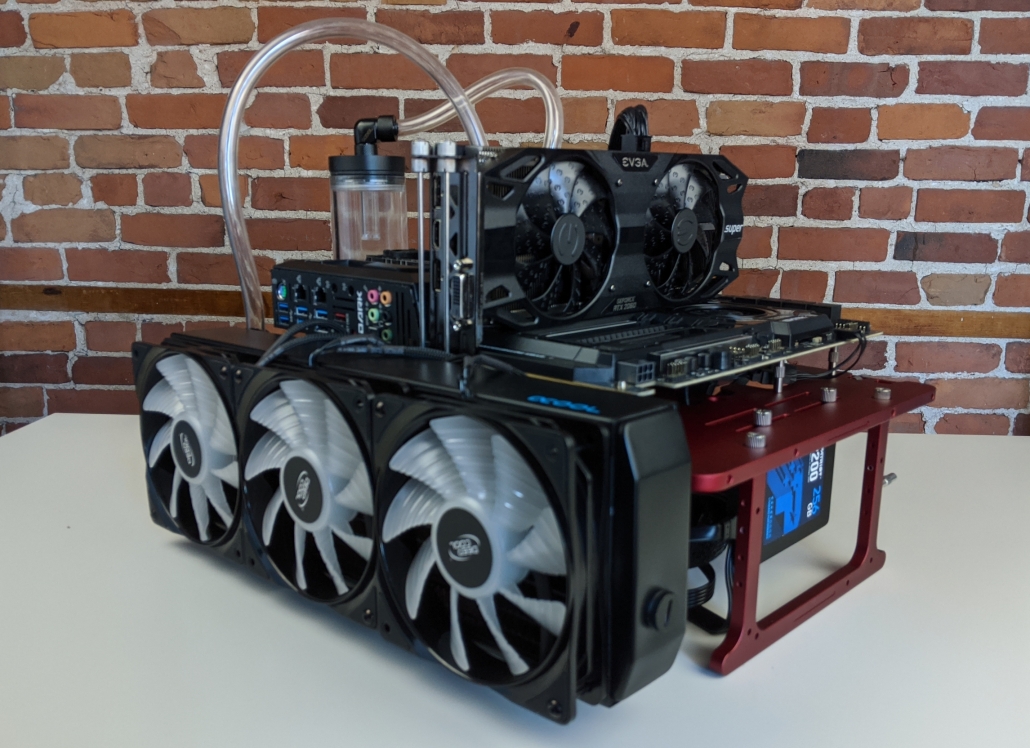
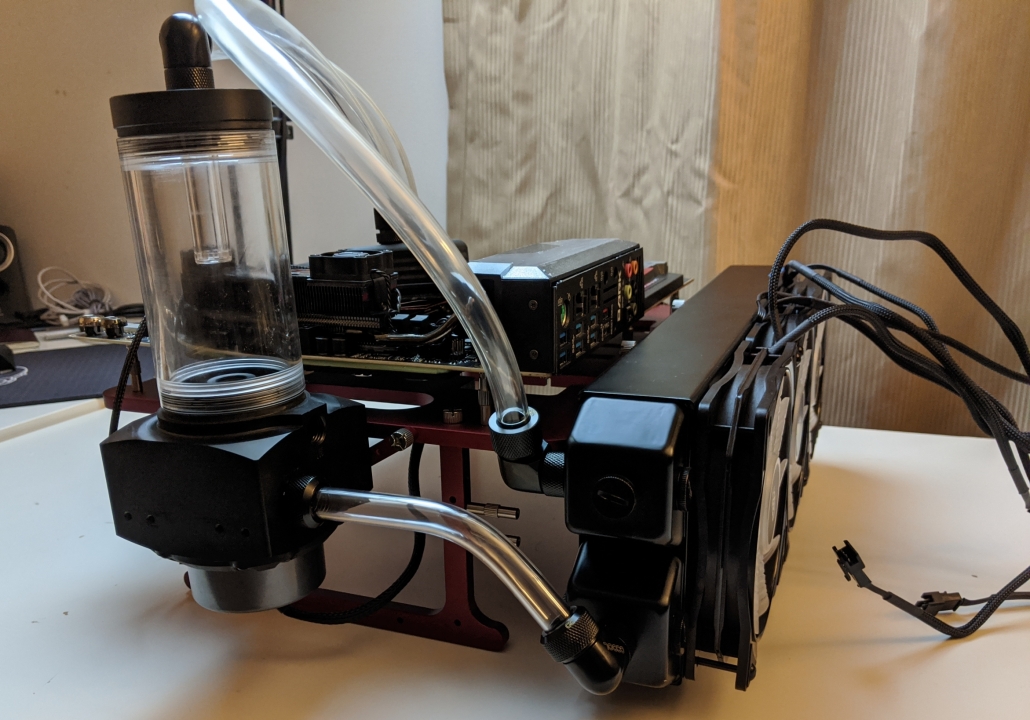
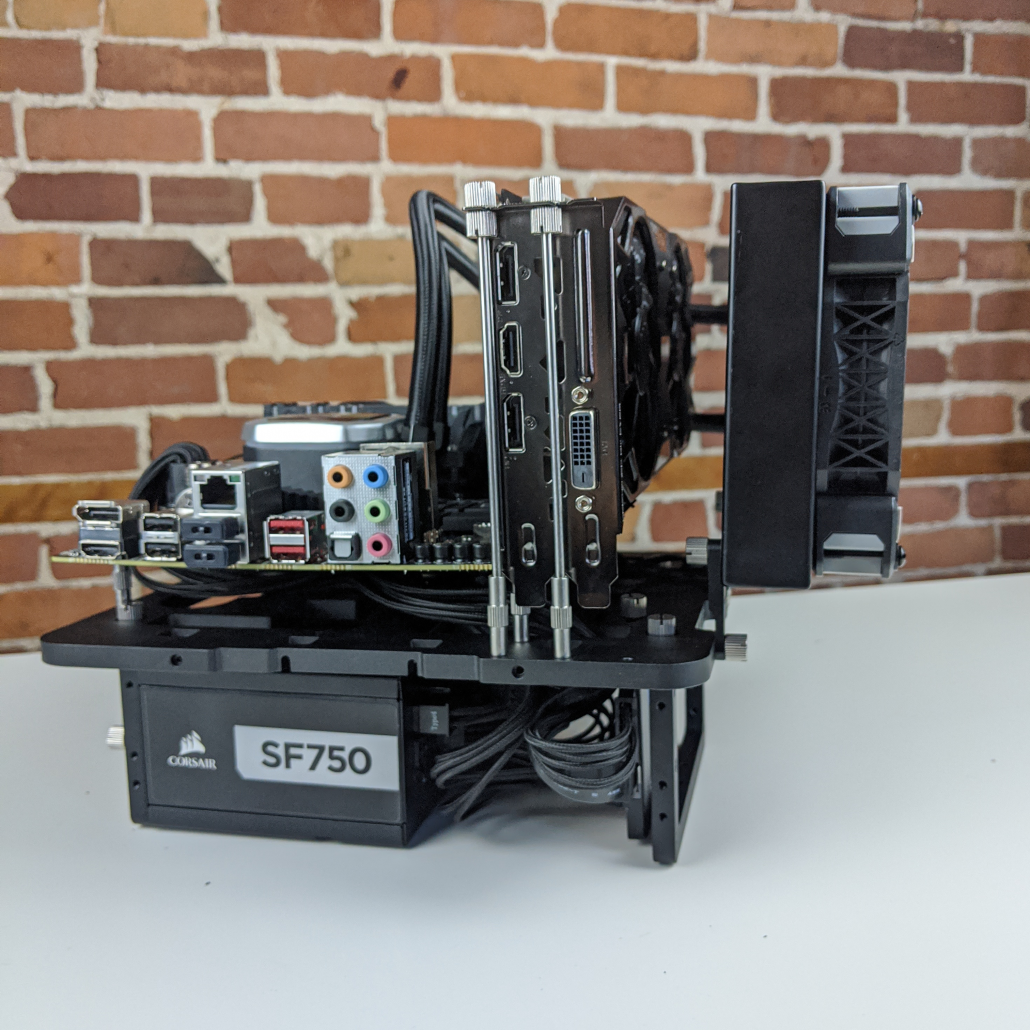
As we demonstrated with the BENCHLAB not so long ago, the Open Benchtable is a stable platform for your hardware even when double stacking the motherboard standoffs.
With the BC1 V2 shipping worldwide, we figured that it would be the perfect time to update our assembly guide to better reflect the new features.
So, here we are with our detailed, step-by-step assembly and use guide for the Open Benchtable. This is also is our always up-to-date user-guide/manual.
The instructions provided here are valid for the V2 of the Open Benchtable. If you are still rocking a previous edition we got you covered. If you are a mini build adept, our step-by-step guide for the OBT Mini is available aswell.
On the Open Benchtable, there is no limitation on motherboard sizes, as long as they fit some of the standard mounting holes. There is also no hard limit on the CPU cooler or GPU sizes.
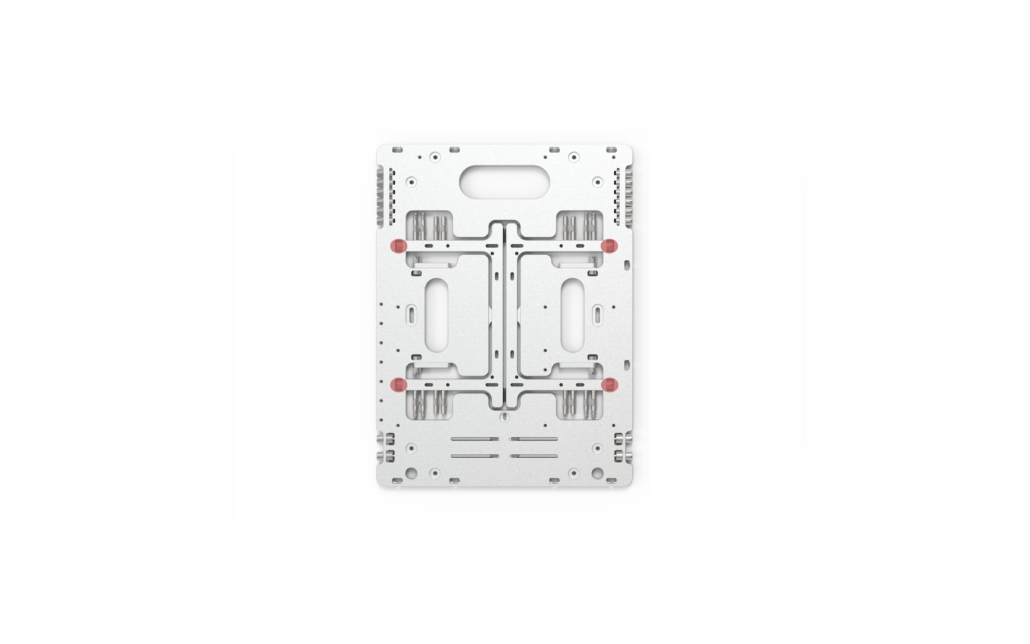
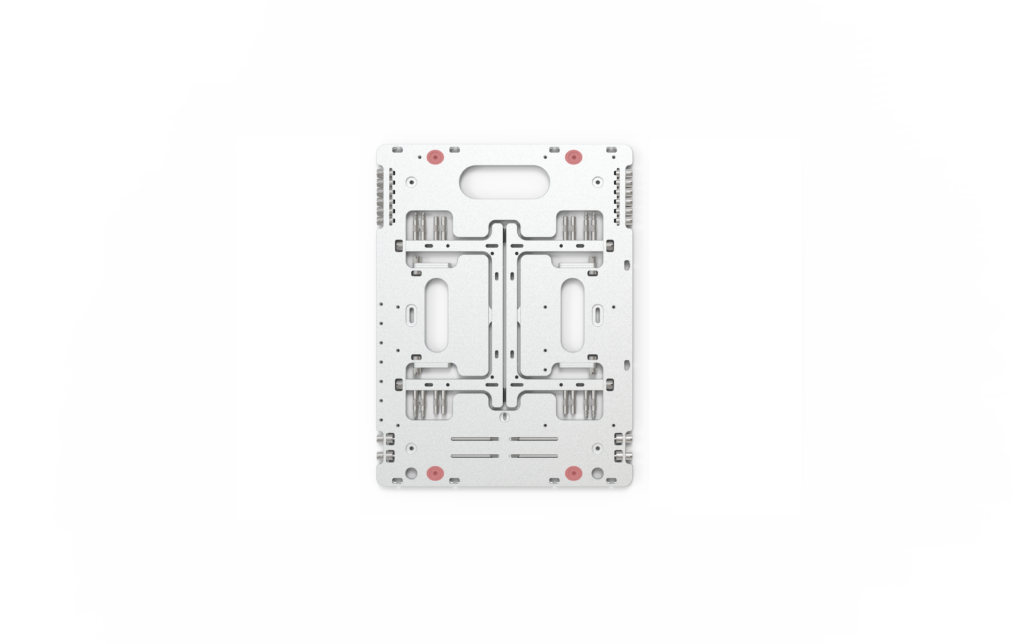
To release the feet, unscrew the four screws holding the feet to the structure. Using these screws, assemble the feet directly in the two holes on each side of the benchtable as marked in the picture below.
Detach feetAttach feet
Note that the laser engraving with the Serial number, logo and marking is always under the Open Benchtable.
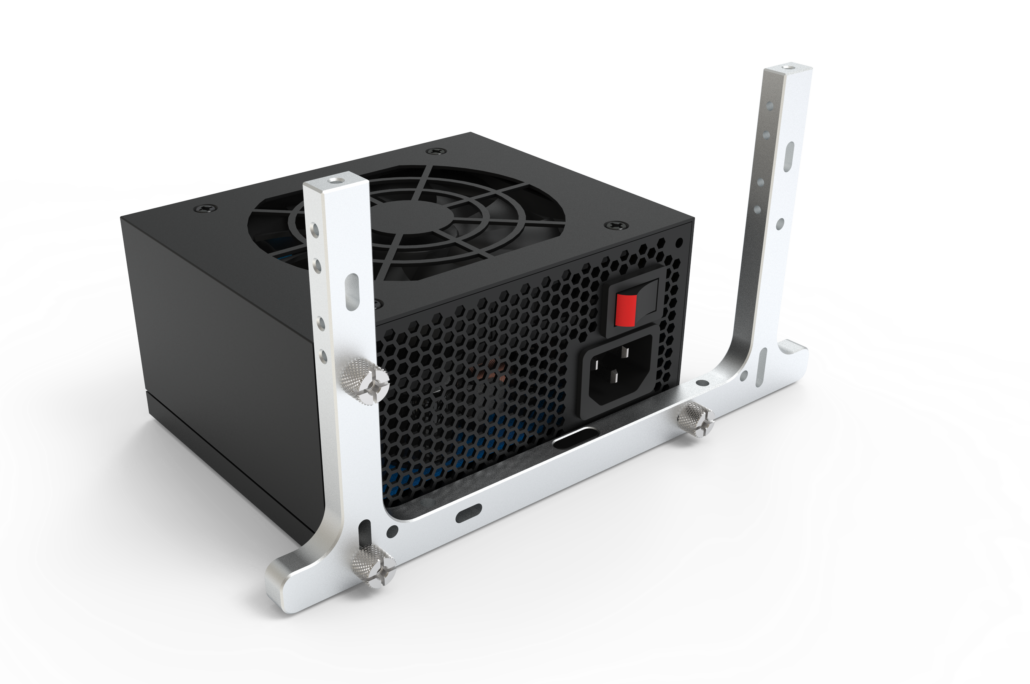
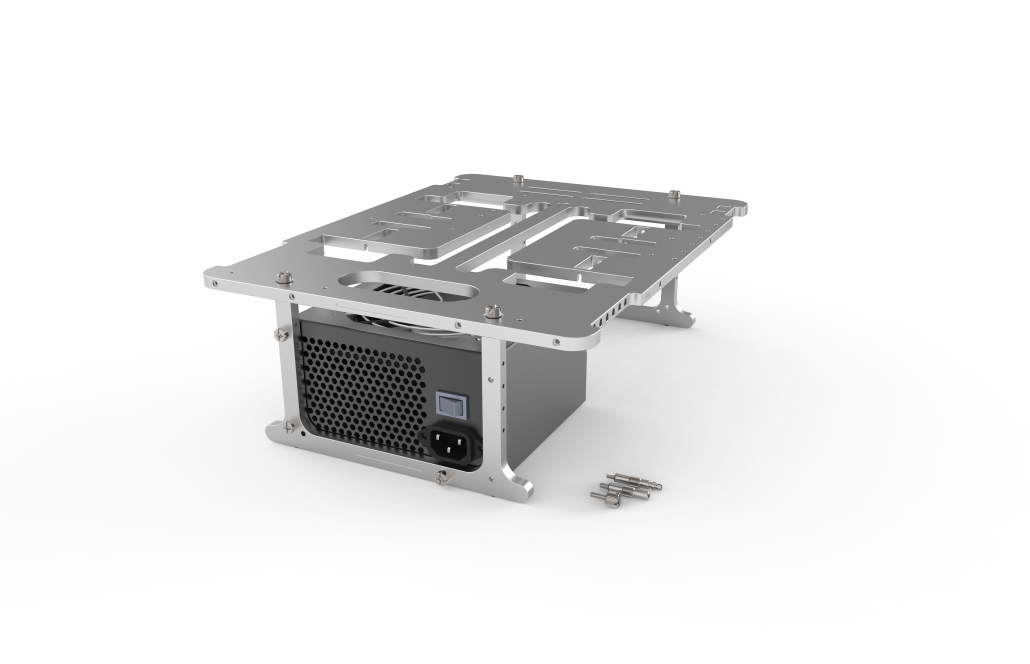
Attaching the PSU
The OBT V2 is compatible with the ATX 12V, ATX Large, ATX-EPS, BTX and now the SFX power supply formats.
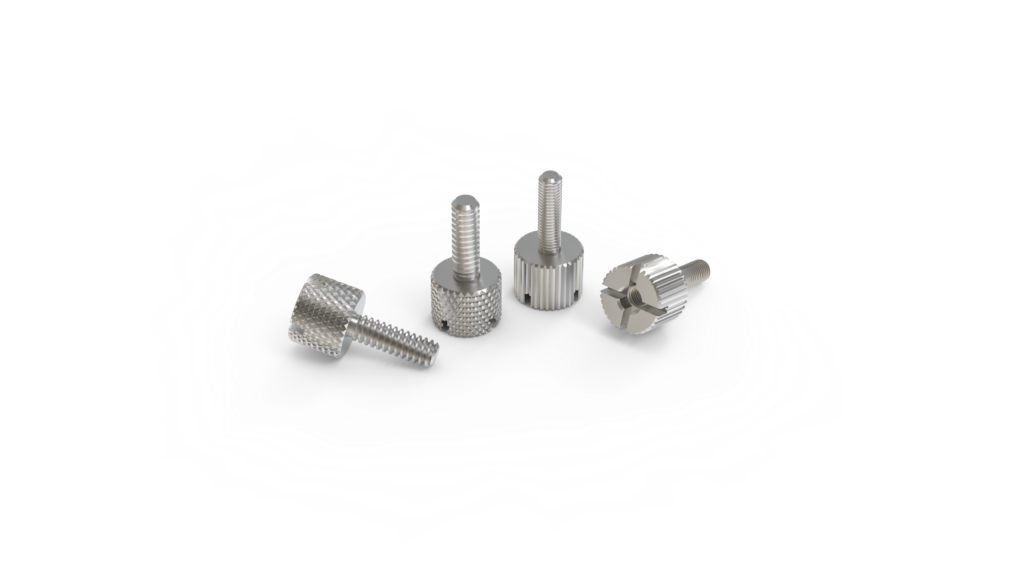
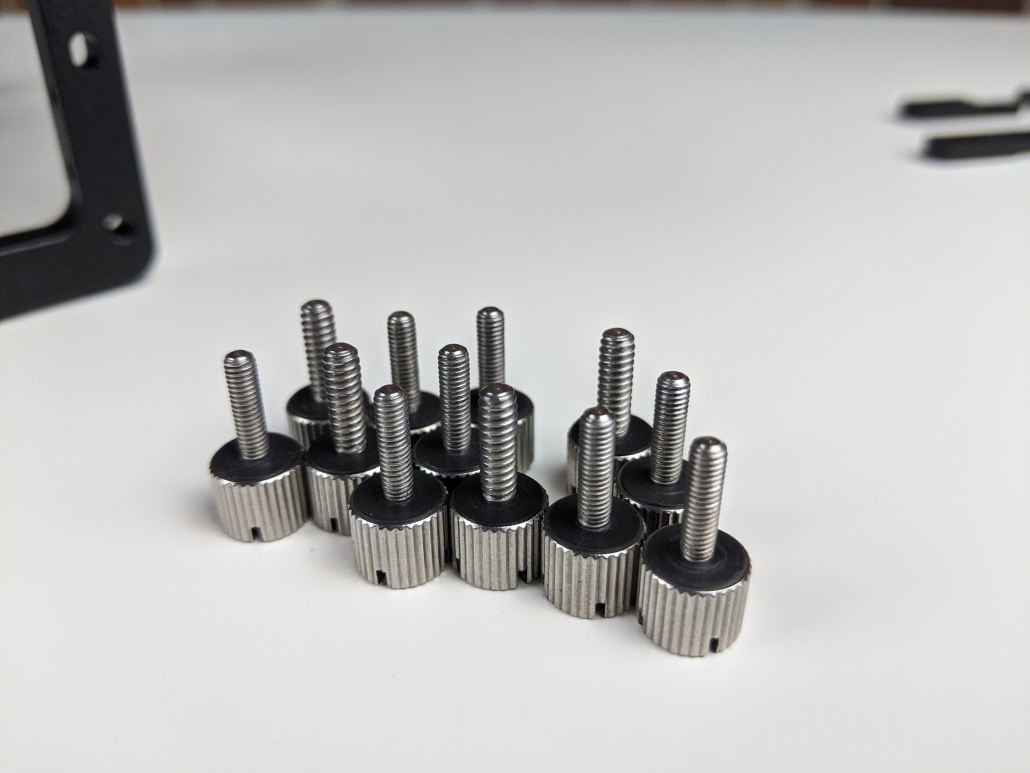
Note that the screws used for holding the PSU and the feet to the main body are 6#32 when everything else on the OBT uses M3. (NB: OBT v2 use 6#32 screws for the feet while previous version used M3)
The 6#32 screws can be found on the left side of the table, while spare M3 screws are on the right side.
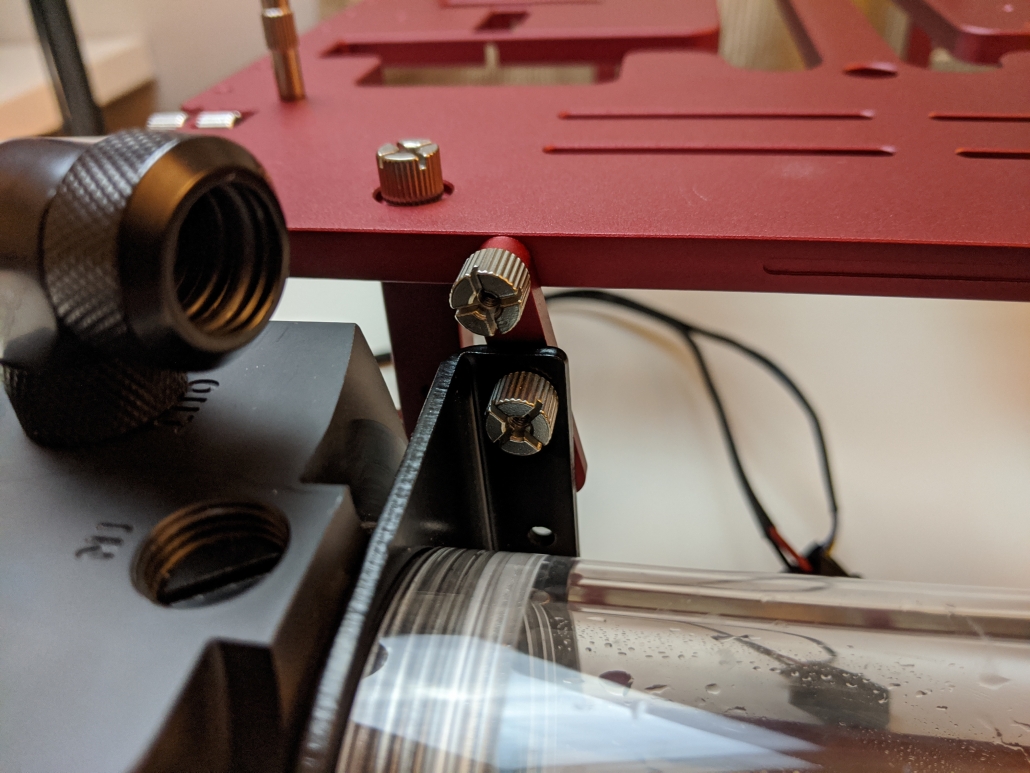
The two types of screws used on the Open BenchtableTips from the team: The 6#32 screws feature a “criss-cross” pattern, while the M3 screws feature a straight pattern.
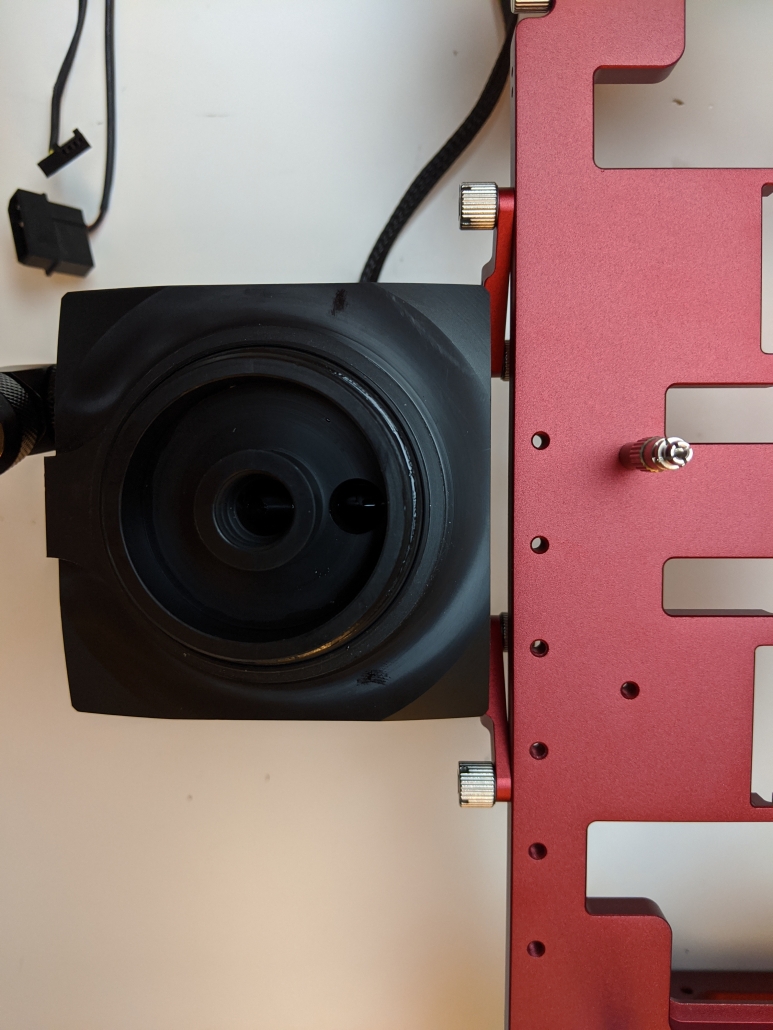
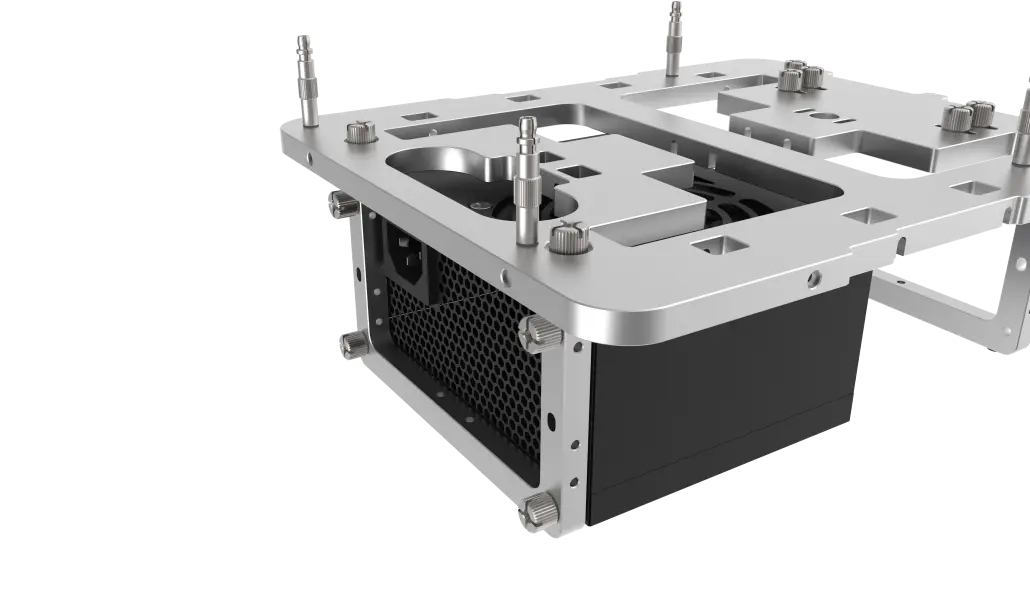
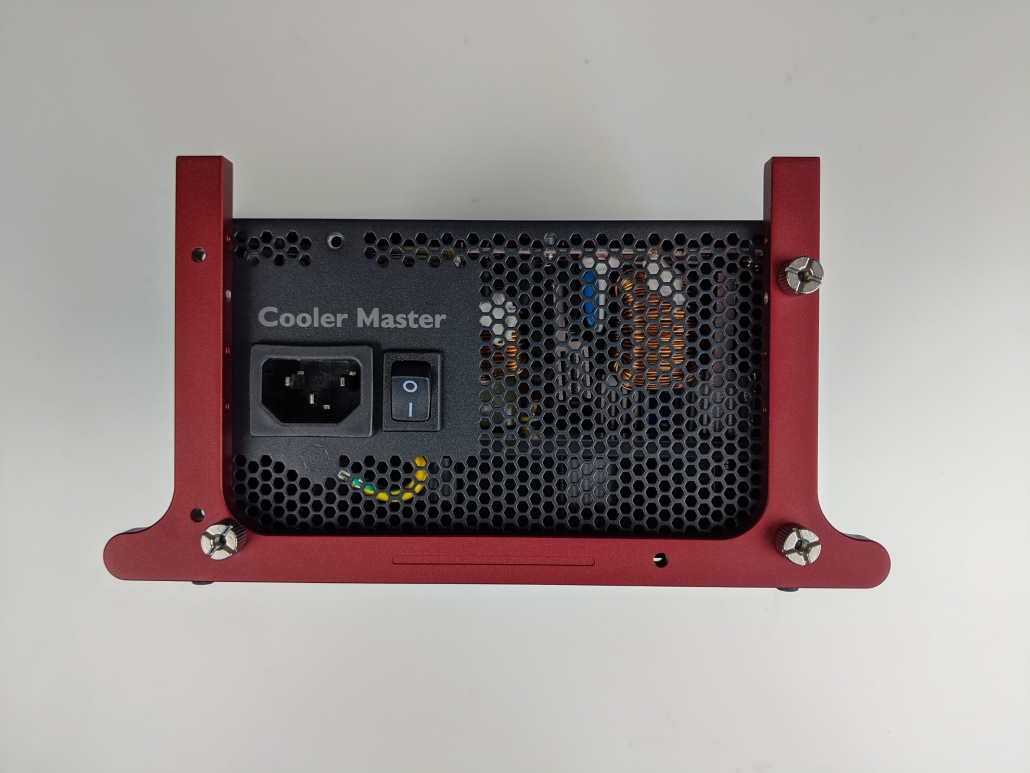
The PSU can be attached with the fan facing up or down, but it is recommended to use your PSU with the fan facing up. You will only need three 6#32 screws to hold the PSU to the Open Benchtable foot. This is the same process for ATX and SFX power supplies.
There are multiple wasy of attaching the PSU, feel free to explore possibilities.
Attach this under the top handle for better compatibility with the storage (see later).
At this stage, you should mount the CPU, RAM and retention bracket for your CPU cooler.
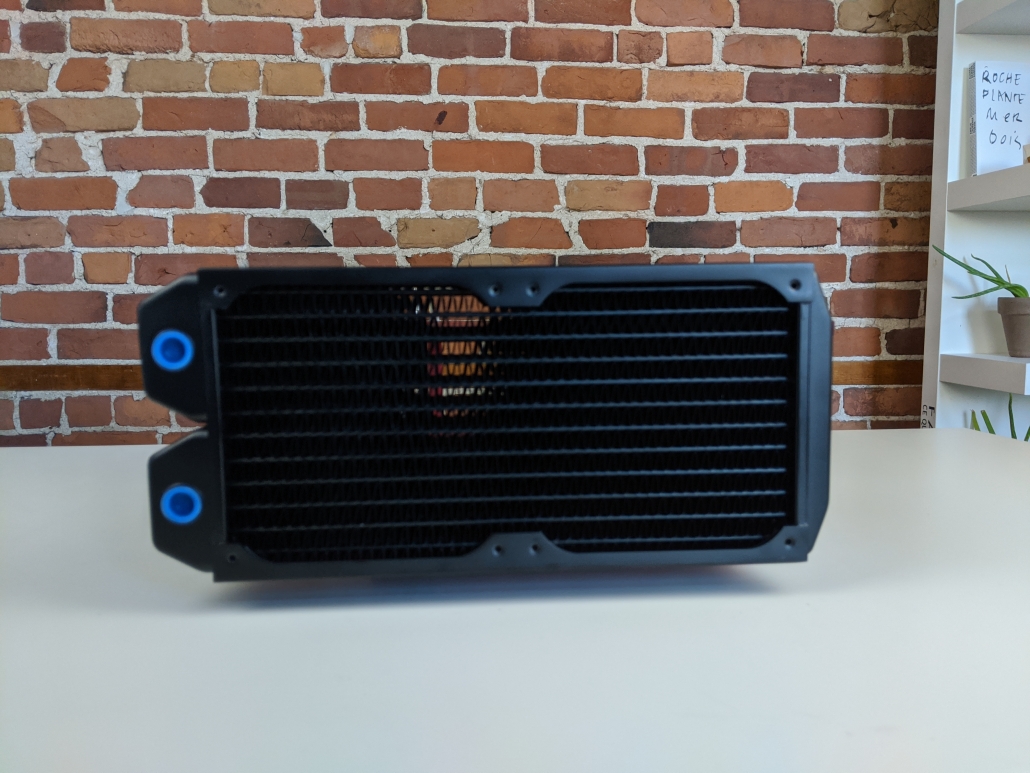
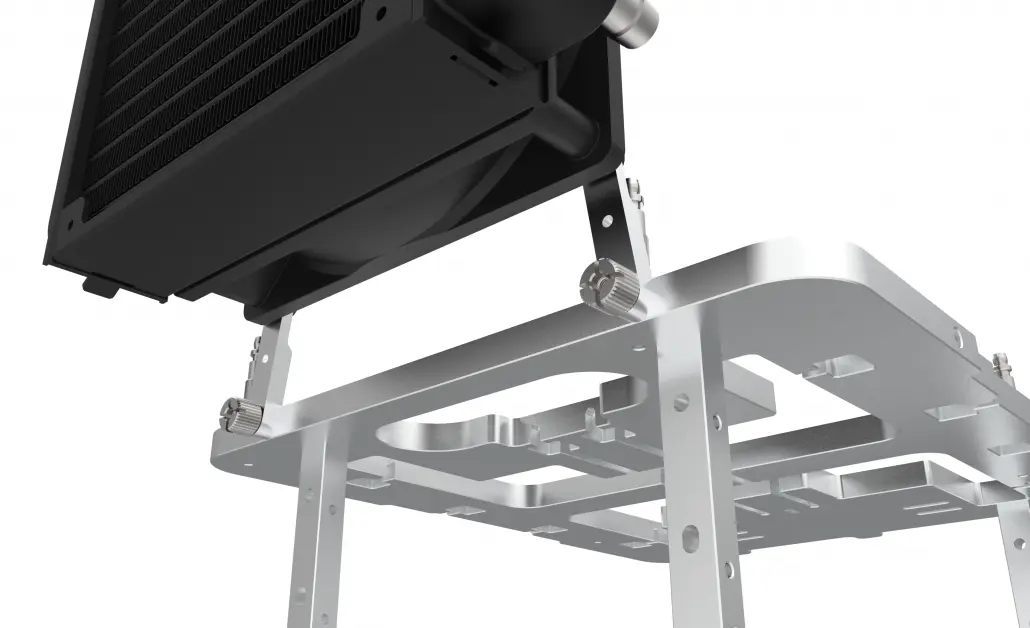
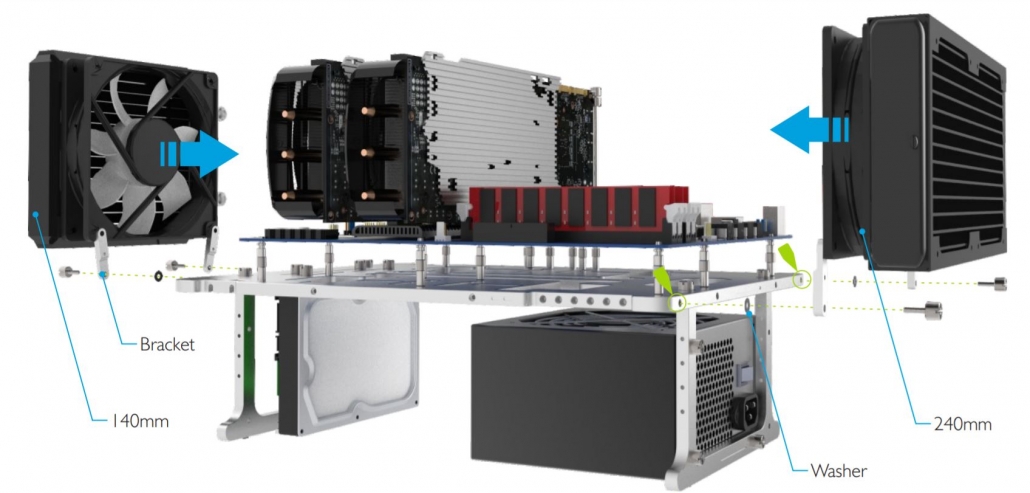
The new support brackets can be used in a wide array of scenarios depending on how you orient them, accomodating typical 120mm , 140mm, 240mm and 280mm mounting. This help support a wide range of radiators, even large ones.
Tips from the team: In case you build with watercooling radiators or large All-In-One watercooling kits in a non-conventional approach (see the last step) : Hook your radiators before the motherboard.
Securing the motherboard
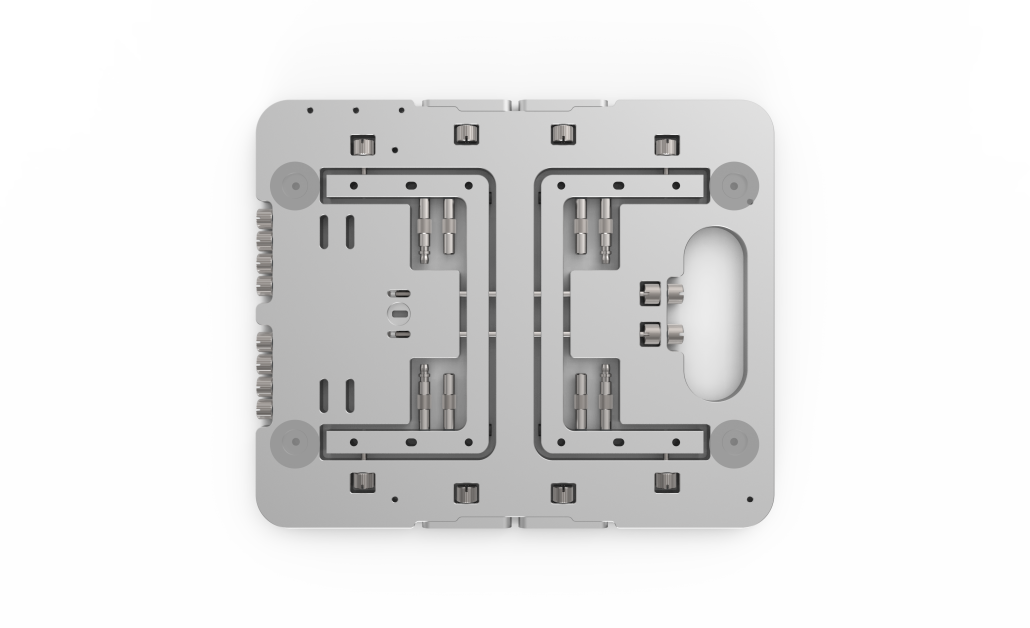
To secure your motherboard on the OBT you need the standoffs located on the feet.
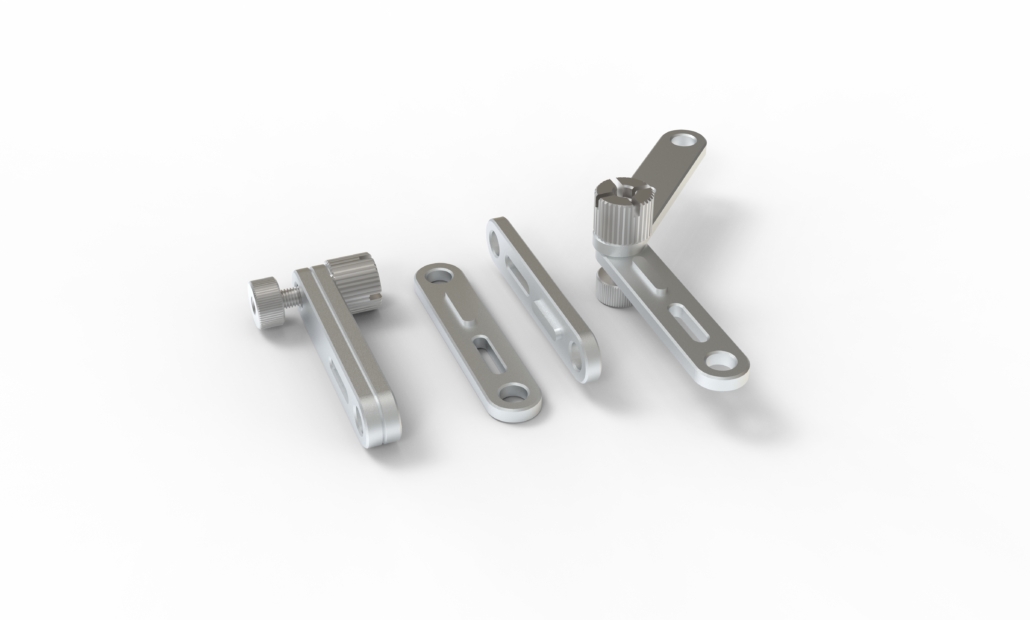
There are two types of standoffs:
Push-pins : our fast mounting push-pin standoffs for motherboard support.
Screw-in : the usual screw standoffs that help you secure the motherboard and PCI-Express support rods.
You can use whichever type suits your needs best.
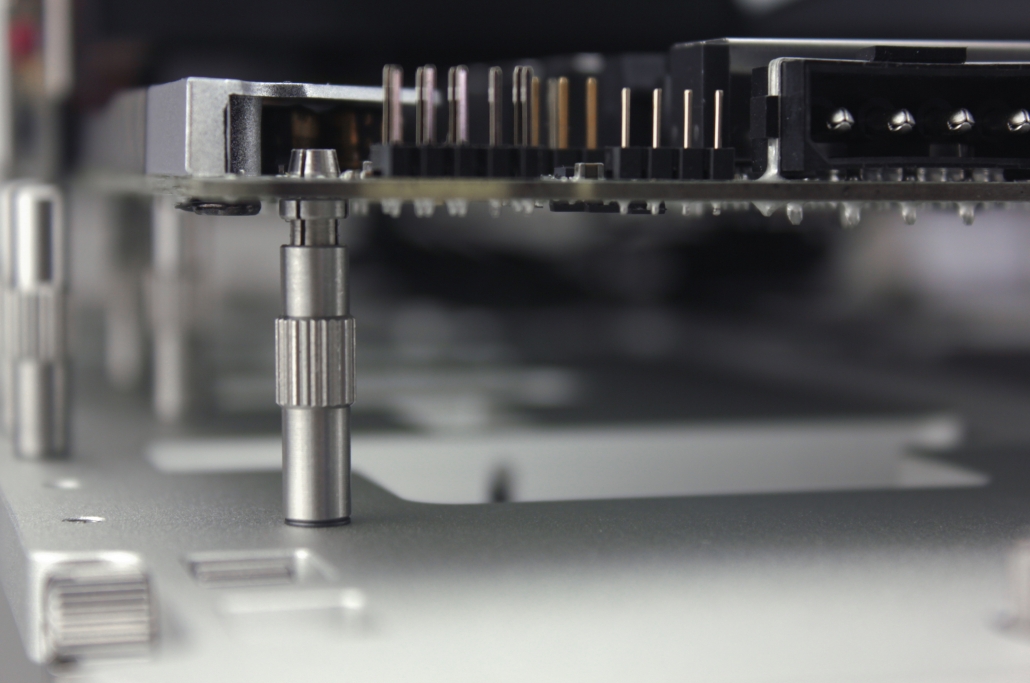
Attach the standoffs on the mounting point that accommodate your motherboard. You can hold the nut from under the table when attaeching them for easier tightening!
Once installed, push-pins standoffs hold your motherboard
Tips from the team: we usually go for one conventional standoff in the center and push-pins for the others!
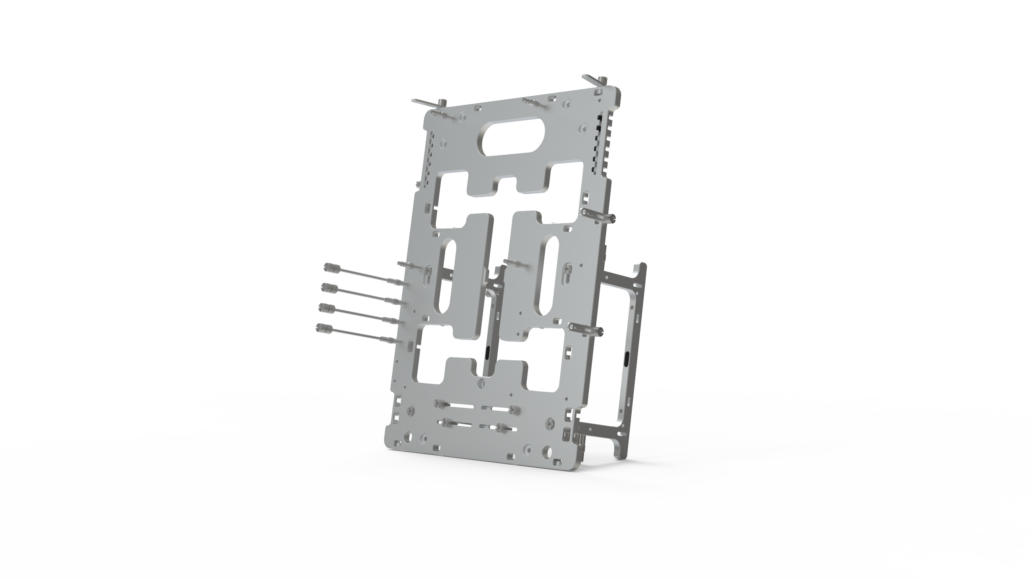
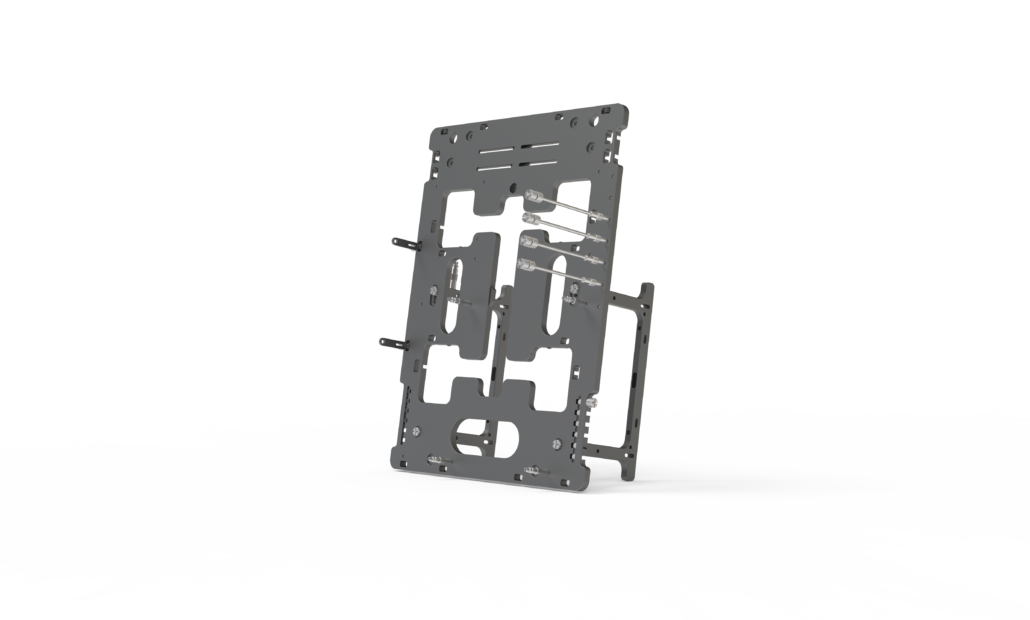
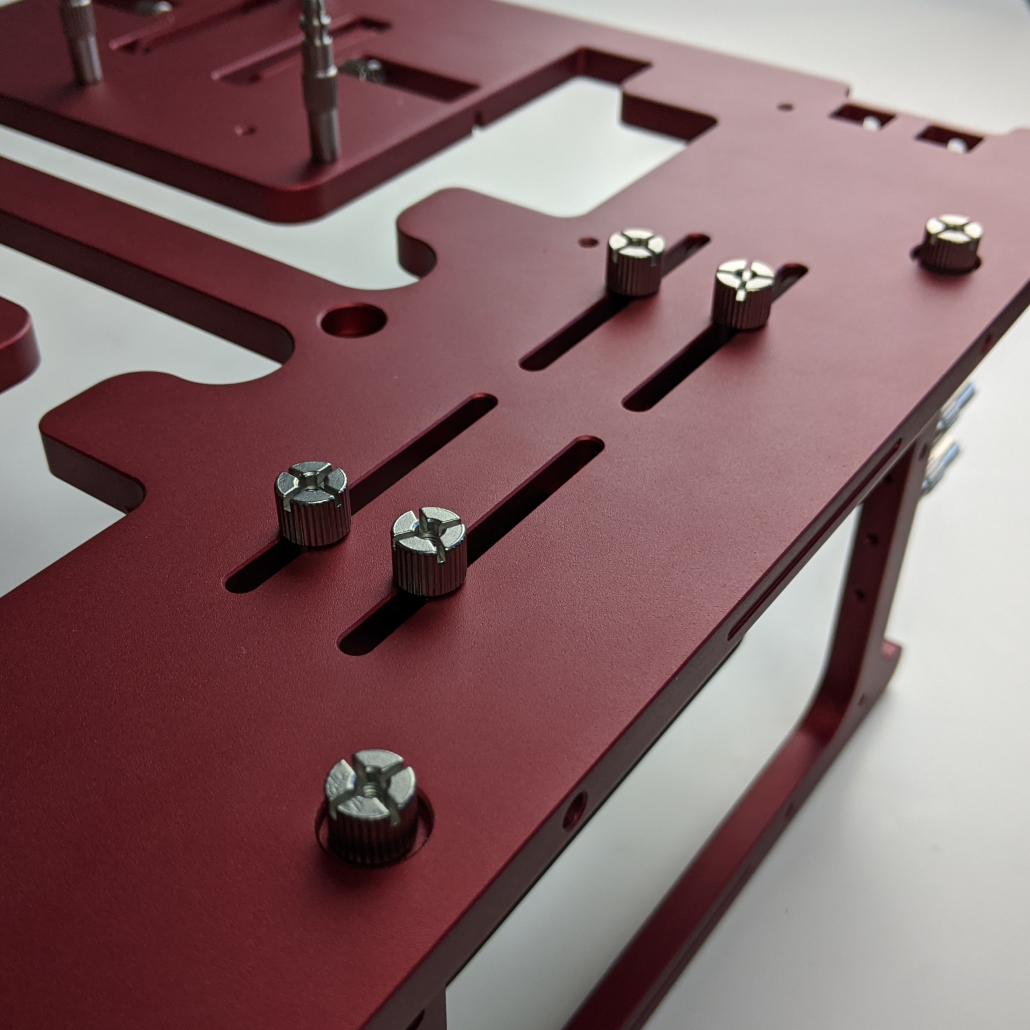
Securing the GPU
At the bottom of the OBT frame are four PCI-E thumbscrews. For each PCI-E support, you will need a screw-type standoff (from the step above).
Attach the PCI-E thumbscrews to the standoffs, and align on your OBT to fit your GPU.
Remove the top nuts and insert your GPU, the thumbscrews should line up with the GPU. Once done, tighten the nuts onto the top of the PCI-E standoffs.
This guide will guide you through an even more detailed way to secure your GPU!
Attach storage
You can easily attach up to two storage devices at the bottom part of the OBT.
The Open Benchtable supports 2.5″ SSD or HDD of 7mm and 9.5mm z-height (thickness). You can attach a regular 3.5″ HDD as well. Use the M3 screws provided with the Open Benchtable to secure your SSDs and the 6#32 for large-size HDD .
M3 screws are easily recognizable with their straight patternYou can easily attach 2 SSDs to your OBT.If you need more help on how to mount drives, we got a tutorial for you!
Assembling accessories & AiO cooling
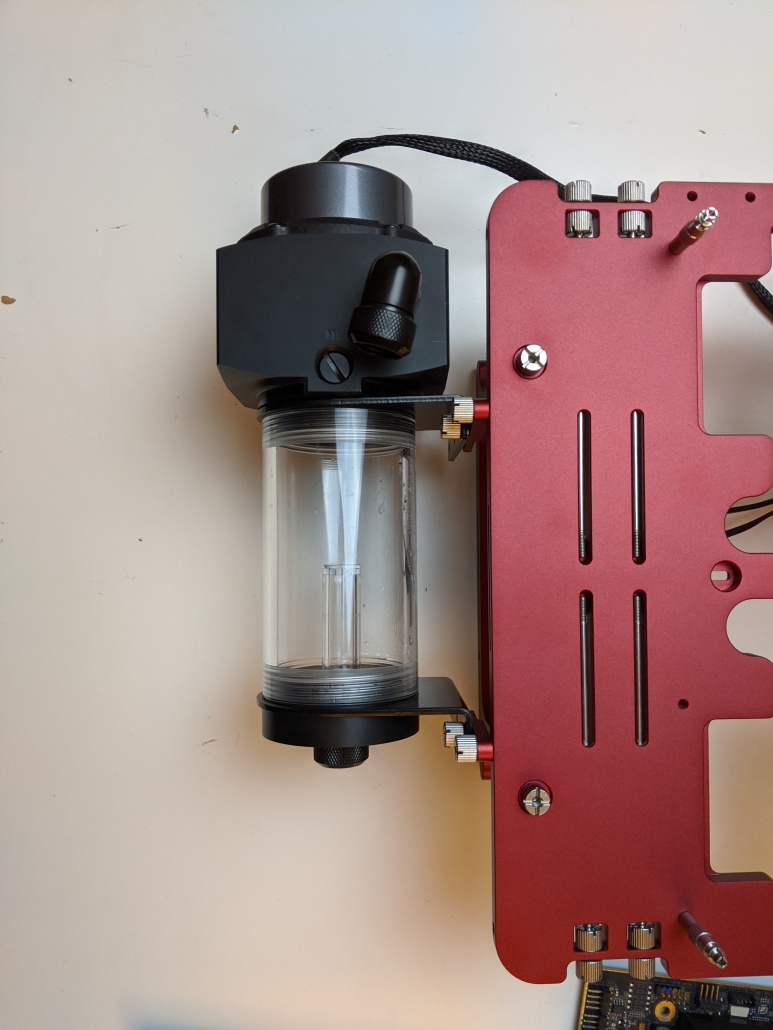
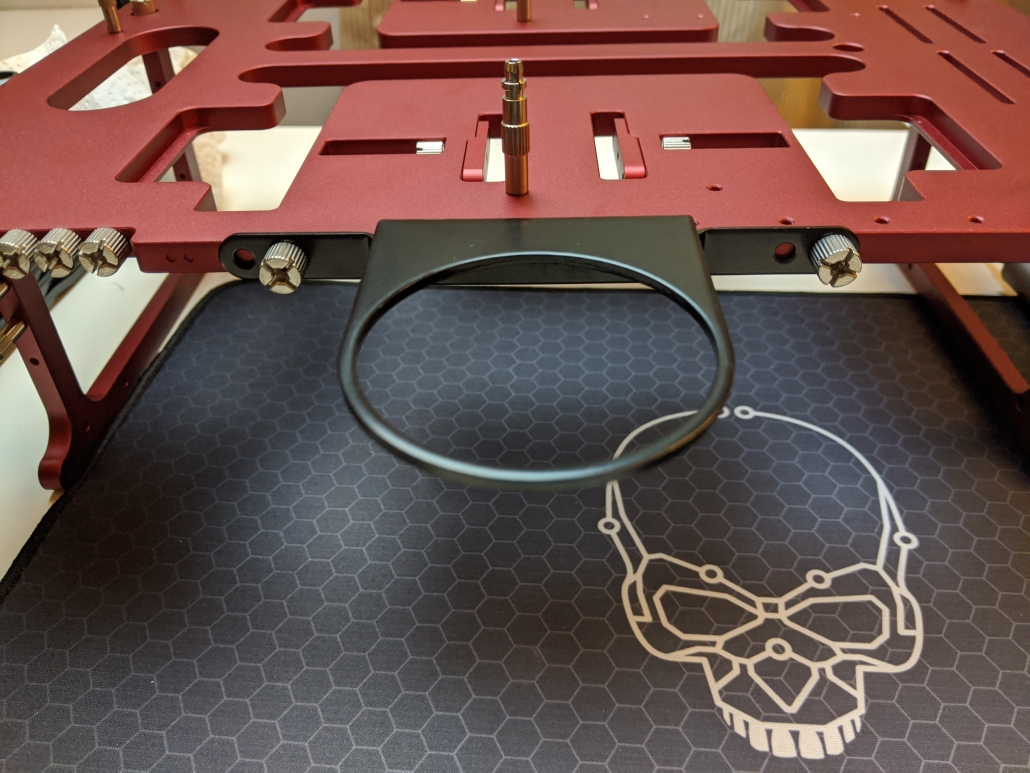
The Open Benchtable V2 feature a new, redesigned double bracket. Alway hook the 2 brackets to the main body, you can then use both at once for heavier items or split them in two for lighter accessories like a fan, pump or our Open Benchtable Debug Card.
With any open-air system, cable management is an important part of the final look-and-feel.
Tips from the team: Use cable ties and make use of the space between the motherboard and the OBT to route/attach/guide your cables nicely.
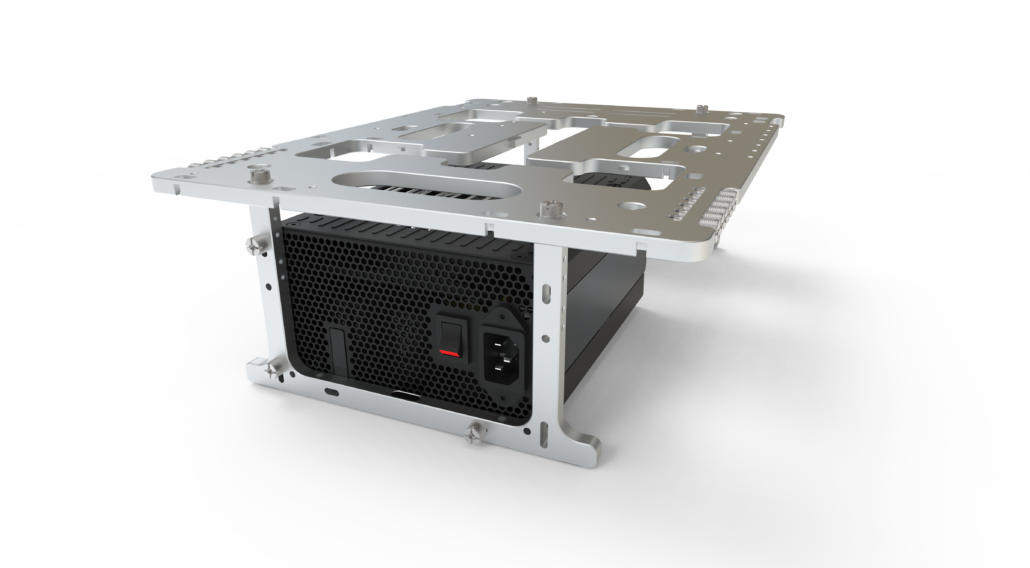
Bonus : Demo-Mode
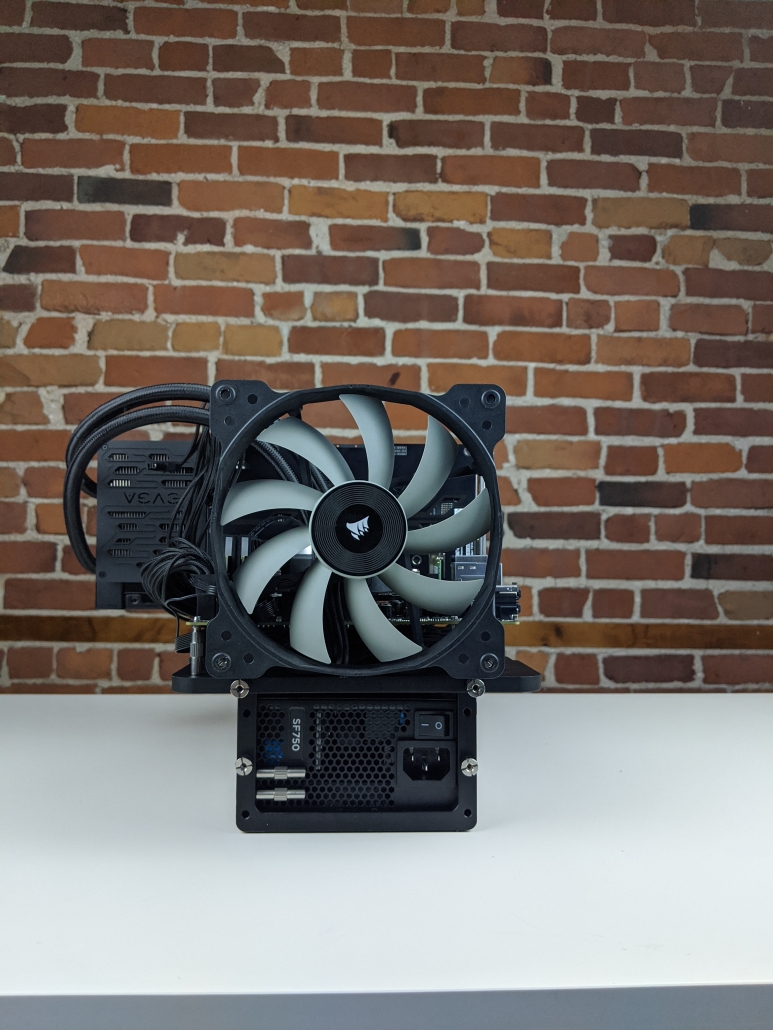
The Open Benchtable V2 feature a simpler way to build a vertical system. Let’s look at the key elements of this “Demo mode”.
Attach the OBT feet with the hole at the center of the main body, and either at the top or the bottom depending of the look your want to achieve.
Before anything else, attach your PSU to the feets, this is a requirement to use the demo-mode as it provide a counter-balance for your components later down the road. When building in “Demo-mode”, make sure the unit is stable, as using undersized PSU and oversized GPUs or coolers could unbalance the build.
Demo-ModeDemo-Mode flipped
Secret feature : Wall-Mount
Yes, you can! How?
In each feet there are 2 extras holes (see below), they can be used to screw the whole rig to a wall or… anything else.
This concludes our Open Benchtable V2 assembly guide. We would love to see what you build on your Open Benchtable.
This is part of our series of how-to & guide about the Open Benchtable and the Open Benchtable Mini. Today we focus on mounting a motherboard on your Open Benchable.
Getting ready
The Open Benchtable is compatible with pretty much all the common form-factors: Mini-ITX, Micro-ATX, ATX, E-ATX and XL-ATX.
The Open Benchtable Mini is compatible with the Mini-ITX (and some Mini-DTX) form factor.
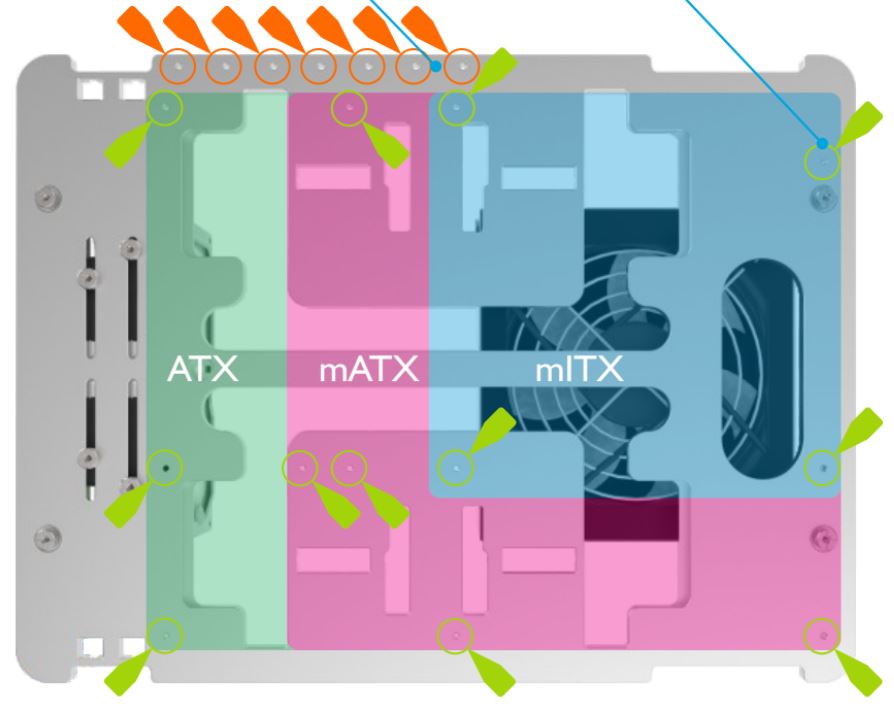
To start, get the number of stand-off that you need from their storage location. ATX & Micro-ATX form factor requires up-to nine and Mini-ITX requires four.
As mentioned in our mounting guides, there are two types of stand-offs and they can be mixed. Half of them are push-pin standoff while the other half is made of screw standoffs (these are similar to the conventional standoffs you find in most cases). All of the standoffs are stored in the feet of your OBT.
If you are using screw standoffs, get the same amount of M3 screws off, there are located on the right of your OBT.
Tips from the team: we usually go for one conventional standoff in the center and push-pins for all of the others! (you can mix push-pin and screw-standoffs that you feel comfortable with).
Motherboard Mounting
Once you’re all set up, install your standoff so they align with your motherboard (green locations).
Use the pattern which corresponds to your motherboard
If you are using conventional standoffs, tighten your M3 screws in them to secure the motherboard.
Usign the Open Benchtable Mini is even easier, you only need 4 standoffs
Push-pin standoff
Push-pin standoff
Standoff with OBT thumbscrew
Let us know on Social Media what is your favorite mounting strategy: Push-pins only or Mixed ?
https://openbenchtable.com/wp-content/uploads/2021/08/OBT-standoff-2-scaled.jpg19202560Thomas Domarthttps://openbenchtable.com/wp-content/uploads/2017/06/logo-if-rd-330-300x107.pngThomas Domart2021-08-18 06:55:002021-08-20 02:17:41Motherboard mounting guide for Open Benchtable and OBT Mini
Even if the OBT is easy to build, sometimes we just want to check how things should be worked out. Today we focus on installing fans on your Open Benchtable.
Getting ready
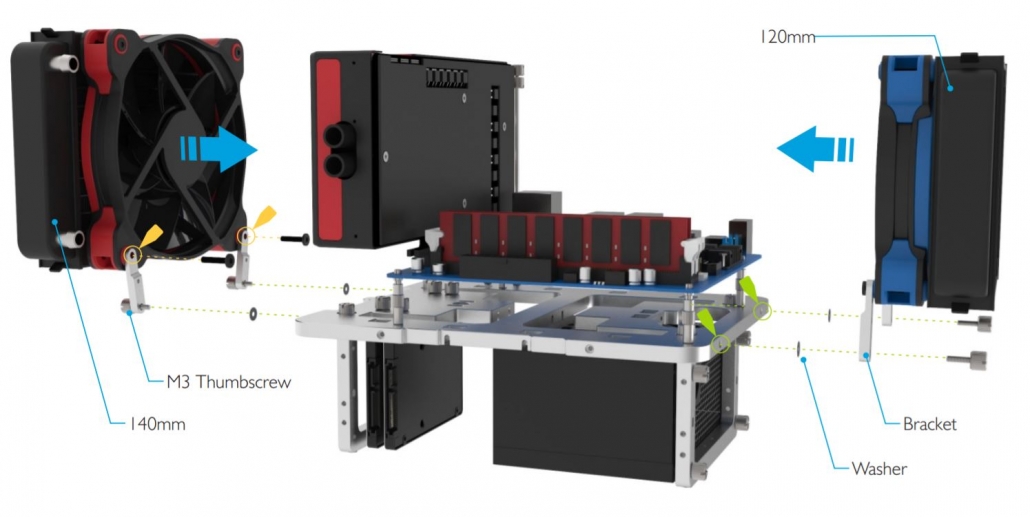
To mount your fan, you will need to detach four M3 screws, two brackets and optionnally two washers.
In the middle of your OBT, you fill find your brackets, they are attached with one M3 screw each. Unscrew these to get the brackets off. Washers are securely held with the PCI-E thumbscrews, unscrew the nuts and you will find your washers! You can then find two more M3 screws on the right side of your OBT or in your OBT Screw Kit.
Tip from the team: Washers are optional, they are here to prevent any friction between the two aluminum parts which can leave esthetic marks.
Installation
While fans all have the same mouting point & dimension, not all fans are created equal. Thus we outline the two common way to mount your fans to the brackets.
Case 1: Your fan can fit a screw through its mount
This is the easiest case! First, pass a M3 screw through the corner of your fan. Next, screw it the middle hole of the bracket. Finally, use your spare M3 screws to secure the brackets to the holes which are located on the edge of your Open Benchtable.
Tip from the team: The bracket has two different thicknesses on it to accomodate most configurations possible. Play with the brackets to find the best fitting position.
Case 2: Your fan can’t fit a screw through its mounts
There are two ways to tackle it. You can use third party screws and nuts or use third party extra long M3 screws.
Using screws and nuts
When using screws and nuts, pass the screws through your fan’s mounting point and bracket, then tighten the nuts. Finally, use M3 screws to attach the brackets in the holes located on the edge of the Open Benchtable.
Using extra-long M3 screws
When using extra long M3 screws, pass them through the fan’s mounting points. Next, use the middle hole of the bracket as a nut to attach the screw in it. Finally, use your OBT M3 thumbscrews to secure the brackets to the edge of your OBT.
Connect!
Finish by connecting your fan to your motherboard or fan controller.
Theses are awesomes builds by the community to inspire you.
Even if the OBT is easy to build, sometimes we just want to check how things should be worked out. Today we focus on mounting storage on your OBT.
Getting ready
First, make sure your storage is supported on your OBT model. The BC1 supports 2.5″ and 3.5″ drives whereas the OBT Mini support 2.5″ drives. What’s not different is that you can attach two drives on each model.
Mounting the drive
Unscrew two M3 screws of you OBT.There are located on the top right corner of the BC1. Concerning the OBT Mini, there are securely held on at the bottom right of the structure.
At the bottom of your OBT are four hard drive slots, align your drive under two of these holes and tighten the M3 screws in your drive’s threads.
Tips from the team: Attach your drive so that its connectors are on the same side that your motherboard’s SATA ports, it will make cabling easier!
Even if the Open Benchtable is easy to build, sometimes we just want to check how things should work out. Today we focus on installing any sort of full sized extension card, such as a GPU or Capture Card.
Getting ready
First, get the PCI-E thumb screws out.
If you are using the OBT, four PCI-E standoffs are included. To get them out, simply loosen the thumbscrew and they will detach easily.
If you are using an OBT Mini, two PCI-E standoffs are included with your unit. To get them out, you need to unlock the feet. Loosen the 6 screws highlighted in the picture below. Then get the PCI-E standoffs by sliding them out of the feet.
A video is worth a thousand words.
Loosen the highlighted screws
Use the required number of PCI-E standoffs, and store the remaining in their original location.
If you are using a large number of PCI-Express cards and require extra PCI-Express standoffs, consider getting an OBT Screw Kit.
Installation
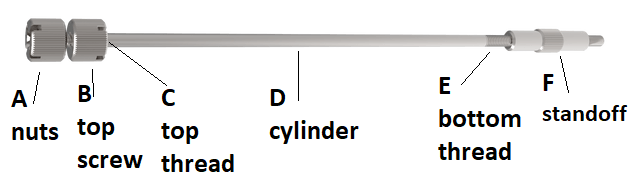
Once you’re all set-up, screw the bottom thread of the PCI-E standoff to the screw standoff. Find the screw standoff attached to the OBT feet. Repeat this process on all the standoffs you plan to use.
You should get something like this
Now that everything is ready, mount your PCI-E standoffs in the holes that correspond to the PCI-E slot of your motherboard.
Plug your PCI-Express card. Tighten the nuts on the top screws. All done!
Tips from the team: Some cables with large display port connectors, might need a bit more wiggle room with the standoffs. In this case, play with the top nuts to adjust position and alignment.
Let us know on social media what other guides you want to see for your Open Benchtable!
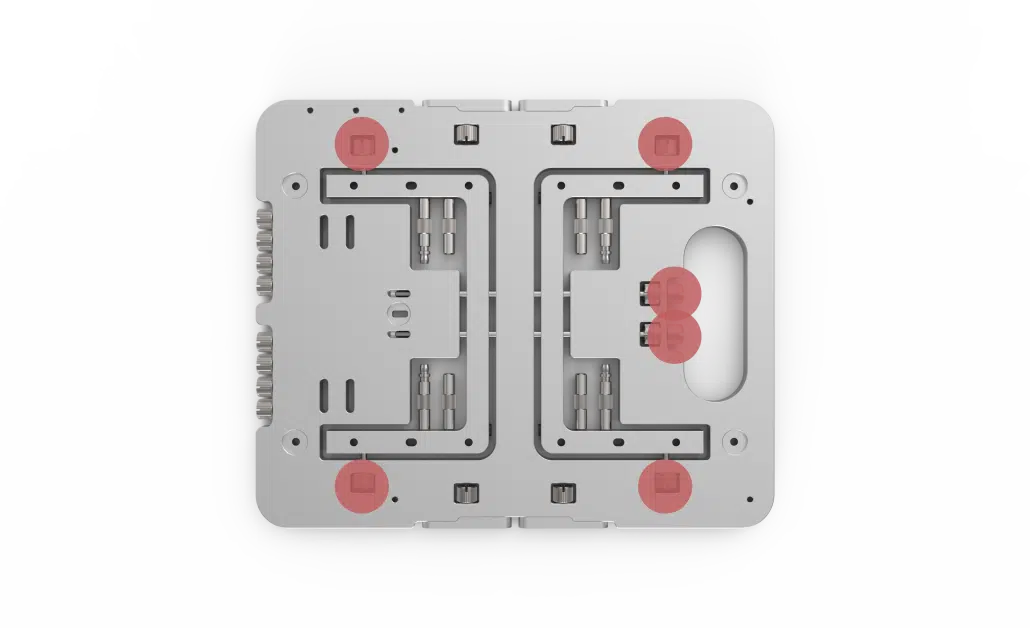
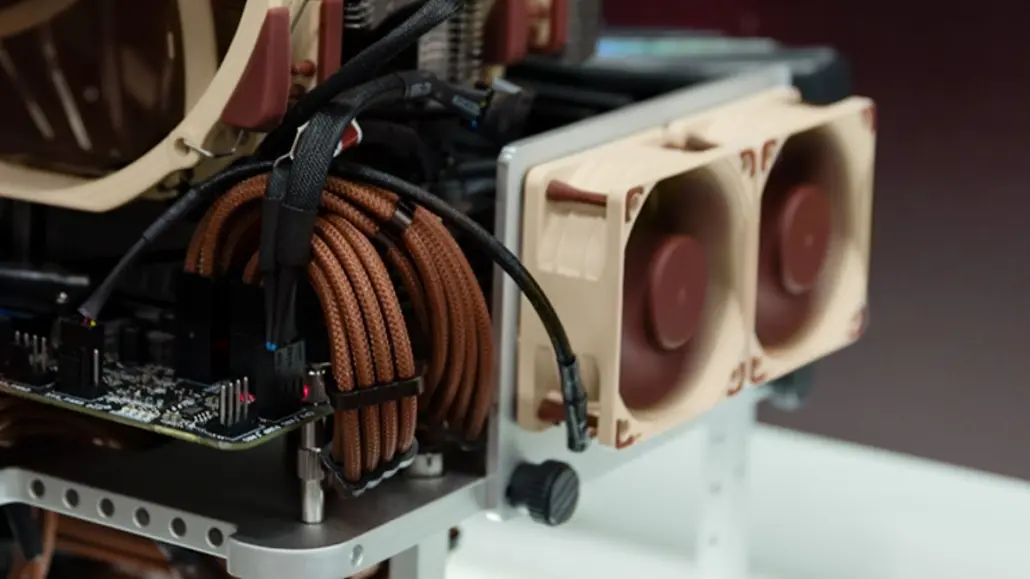
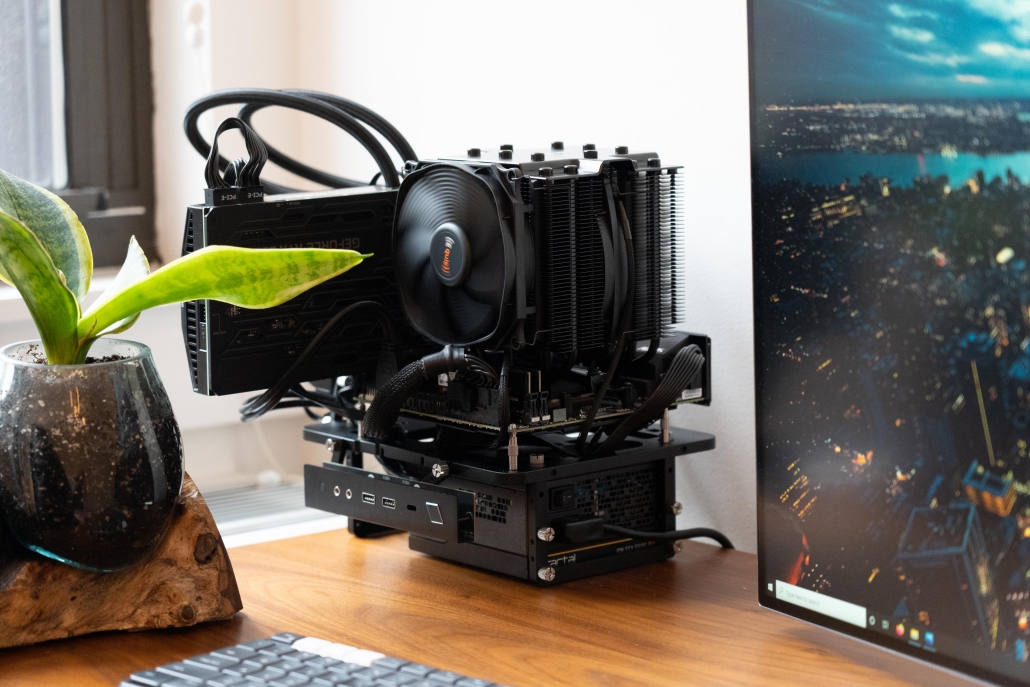
The OBT community created a lot of different adds on to the benchtable. Most of the community projects are created by enthusiasts on their own but NOCTUA decided to pitch in as well. This post will guide you to install this exclusive VRM cooling bracket!
The installation of the VRM cooling bracket is ultra simple and barely require a guide.
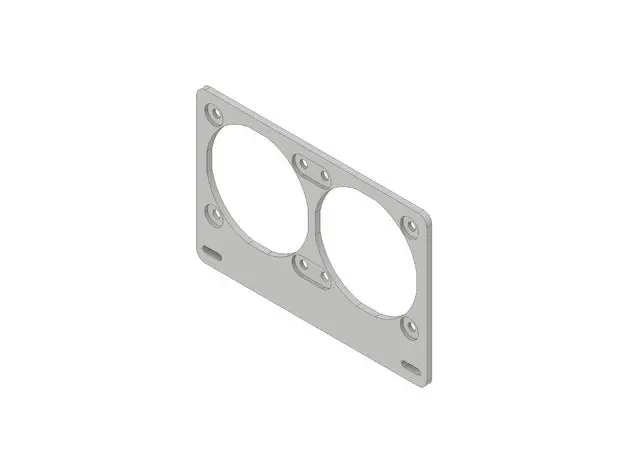
Make one or get your VRM cooling bracket
First, you have to have the bracket (3D print it or purchase it) and the Noctua fans. As we discussed in our post focusing on why and how they came up with this idea, you can 3D print the bracket in any material that you have or you can buy an aluminium version.
Noctua’s VRM fan bracket
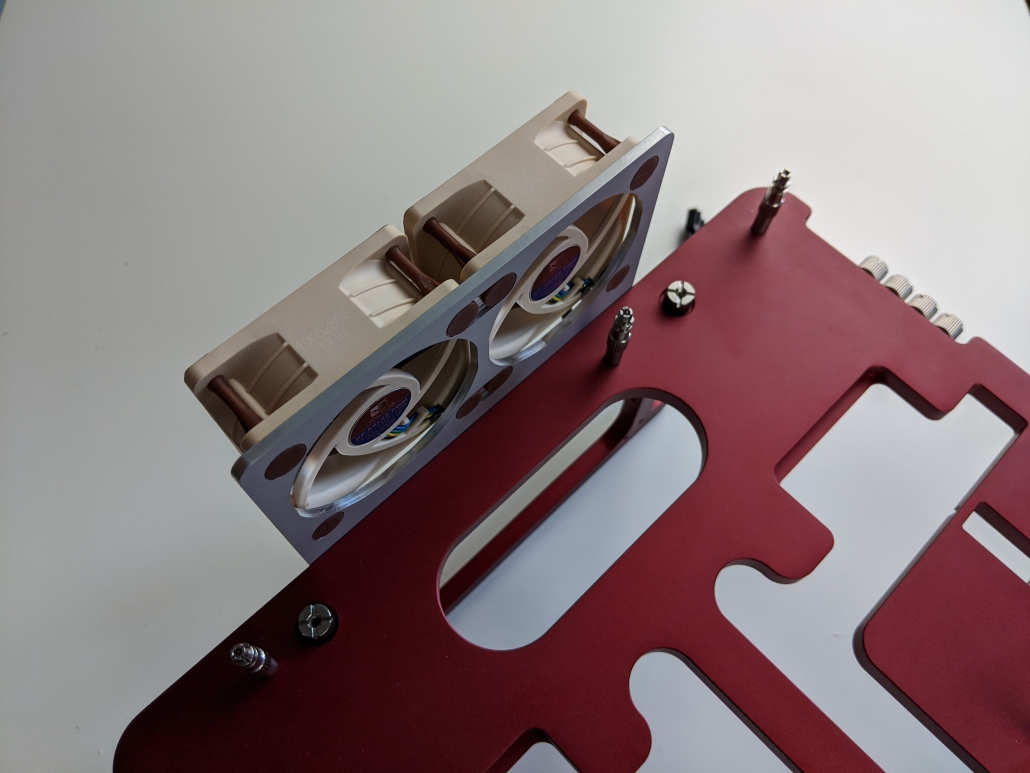
Attach the fans
Attach the fans to the bracket. To mount them, use your prefered way to mount fans, wether it is screws or rubber tighteners.
Extra cooling, extra performance!
Secure on your Open Benchtable
Pick two M3 screws, from the right side of the Open Benchtable or from the OBT Screw Kit. Attach the VRM cooling add-on with the M3 screws in the holes located on the edge next to the handle.
Connect!
Finish by connecting, the two 4-pins wire on any of the fan port of your motherboard.
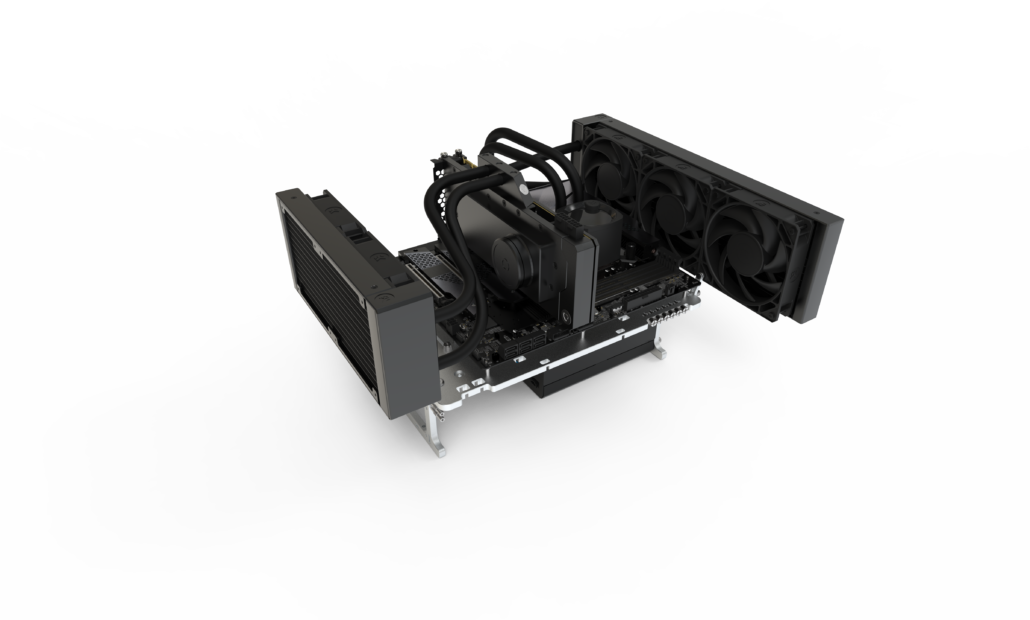
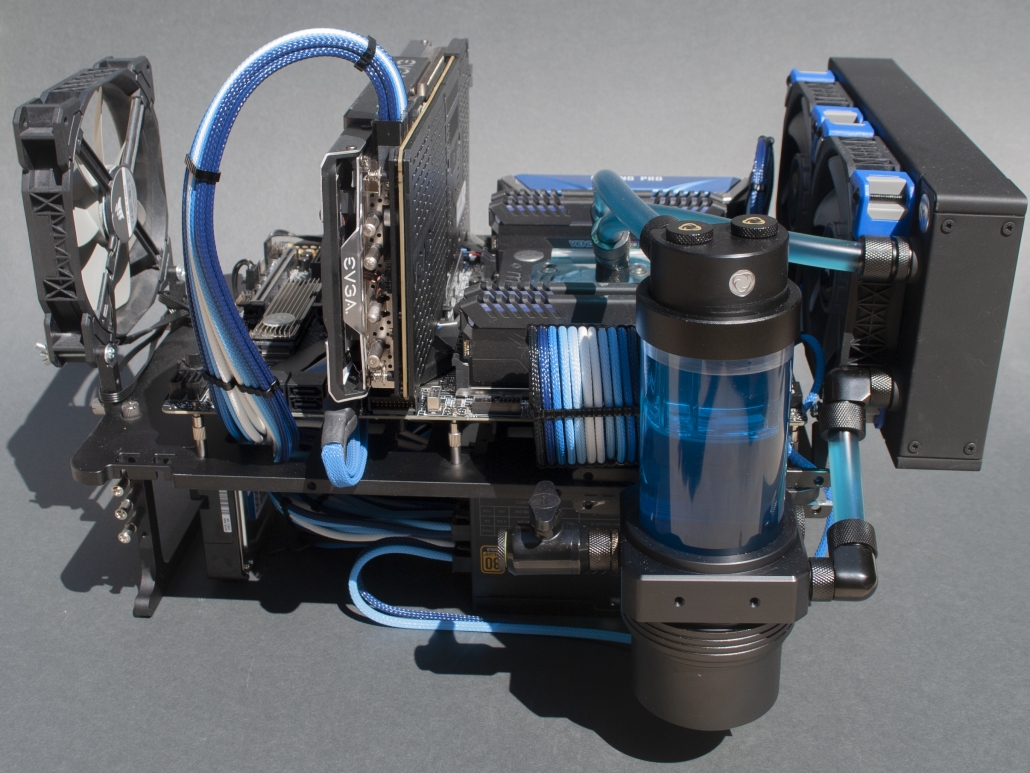
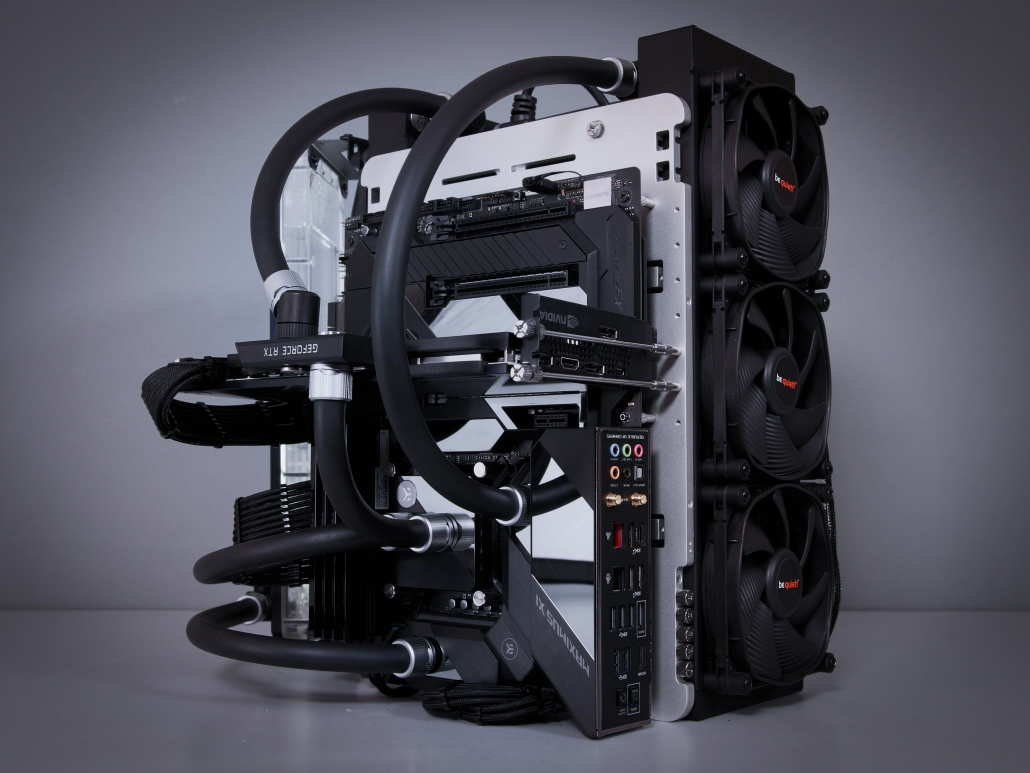
The Open Benchtable is quite straightforward to build as we showed on our step by step assembly guide. But due to the multitude of configurations you can create, we share the teams tips for attaching your watercooling kit. This watercooling installation guide focus on the most popular configurations to build your WC kit on the OBT.
The Open Benchtable is designed to handle any sort of hardware, it allows the users to build computers with a wide variety of component choices. Watercooling kits are no exception. Indeed, the OBT can support large radiator sizes, from 120mm to the giant 420mm ones. The only limit is gravity (almost)!
On the edges of the OBT, holes allow to create pretty much any configuration you could think of! Let’s divide them in three categories:
Radiator on top
Radiator on the side
Exotic mounting
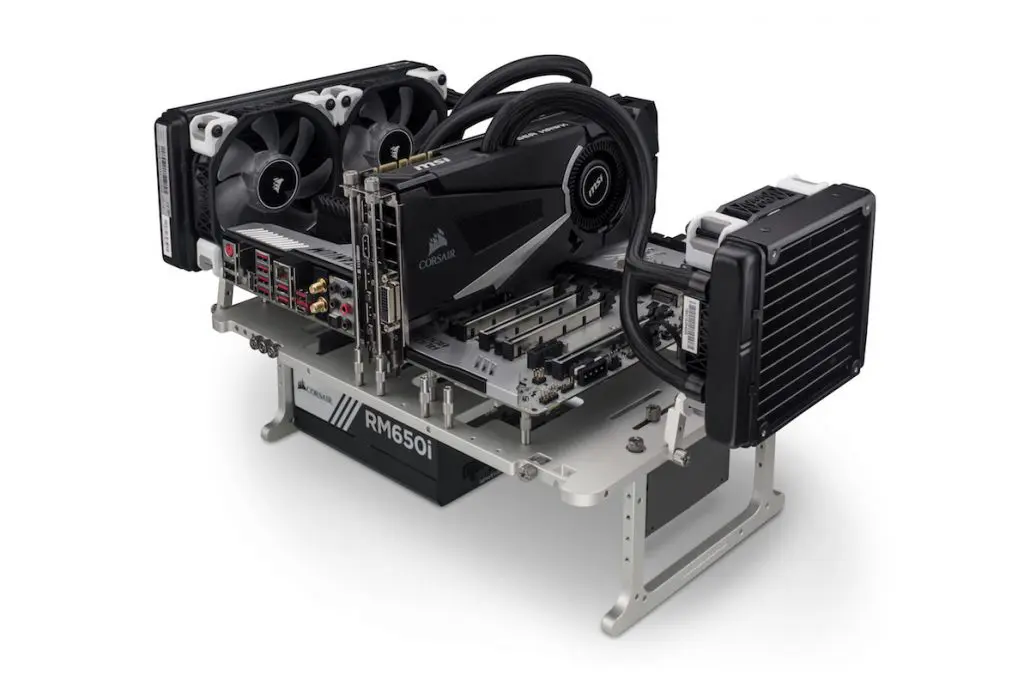
Category 1 : Above the Open Benchtable frame
There are three recommended locations to install your watercooling’s radiator:
At the top (PSU/handle area)
On the right side
At the bottom (storage area)
There is an extra location on the IO side, that we wouldn’t specifically recommend.
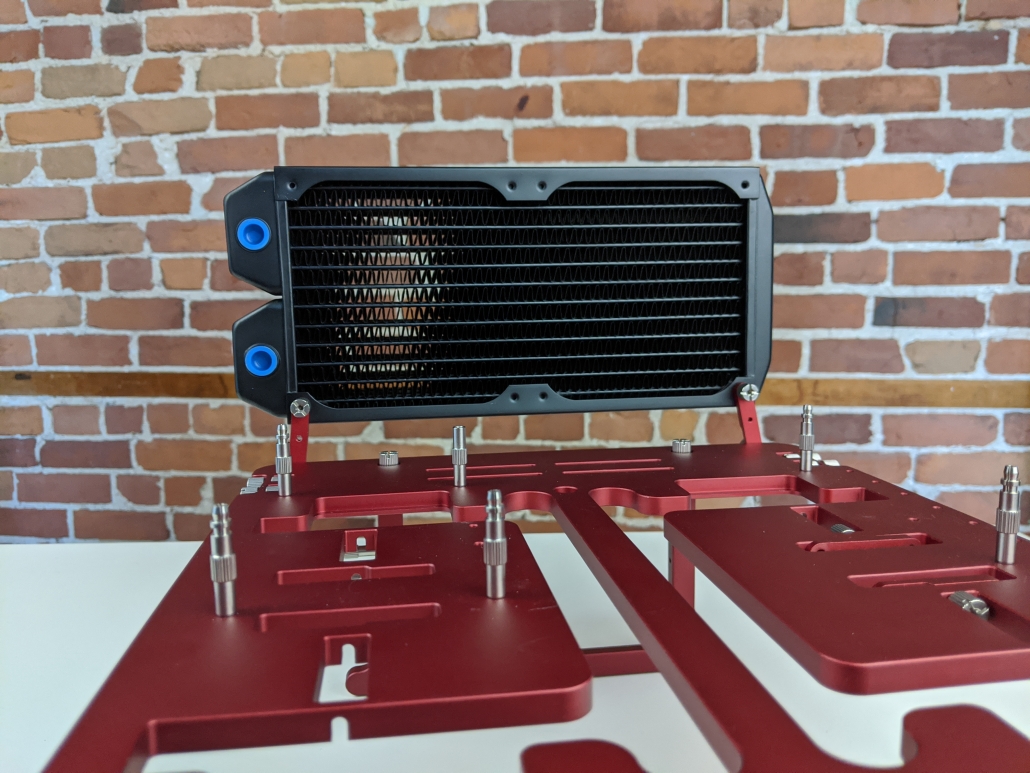
At the top (PSU/handle location)
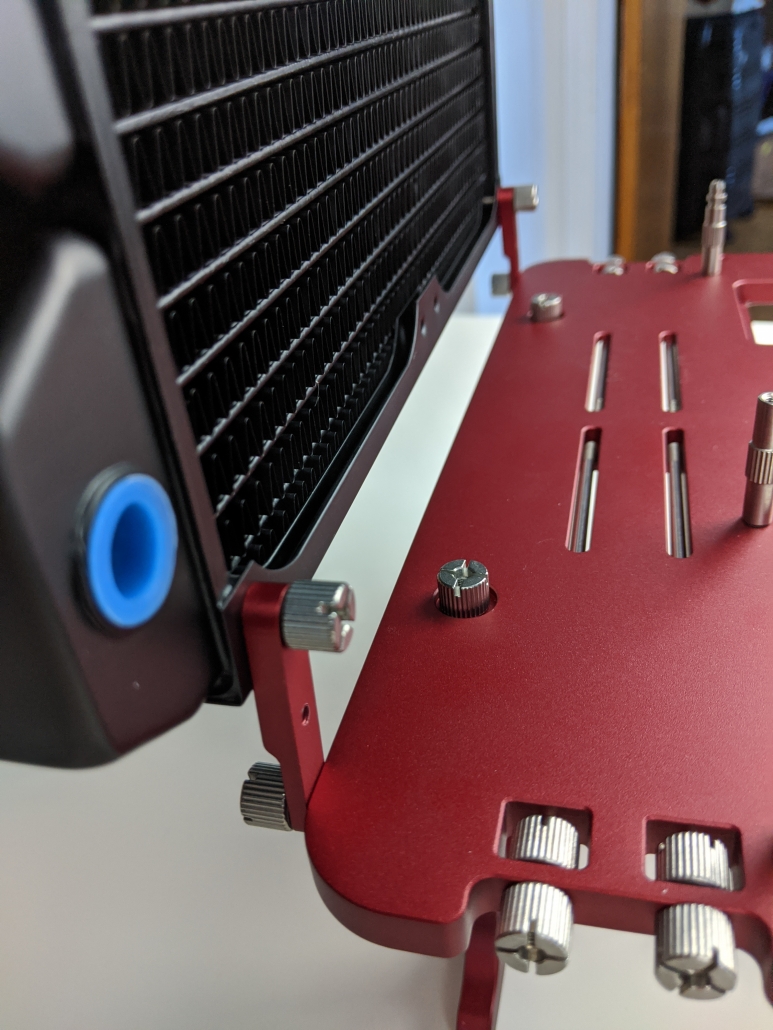
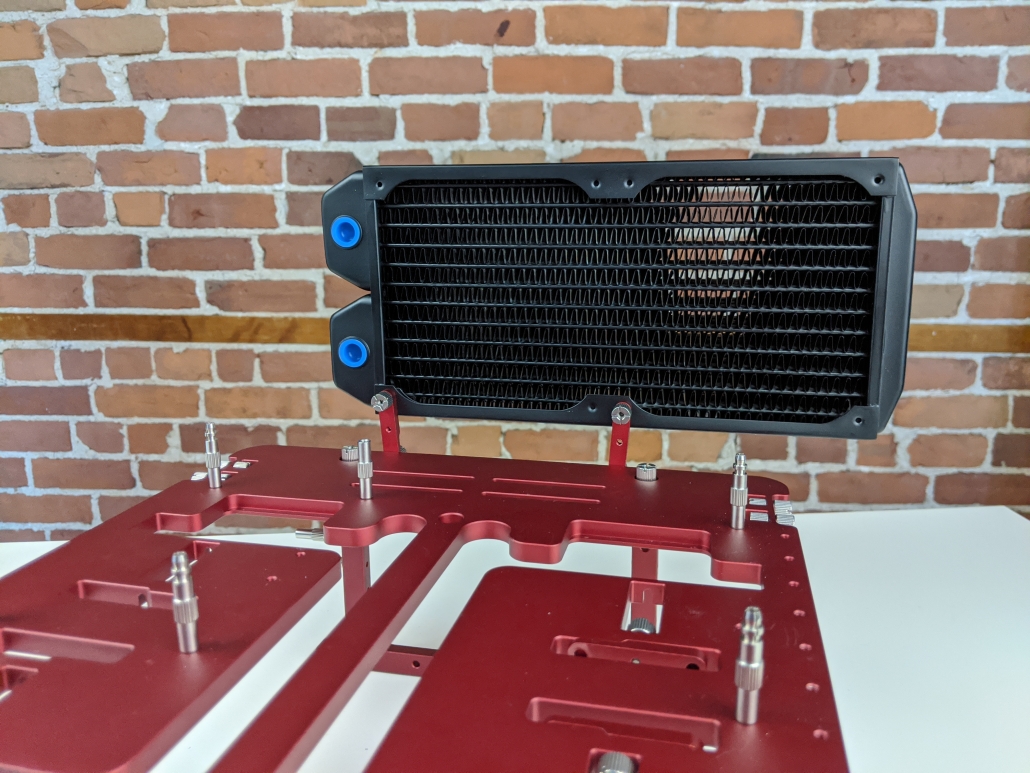
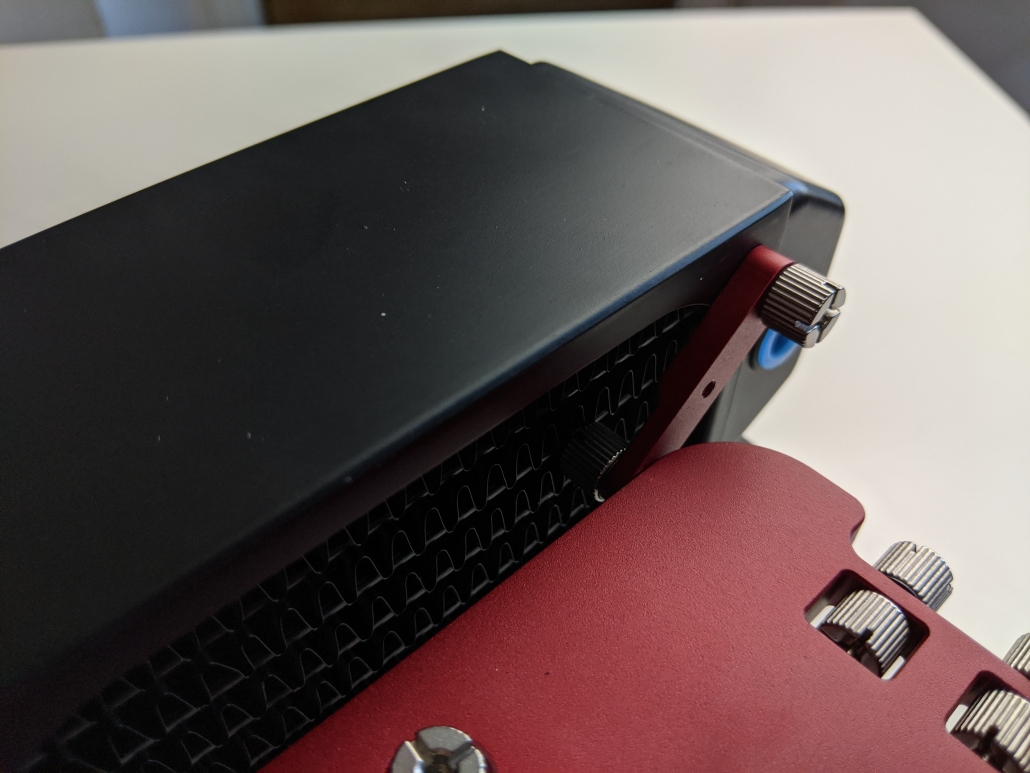
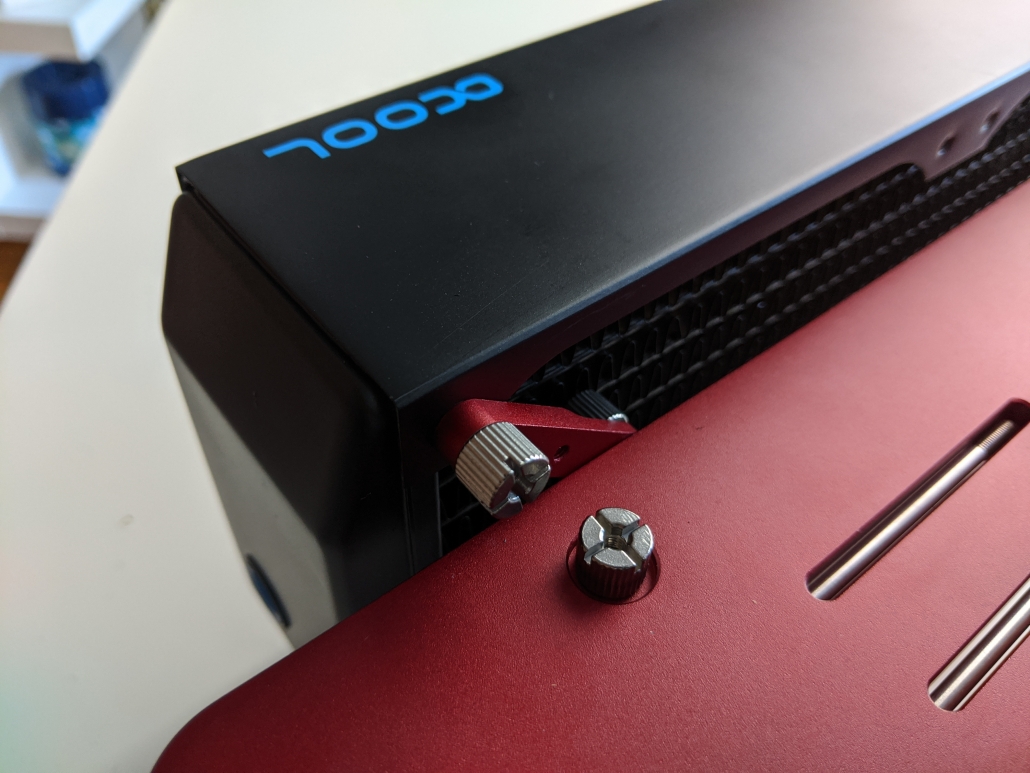
At the Open Benchtable’s edge located above the power supply unit, you will find holes. Attach two brackets using the M3 thumbscrews provided with your OBT. Adjust the brackets to fit your radiator mounting and use the screws provided with your radiator or the OBT screws.
Tips from the team: Use the widest mounting point on the Open Benchtable to support large radiators.
Recommended position for large radiators
For smaller radiator, find the combination of brackets & radiators mount that fit best. This mounting approach is supported and recommended for both the Open Benchtable and the Open Benchtable Mini.
Depending on your motherboard format and GPU size, consider mounting the radiators on the right of the OBT. Adjust the brackets to fit your radiator and you’re good to go!
Tips from the team : This usually works with ATX or smaller motherboards. Consider that any GPU larger than your motherboard frame can conflict with large radiators.
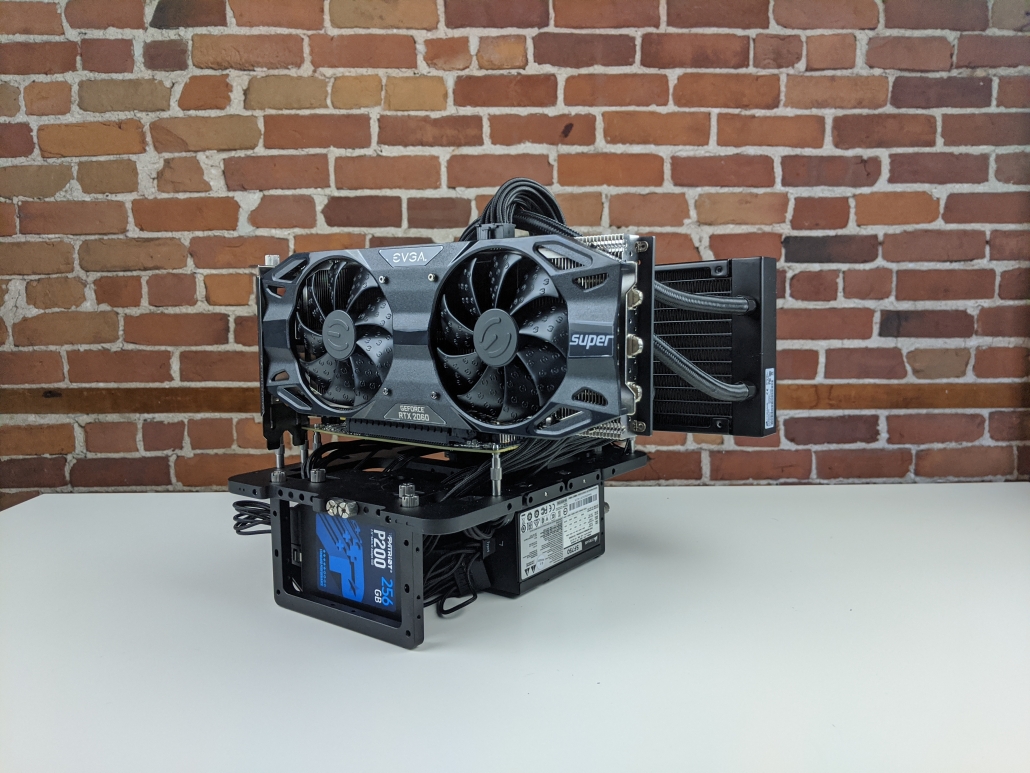
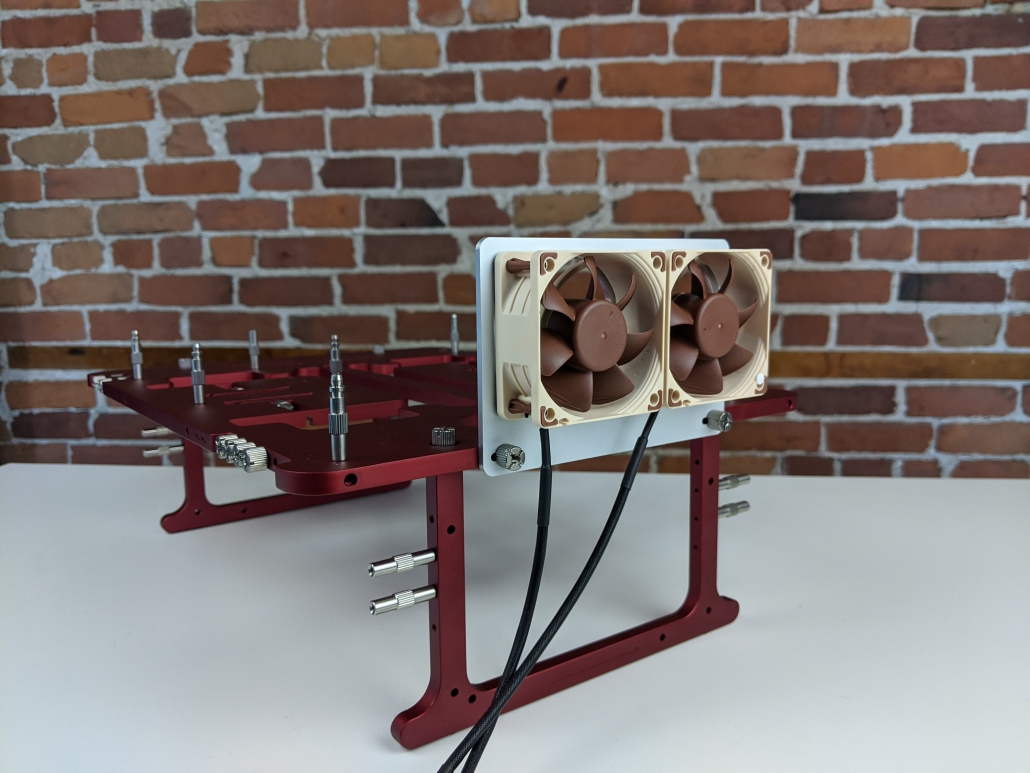
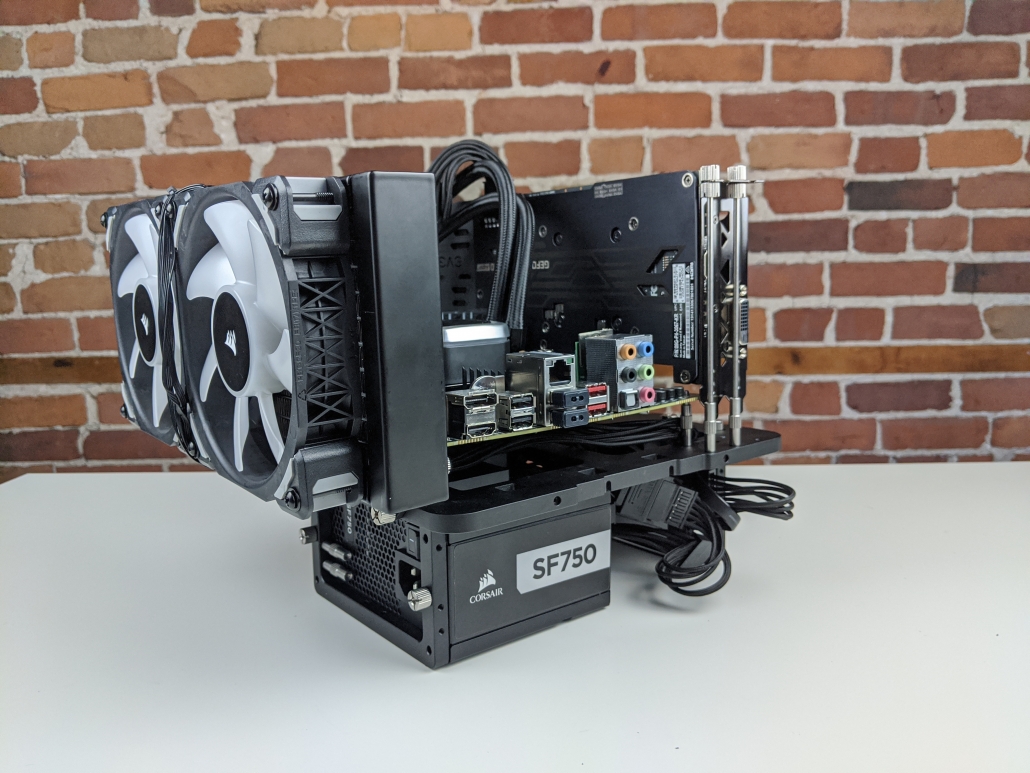
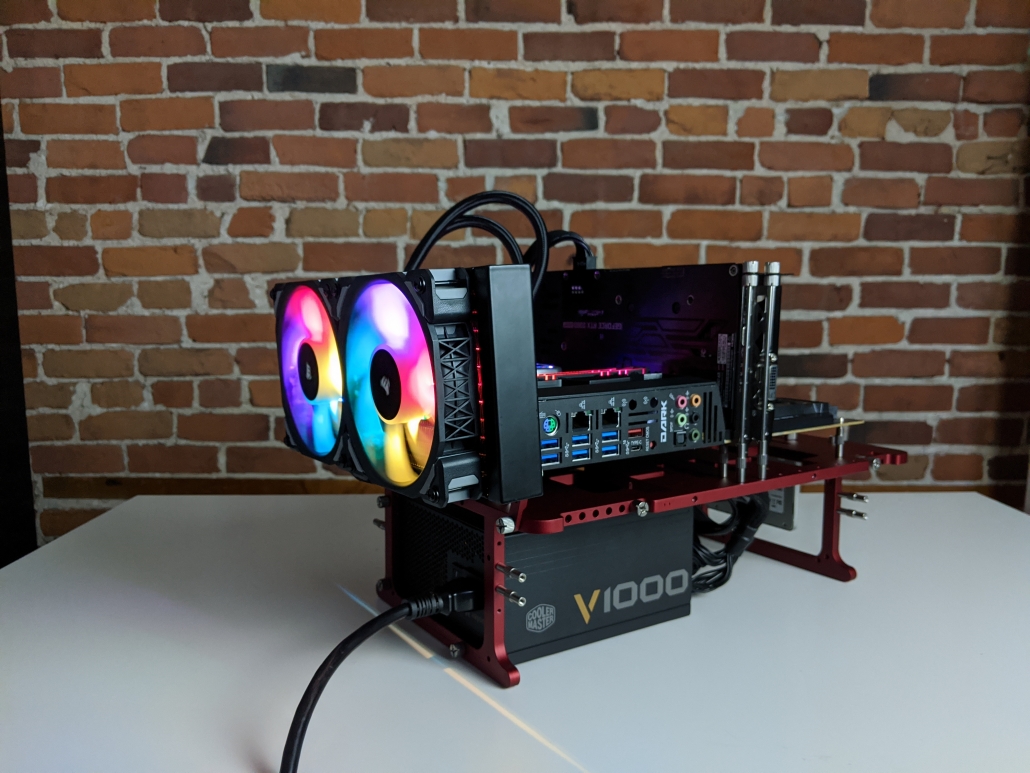
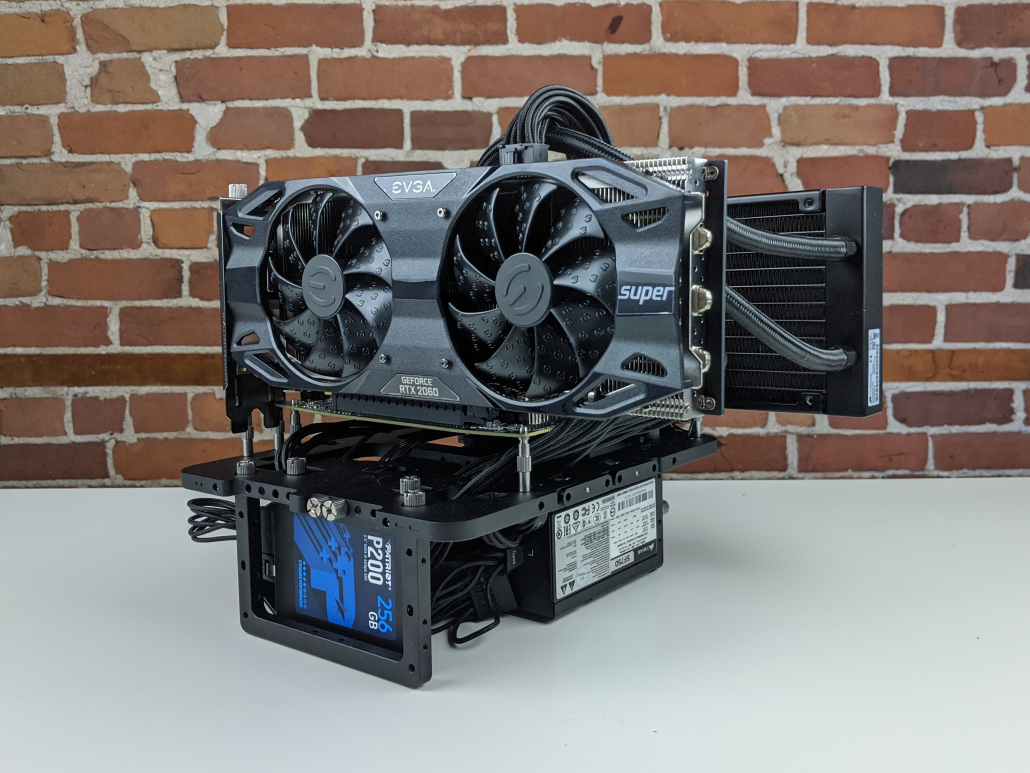
Facing the GPU / storage side
This one makes a lot of sense if your GPU is watercooled. Just above the storage space, there are 4 holes to attach the brackets. Like the PSU/handle side seen earlier, find the holes that fit the best your watercooling system!
Double All-in-One cooling in a breeze.
On the left side (behind the IO shield)
This setup is not recommended, as it easily blocks the motherboard IO and the GPU connectivity. This option is available on OBT v1 and v1.1.
There are two holes on the OBT edge behind the IO shield to attach your components. However, this mounting space is used mostly in Extreme Overclocking Setup when the GPU is on a different PCI-E slot and for industrial motherboards/testing systems.
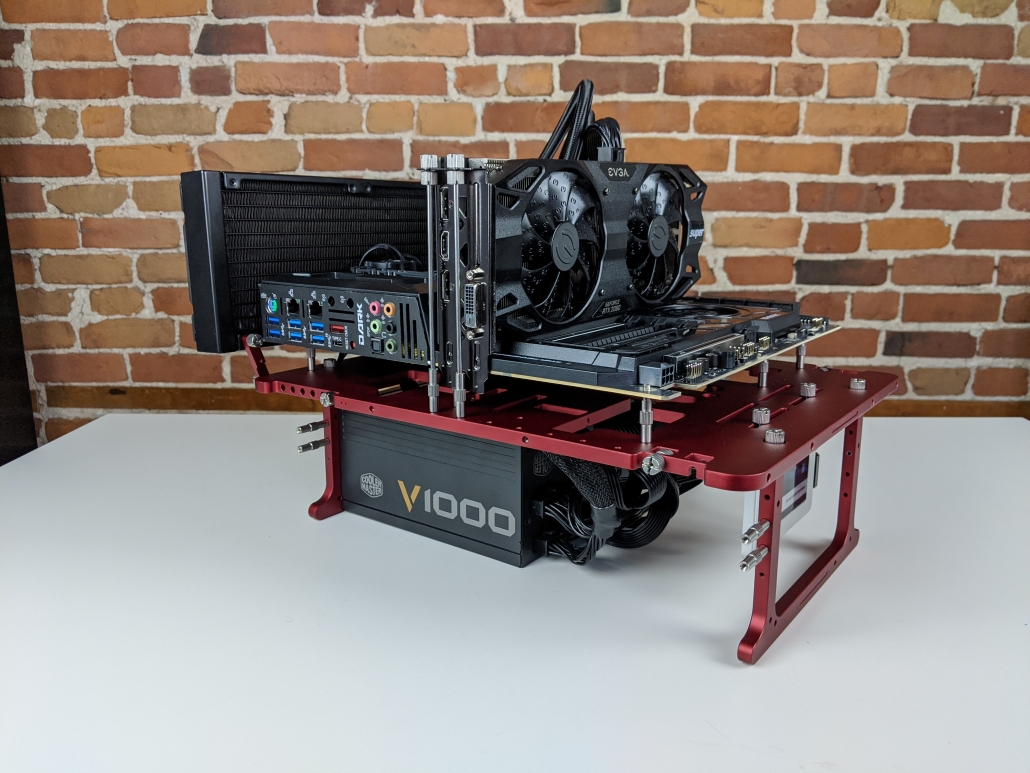
Category 2 : Below the Open Benchtable frame
There are four different locations where you can install your radiator when you choose it to be under the OBT frame. There are two recommended layouts and two other locations possible.
Setting the radiator below means that your radiator is below your pump, in some configurations this can lead to bubbles in your loop.
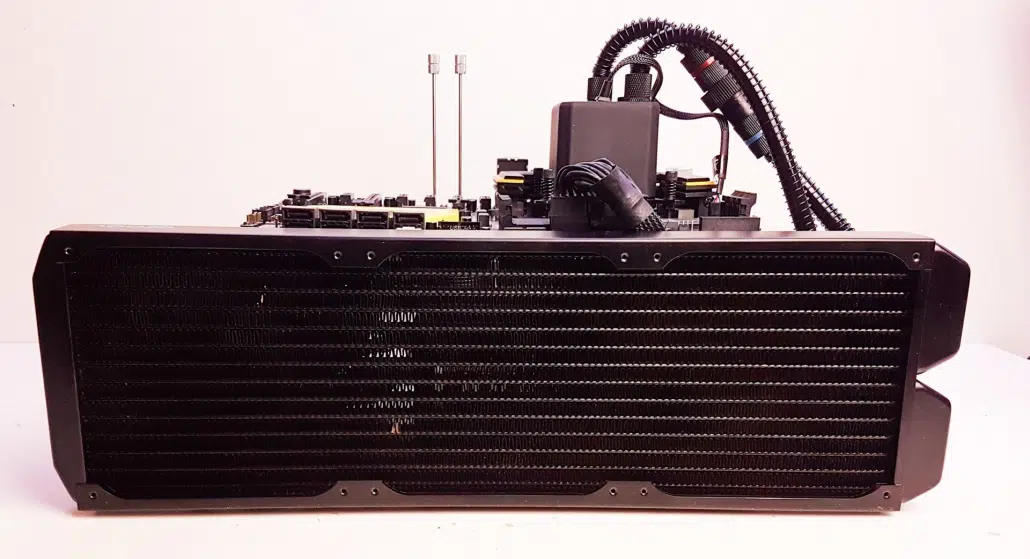
At the top (PSU/handle location)
We wouldn’t really recommend this setup because it can easily obstruct the PSU’s plug. This is a good location for a tiny radiators, pump or VRM Cooling bracket.
Use the brackets to secure the radiator to the frame. Holes are located on the edge just above the PSU.
On the right side
This position is useful for long radiators, be creative with the brackets and positions.
With a combination of “Bigger-than-ATX” motherboards and large radiators this might not be possible. Nonetheless, this is a great location for long radiators, distro-plates or reservoirs.
At the bottom, facing the storage
In the same fashion as PSU/handle position, you can set your radiator facing the storage. The good part here is that there won’t be any conflicts with airflow nor plugs.
Adjust the bracket spacing based on your needs and component size.
On the left side, (under the IO shield)
You can attach the radiator on the IO side of your rig. This setup works best with thin radiators that use 120mm fans or smaller. This position is not recommended as some radiator size will conflict with the IO of your motherboard or GPU.
This can be used for your radiator or your pump depending on your creativity.
Mounting pumps or reservoirs
All the locations can accommodate watercooling pump, reservoirs or extra add-ons like the OBT Debug Card. Depending on your pump, the brackets are helpful to accommodate a large choice of models.
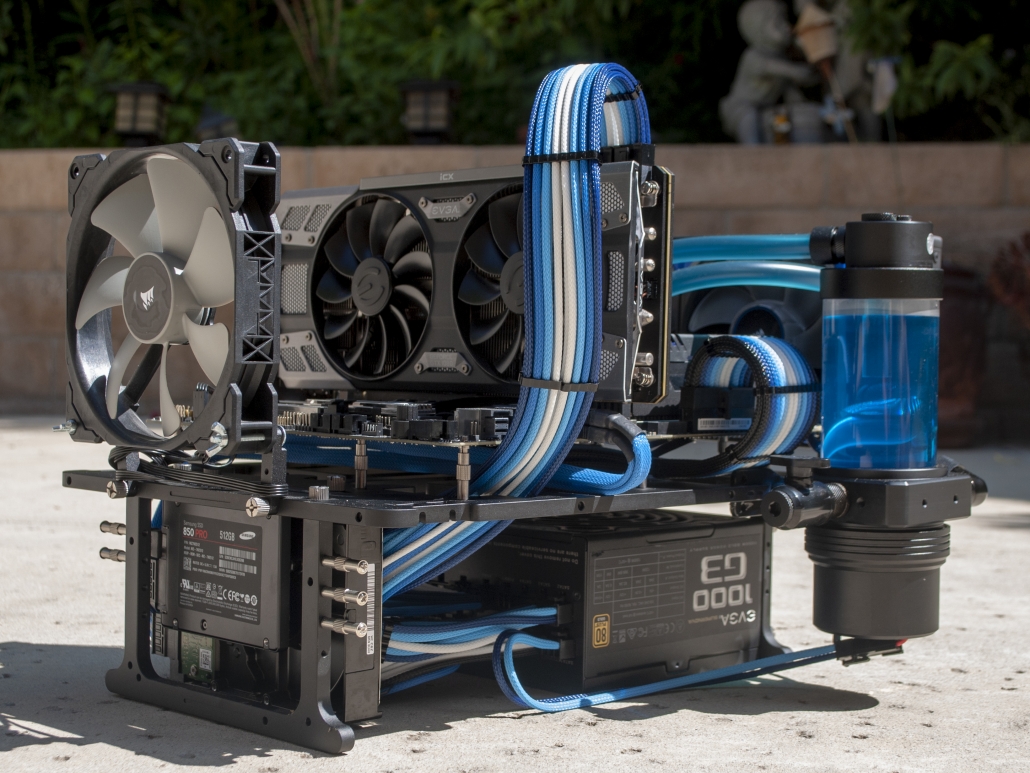
Build & Share
We love to see the OBT Community members building on the Open Benchtable.
The Open Benchtable Mini is so simple to assemble that we never really bothered making a step-by-step assembly guide besides the one available in the box.
This guide focuses on the Open Benchtable Mini. The use of mini-ITX motherboards is recommended but there is not “hard limit” and mini-DTX motherboards would fit as well. There is no hard-limit on the CPU cooler or GPU sizes neither.
To release the feet, start by unscrewing the four screws holding the feet to the structure. Then loosen the PCI-E thumbscrews. The two feet and the PCI-E standoffs should now be released from the main body.
The PCI-E standoffs slide in slightly in the main body to stay secured when packed.
To secure the feet to the main body, use the same screws directly in the two holes on each side of the benchtable as highlighted.
Attach the feet in the higlighted holes.
Attaching the PSU
The OBT Mini is compatible with the SFX and SFX-L PSU form-factor.
Note that the screws used for holding the PSU are 6#32 when everything else on the OBT uses M3.
All of the screws are located at the bottom of the OBT Mini. The 6#32 screws can be found on the left side, while spare M3 screws are on the right side.
6#32 screws can be easily recognized because they feature a wider threading
Attach the PSU to the feet located under the handle. The PSU can be attached with the fan facing up or down, but it is recommended to use your PSU with the fan facing up.
Once assembled, you OBT Mini is rock stable
Attaching the CPU/Cooler/RAM
At this stage, you should mount the CPU, the cooler and the ram to your motherboard.
Tips from the team: In case you use watercooling radiators or large All-In-One Watercooling kits in a non-conventional approach (see the last step): This is a good time to hook them up to the table for good. We have a blog post with detailed instructions on how to proceed.
Tips from the team: Brackets can be used in multiple scenarios depending on how you orient them. This helps fit radiators mounting using the 120mm to 140mm (fan-size).
Securing the motherboard
Now, let’s get our motherboard on the OBT Mini!
You need the standoffs located on the feet. If you take a look at them, you will notice that they are of two different types.
Four of them are the usual screw standoffs that help you secure the motherboard in place. The other four are our fast mounting push-pin standoffs. You can use whichever type suits your needs best.
If you’re still not convinced on how to proceed, we got you covered on our blog!
Tips from the team: we usually go for two conventional standoffs in diagonal and two push-pin standoffs on the other diagonal.
Once installed, push-pins standoffs hold your motherboard in place
Securing the GPU
For each PCI-E holder that was securing the feet at our first step, you will need a screw-type standoff (from the step above).
Attach the PCI-E thumbscrews into the standoff, screw into the main body and remove the nuts from the top screw.
Insert your GPU into the PCI-E slot, the thumbscrews should line up with the GPU mounting. Once done, tighten the nuts onto the top of the PCI-E standoffs.
Tips from the team: For single slot graphic cards, you can use one PCI-E standoff, and keep the second one stored.
To unlock the PCI-E support, loosen the nut from the top screw, it will unlock it from the main body of the Open Benchtable.
The OBT Mini support GPUs with large coolers
Our dedicated post will guide you through an even more detailed way to secure your GPU!
Attach storage
You can easily attach up to two storage devices at the bottom part of the OBT. The Open Benchtable supports 2.5″ SSD or HDD on both 7mm and 9.5mm z-height (thickness).
Use the thumbscrews provided with the Open Benchtable to secure them in place.
We recently published an article taht features a video on how to mount the drives!
Assembling accessories
If you need to add extra coolers or accessories to your set-up, use the included brackets. These are located at the center of the benchtable. Screw them at the top of your OBT and then mount your accessory or cooler onto it. The brackets can also be used to accommodate all-in-one and custom watercooling. More advanced information is available on our How-To section
If you are interested in mounting Noctua’s VRM Cooling System, we got you covered on our blog.
Cable management
The end is near! Lay the cables on your OBT and everything should be working!
Tips from the team: Use cable ties and make use of the space between the motherboard and the OBT to route/attach/guide your cables nicely.
Inspire yourself with some builds from the community.
This concludes our Open Benchtable assembly guide.
Feel free to share your builds!
https://openbenchtable.com/wp-content/uploads/2021/07/OBT-Mini-Full-alt.png19202560Thomas Domarthttps://openbenchtable.com/wp-content/uploads/2017/06/logo-if-rd-330-300x107.pngThomas Domart2021-07-31 12:05:342021-08-18 12:35:20Step-By-Step assembly guide – OBT Mini
So, here we are with our detailed, step-by-step assembly and use guide for the Open Benchtable. The instructions provided here are valid for the Community Edition, v1 and v1.1 of the Open Benchtable. A step-by-step guide for the OBT Mini is available in our how-to section as well.
On the Open Benchtable, there is no limitation on motherboard sizes, as long as they fit some of the ATX mounting holes. There is also no hard limit on the CPU cooler or GPU sizes.
To release the feet, unscrew the four screws holding the feet to the structure.
Using these screws, assemble the feet directly in the two holes on each side of the benchtable as marked in the picture below. For better compatibility with all PSUs, orient the feet so that the extruded part at the bottom faces outward.
Place the screws in the red highlited holes
The extrusion can be seen at the center of the foot
Attaching the PSU
The OBT (CE, v1, v1.1) is compatible with the ATX 12V, ATX Large, ATX-EPS and BTX formats.
Note that the screws used for holding the PSU are 6#32 when everything else on the OBT uses M3.
The 6#32 screws can be found on the left side of the table, while spare M3 screws are on the right side.
6#32 screws can be easily recognized because they are the ones with the widest threading
Attach the PSU to the top feet under the handle for better compatibility with the storage (see later). The PSU can be attached with the fan facing up or down, but it is recommended to use your PSU with the fan facing up.
You will only need three screws to hold the PSU to the Open Benchtable foot.
Once your PSU is installed, it should look like this!
Attaching the CPU/Cooler/RAM
At this stage, you should mount the CPU, the cooler and the ram as you would for any other case.
Tips from the team: In case you use watercooling radiators or large All-In-One Watercooling kits in a non-conventional approach (see the last step): This is a good time to hook them up to the table for good. We have a blog post with detailed instructions on how to proceed
Tips from the team: Brackets can be used in a wide array of scenarios depending on how you orient them, from 120 mm to 280 mm radiators.
Securing the motherboard
Now, let’s get our motherboard on the OBT!
You need the standoffs located on the feet. If you take a look at them, you will notice that they are of two different types. Eight of them are the usual screw standoffs that help you secure the motherboard in place. The other eight are our fast mounting push-pin standoffs. You can use whichever type suits your needs best. If you’re still not convinced on how to proceed, we got you covered on our blog!
Tips from the team: we usually go for one conventional standoff in the center and push-pins for the others! (you can mix push-pin and screw-standoffs that you feel comfortable with).
Once installed, push-pins standoffs hold your motherboard
Securing the GPU
Next is our GPU!
At the bottom of the OBT frame are four PCI-E thumbscrews. For each PCI-E holder, you will need a screw-type standoff (from the step above).
Pick the quantity needed for securing your GPU and install the standoffs into the OBT’s PCI-E holes.
Attach the PCI-E thumbscrews to the standoffs, and remove the nuts from the top screws.
Insert your GPU into the PCI-E slot, the thumbscrews should line up with the GPU. Once done, tighten the nuts onto the top of the PCI-E standoffs.
To unlock the PCIE thumbscrews, loosen the nut from the top screw, then the thumbscrew will unlock from the benchtable.
Our dedicated post will guide you through an even more detailed way to secure your GPU!
Attach storage
You can easily attach up to two storage devices at the bottom part of the OBT. The Open Benchtable supports 2.5″ SSD or HDD of 7mm and 9.5mm z-height (thickness). You can attach a regular 3.5″ HDD as well.
Use the thumbscrews provided with the Open Benchtable to secure them in place.
We recently published an article that features a video on how to mount the drives!
Assembling accessories
To add extra coolers or accessories to your set-up, use the included brackets. These are located at the center of the benchtable. Screw them at the top of your OBT and then mount your accessory or cooler onto it. The brackets can also be used to accommodate all-in-one and custom watercooling. More advanced informations is available on our How-To section
Tips from the team: Use the OBT screws to attach the bracket to the table, but use the screws provided by your cooler/accessory manufacturer.
You can already add community projects and accessories to your benchtable, mounting instructions will be in their respective projects.
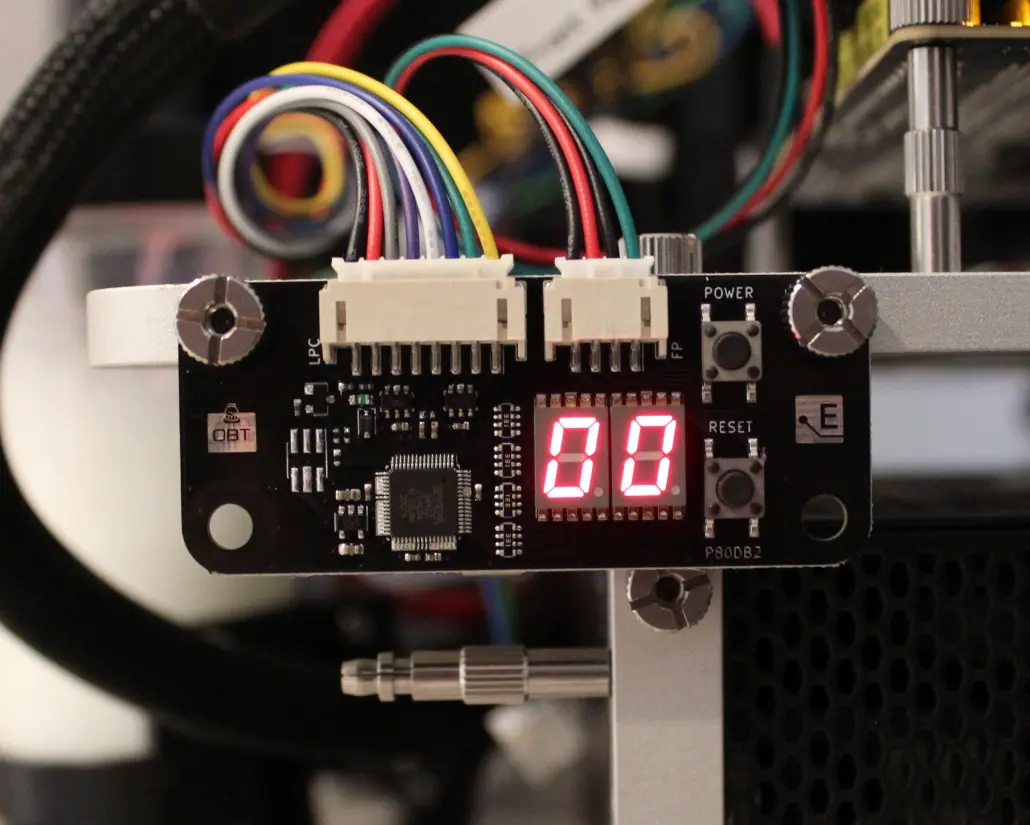
As an example, if you want to install the OBT debug card. Tighten it on the side with two M3 screws and tadaaa!
If you are interested in mounting Noctua’s VRM Cooling System, we got you covered on our blog.
Cable management
The end is near! You just have to lay the cables around and everything should be working!
Tips from the team: Use cable ties and make use of the space between the motherboard and the OBT to route/attach/guide your cables nicely.
Inspire yourself with some builds from the community
This concludes our Open Benchtable assembly guide.