Even if the OBT is easy to build, sometimes we just want to check how things should be worked out. Today we focus on installing fans on your Open Benchtable.
Getting ready
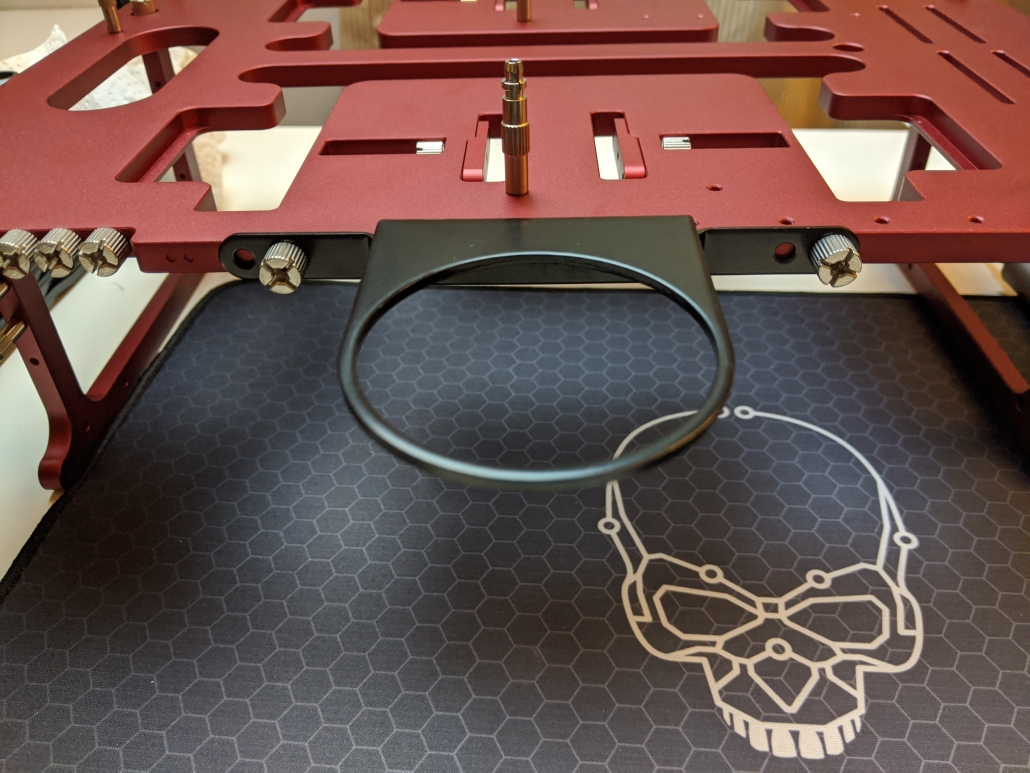
To mount your fan, you will need to detach four M3 screws, two brackets and optionnally two washers.
In the middle of your OBT, you fill find your brackets, they are attached with one M3 screw each. Unscrew these to get the brackets off. Washers are securely held with the PCI-E thumbscrews, unscrew the nuts and you will find your washers! You can then find two more M3 screws on the right side of your OBT or in your OBT Screw Kit.
Tip from the team: Washers are optional, they are here to prevent any friction between the two aluminum parts which can leave esthetic marks.
Installation
While fans all have the same mouting point & dimension, not all fans are created equal. Thus we outline the two common way to mount your fans to the brackets.
Case 1: Your fan can fit a screw through its mount
This is the easiest case! First, pass a M3 screw through the corner of your fan. Next, screw it the middle hole of the bracket. Finally, use your spare M3 screws to secure the brackets to the holes which are located on the edge of your Open Benchtable.
Tip from the team: The bracket has two different thicknesses on it to accomodate most configurations possible. Play with the brackets to find the best fitting position.
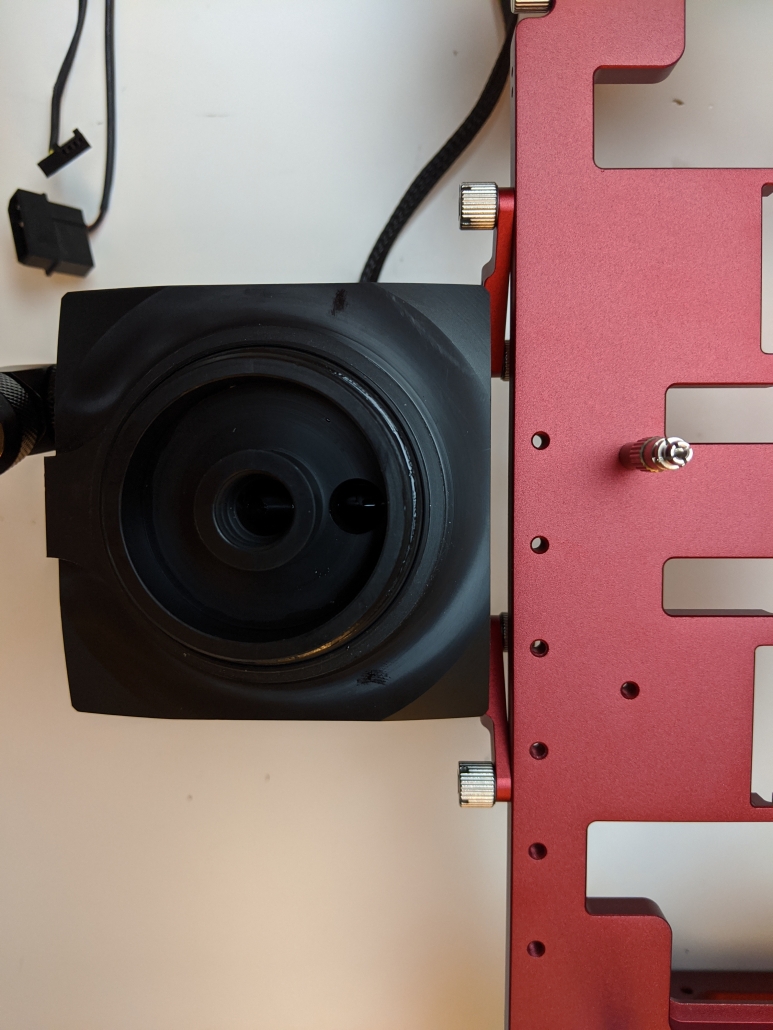
Case 2: Your fan can’t fit a screw through its mounts
There are two ways to tackle it. You can use third party screws and nuts or use third party extra long M3 screws.
Using screws and nuts
When using screws and nuts, pass the screws through your fan’s mounting point and bracket, then tighten the nuts. Finally, use M3 screws to attach the brackets in the holes located on the edge of the Open Benchtable.
Using extra-long M3 screws
When using extra long M3 screws, pass them through the fan’s mounting points. Next, use the middle hole of the bracket as a nut to attach the screw in it. Finally, use your OBT M3 thumbscrews to secure the brackets to the edge of your OBT.
Connect!
Finish by connecting your fan to your motherboard or fan controller.
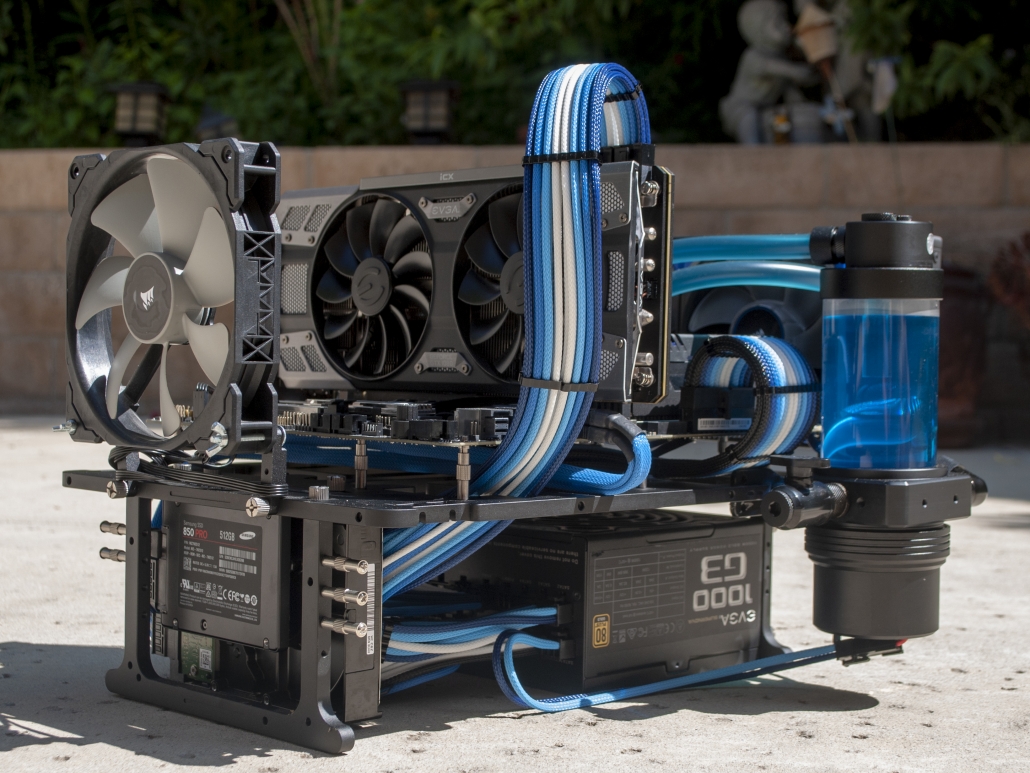
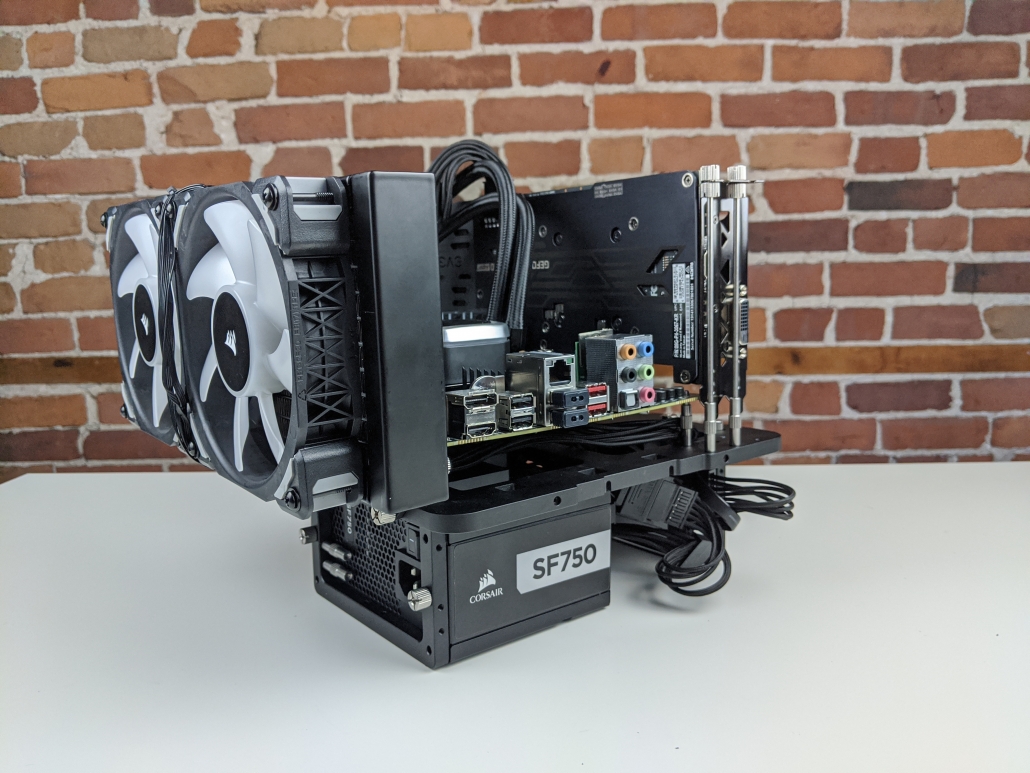
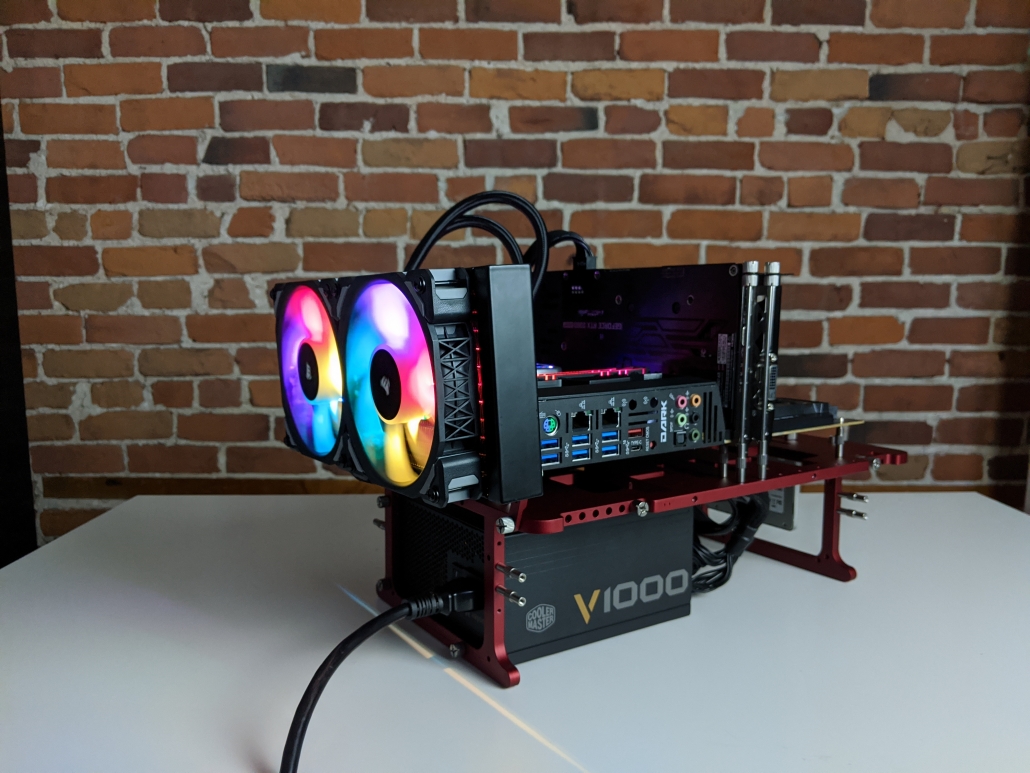
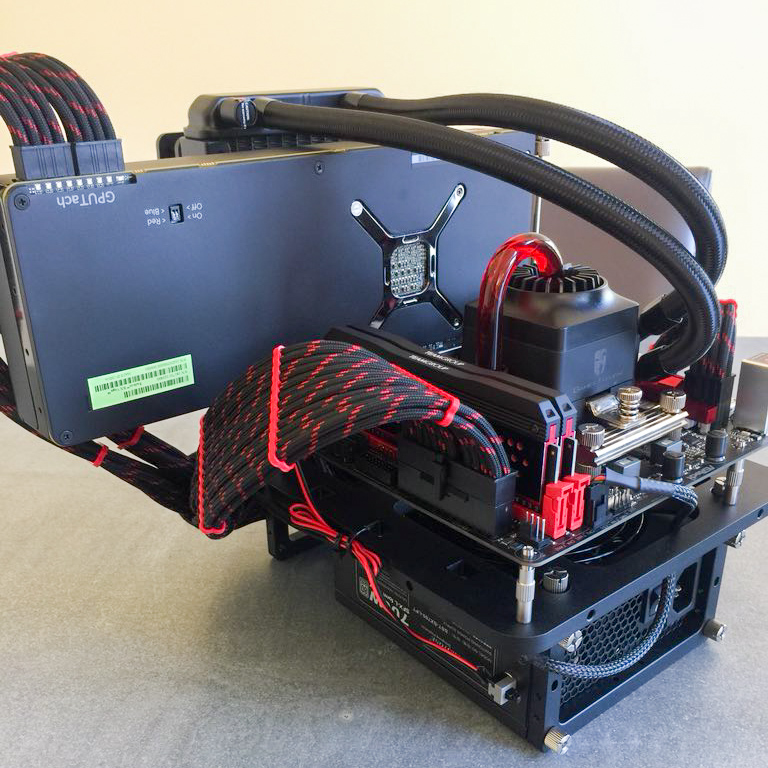
Theses are awesomes builds by the community to inspire you.
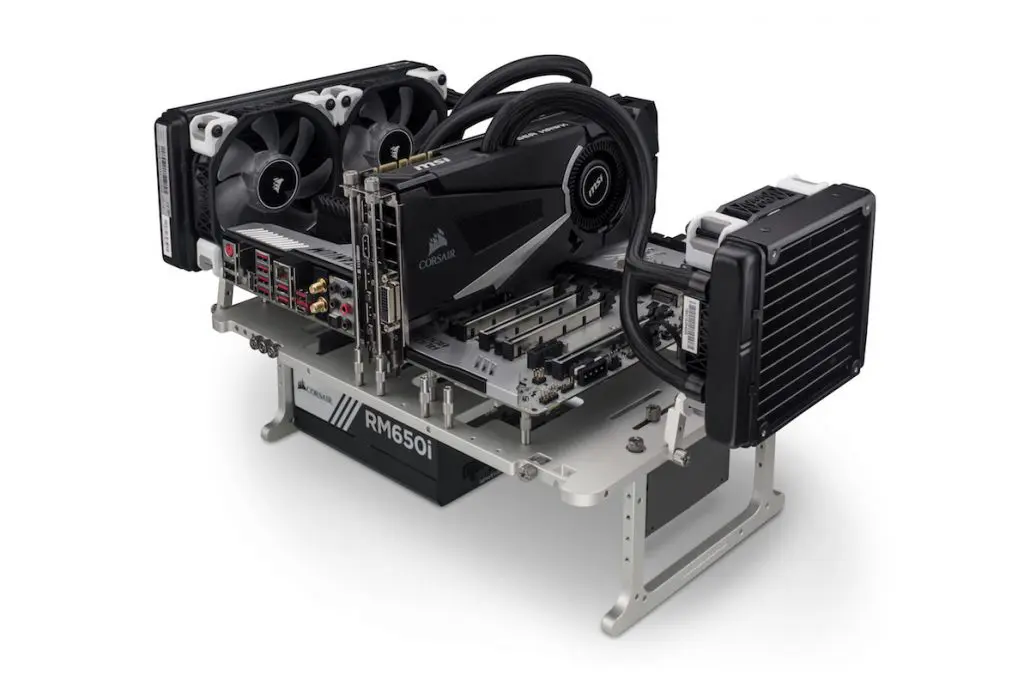
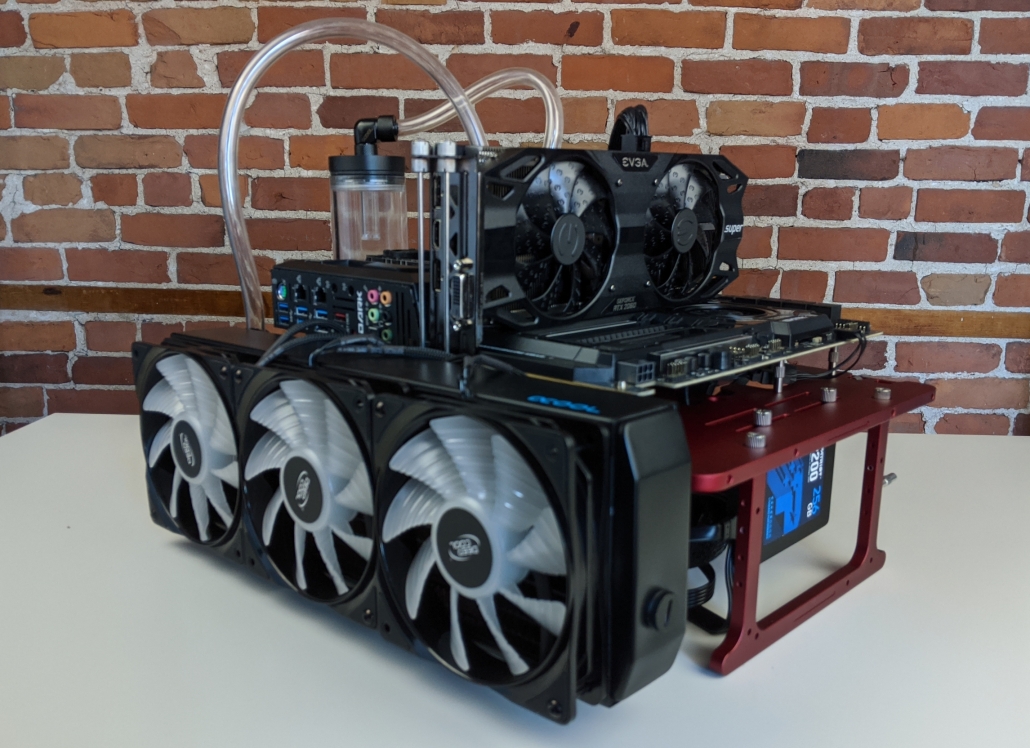
The Open Benchtable is quite straightforward to build as we showed on our step by step assembly guide. But due to the multitude of configurations you can create, we share the teams tips for attaching your watercooling kit. This watercooling installation guide focus on the most popular configurations to build your WC kit on the OBT.
The Open Benchtable is designed to handle any sort of hardware, it allows the users to build computers with a wide variety of component choices. Watercooling kits are no exception. Indeed, the OBT can support large radiator sizes, from 120mm to the giant 420mm ones. The only limit is gravity (almost)!
On the edges of the OBT, holes allow to create pretty much any configuration you could think of! Let’s divide them in three categories:
Radiator on top
Radiator on the side
Exotic mounting
Category 1 : Above the Open Benchtable frame
There are three recommended locations to install your watercooling’s radiator:
At the top (PSU/handle area)
On the right side
At the bottom (storage area)
There is an extra location on the IO side, that we wouldn’t specifically recommend.
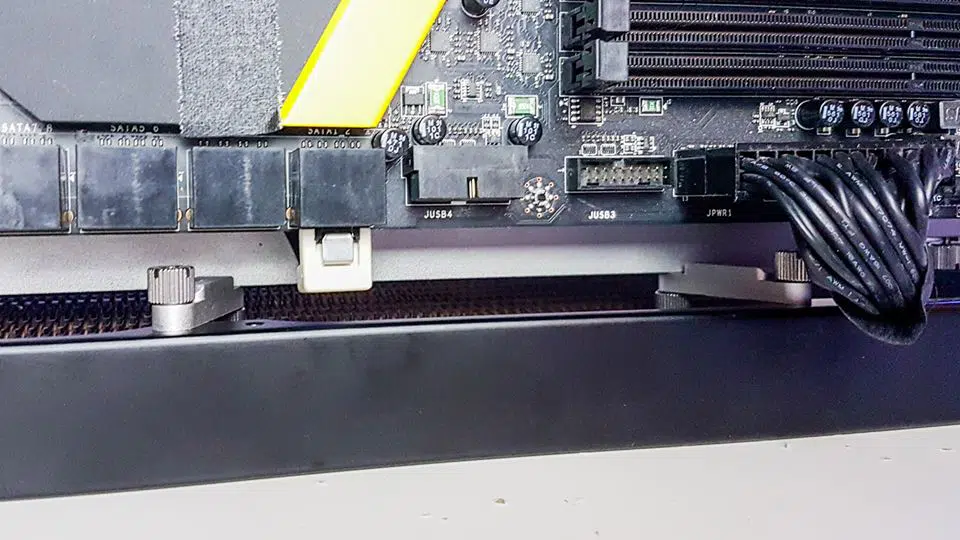
At the top (PSU/handle location)
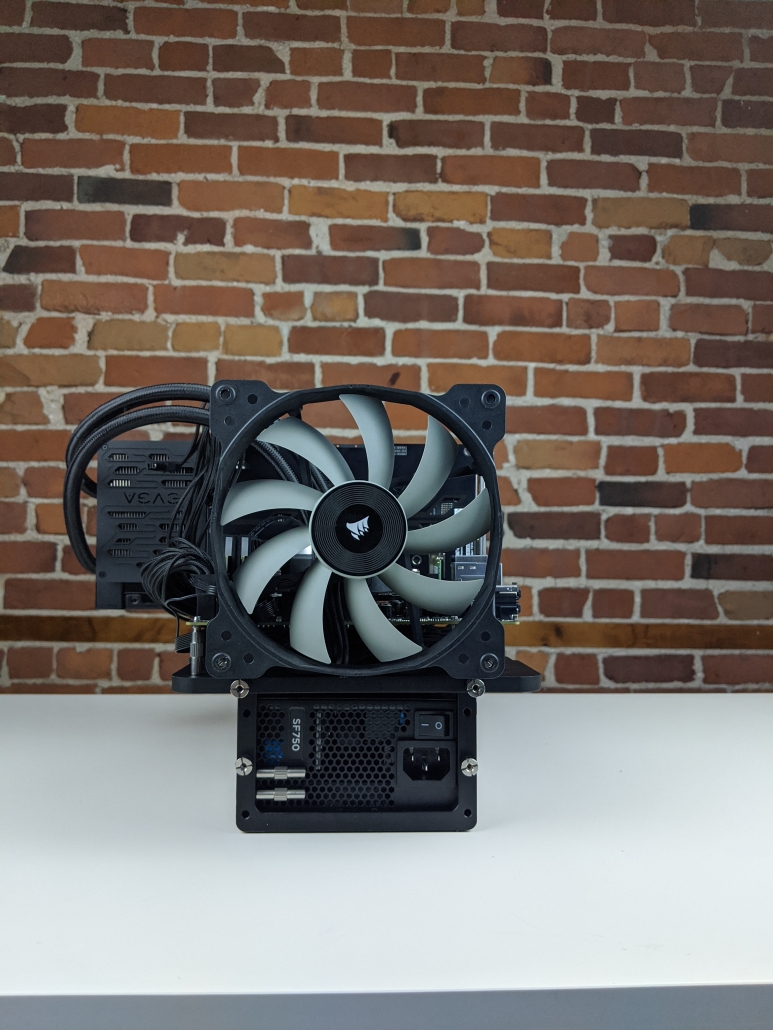
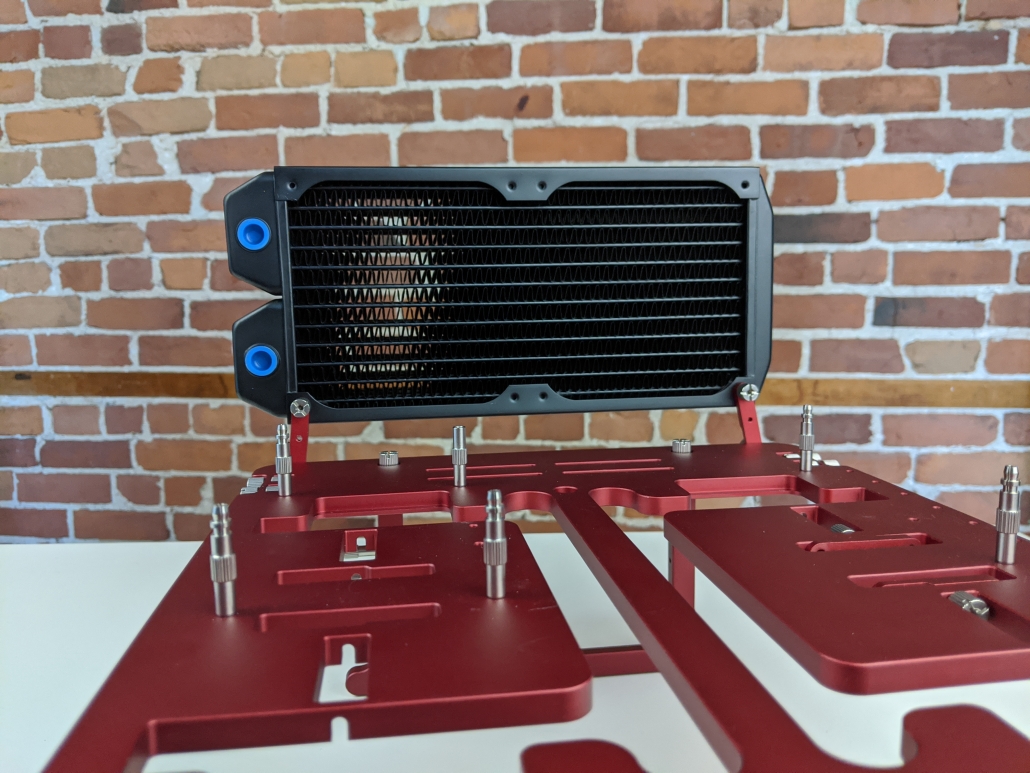
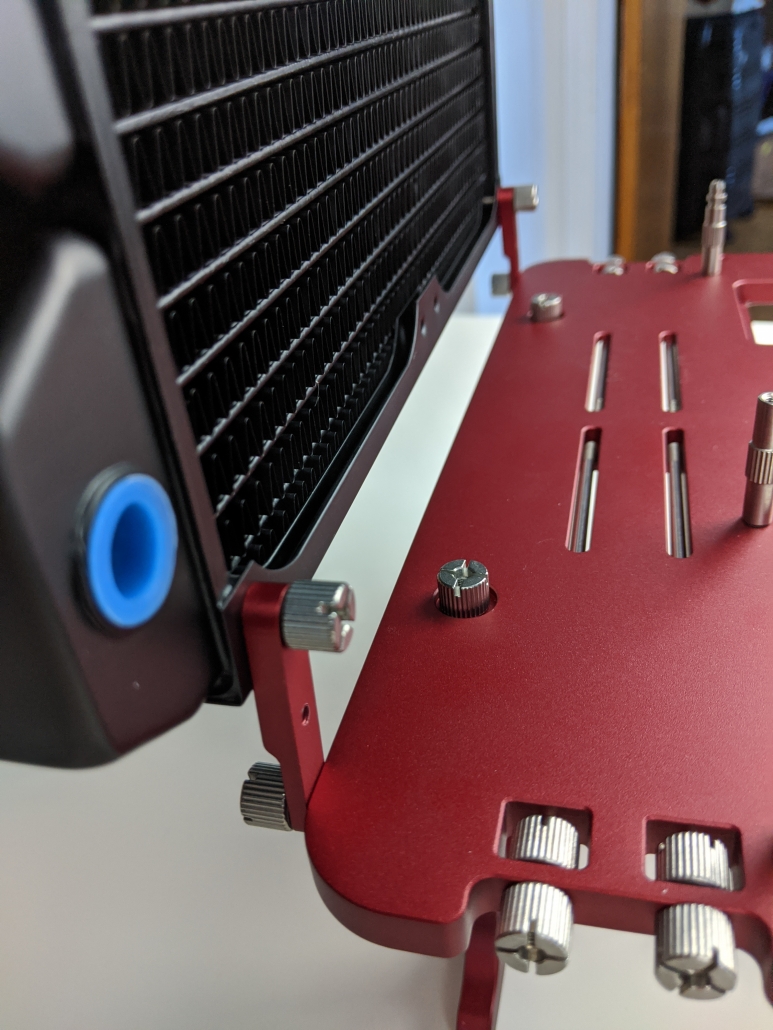
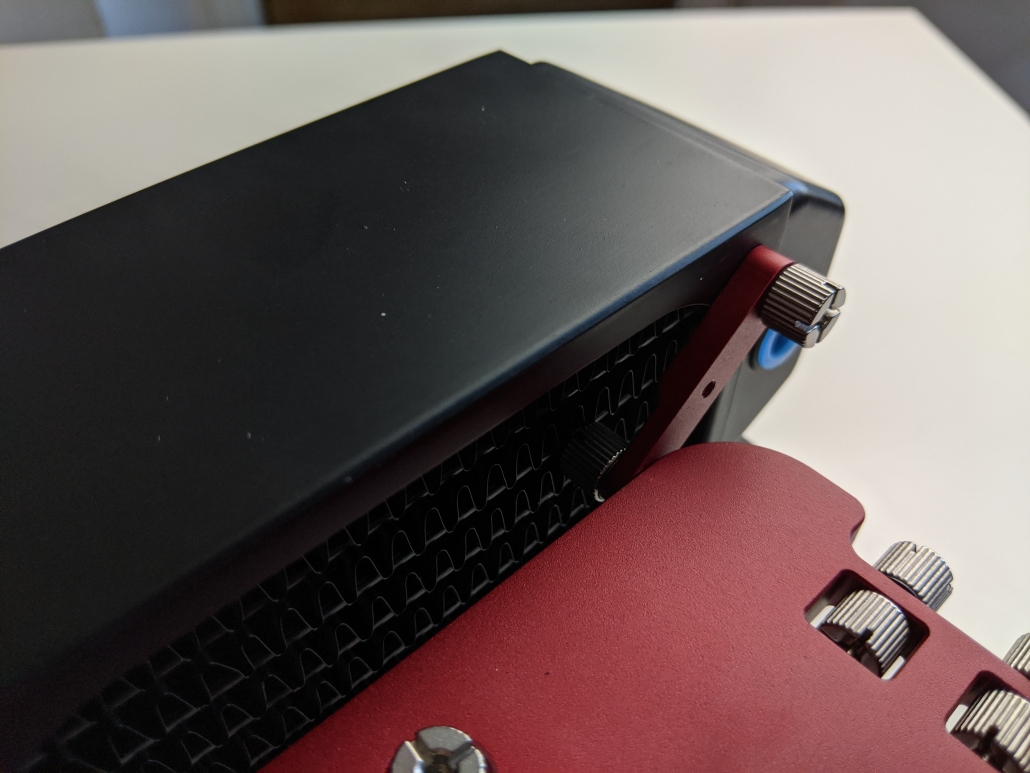
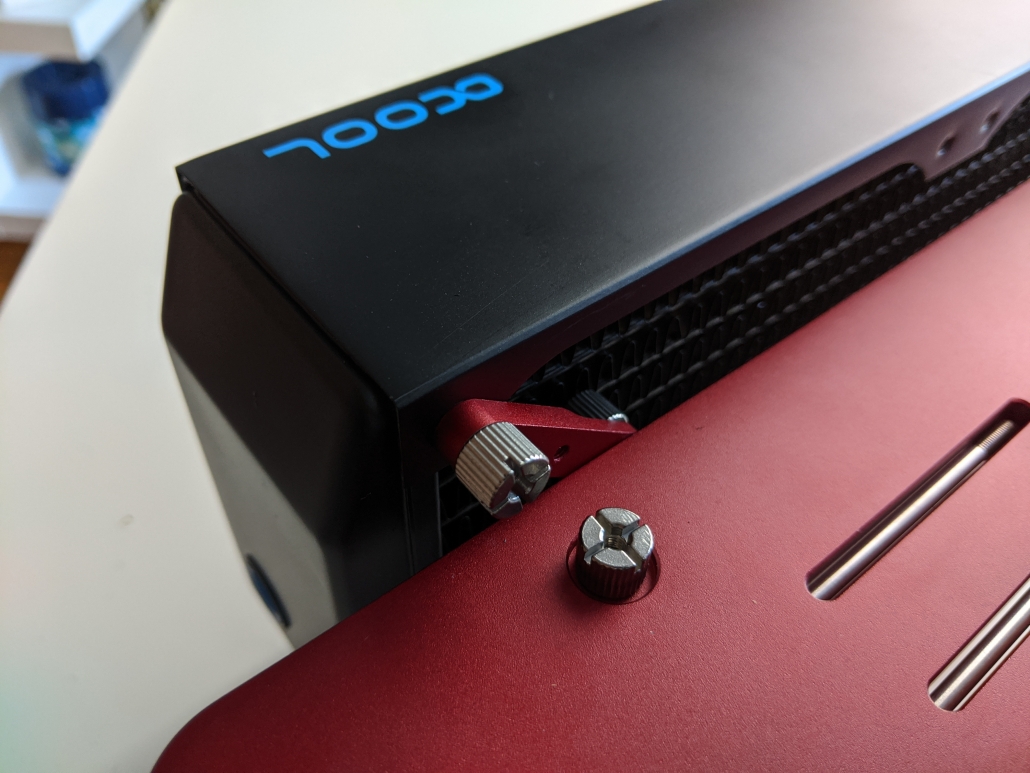
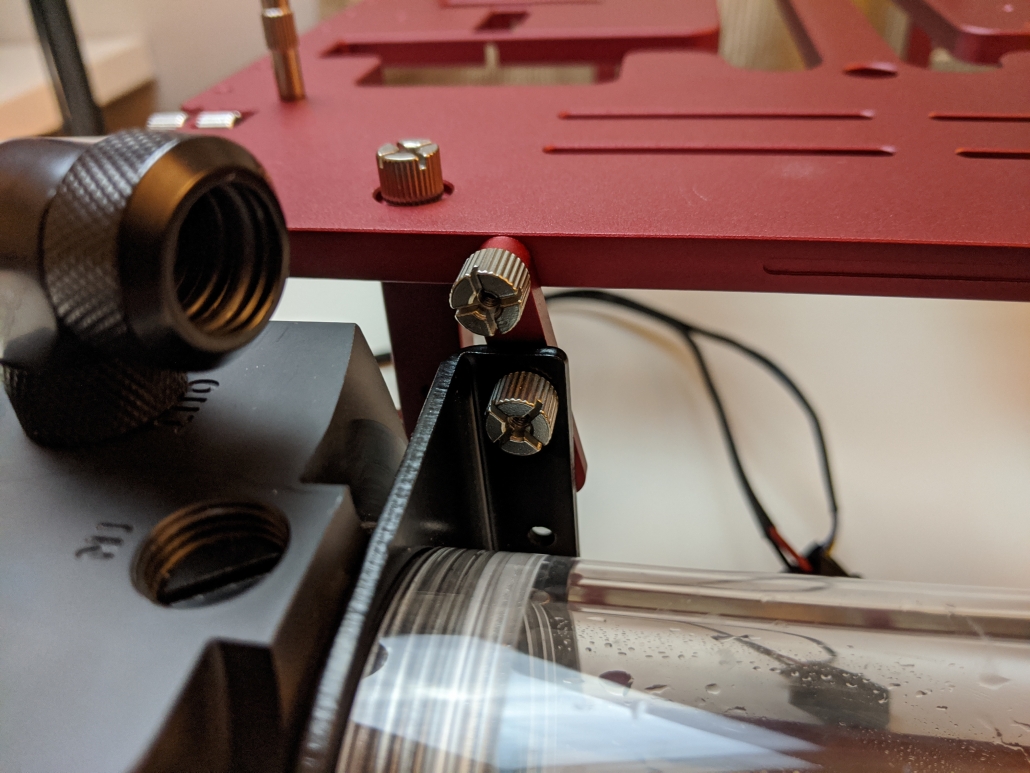
At the Open Benchtable’s edge located above the power supply unit, you will find holes. Attach two brackets using the M3 thumbscrews provided with your OBT. Adjust the brackets to fit your radiator mounting and use the screws provided with your radiator or the OBT screws.
Tips from the team: Use the widest mounting point on the Open Benchtable to support large radiators.
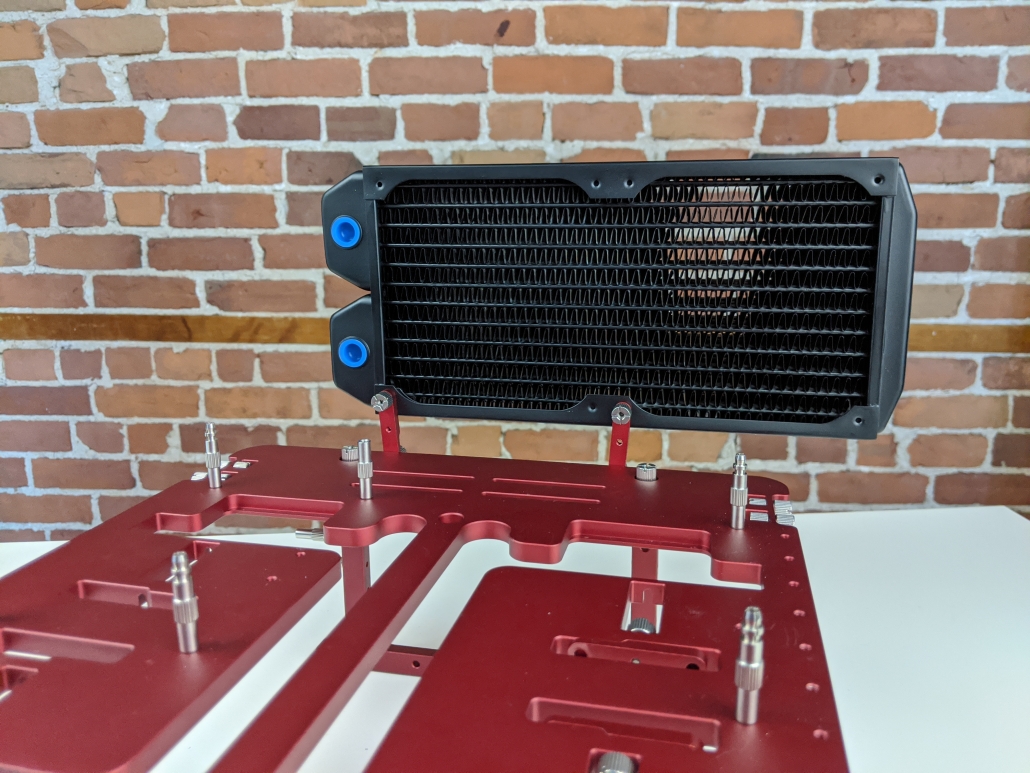
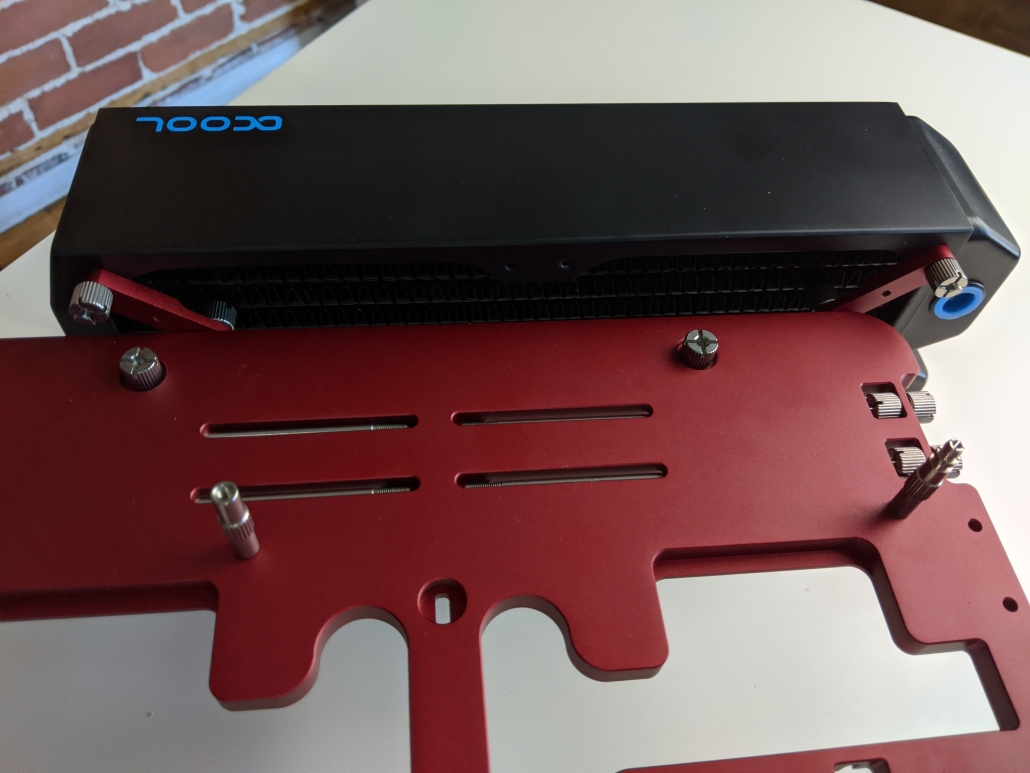
Recommended position for large radiators
For smaller radiator, find the combination of brackets & radiators mount that fit best. This mounting approach is supported and recommended for both the Open Benchtable and the Open Benchtable Mini.
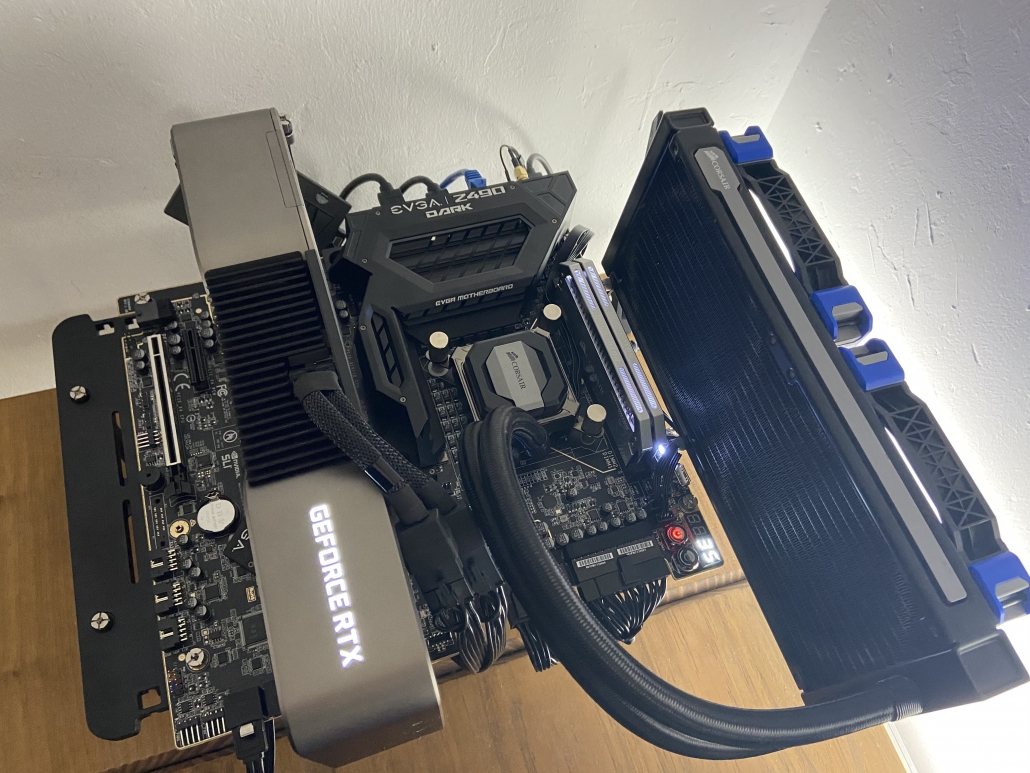
Depending on your motherboard format and GPU size, consider mounting the radiators on the right of the OBT. Adjust the brackets to fit your radiator and you’re good to go!
Tips from the team : This usually works with ATX or smaller motherboards. Consider that any GPU larger than your motherboard frame can conflict with large radiators.
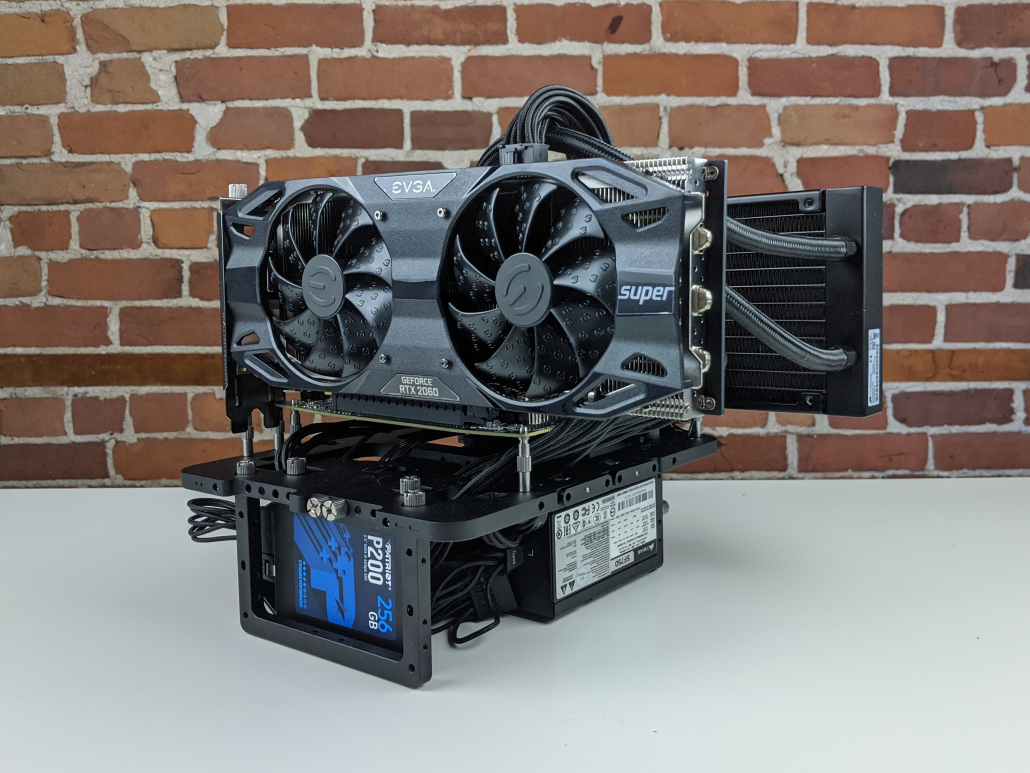
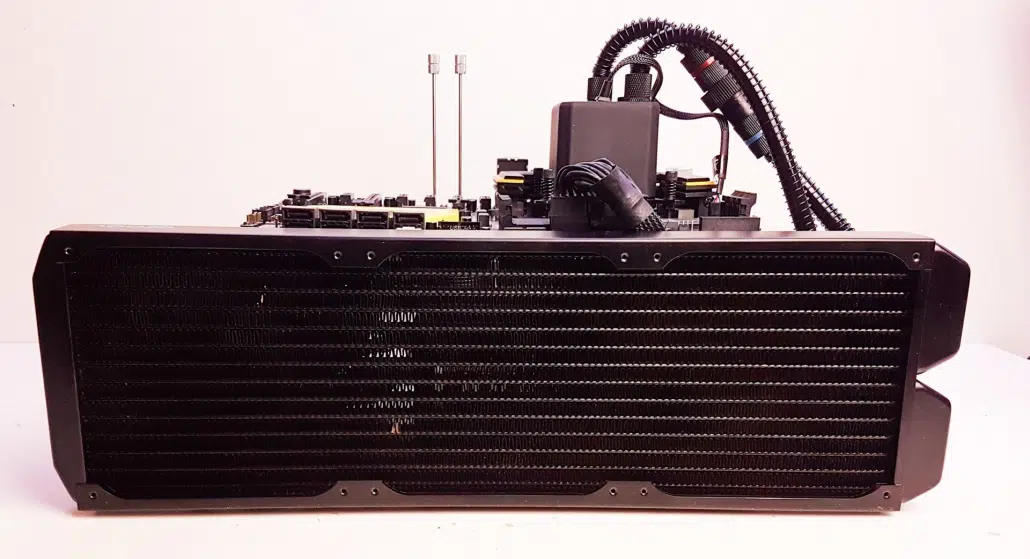
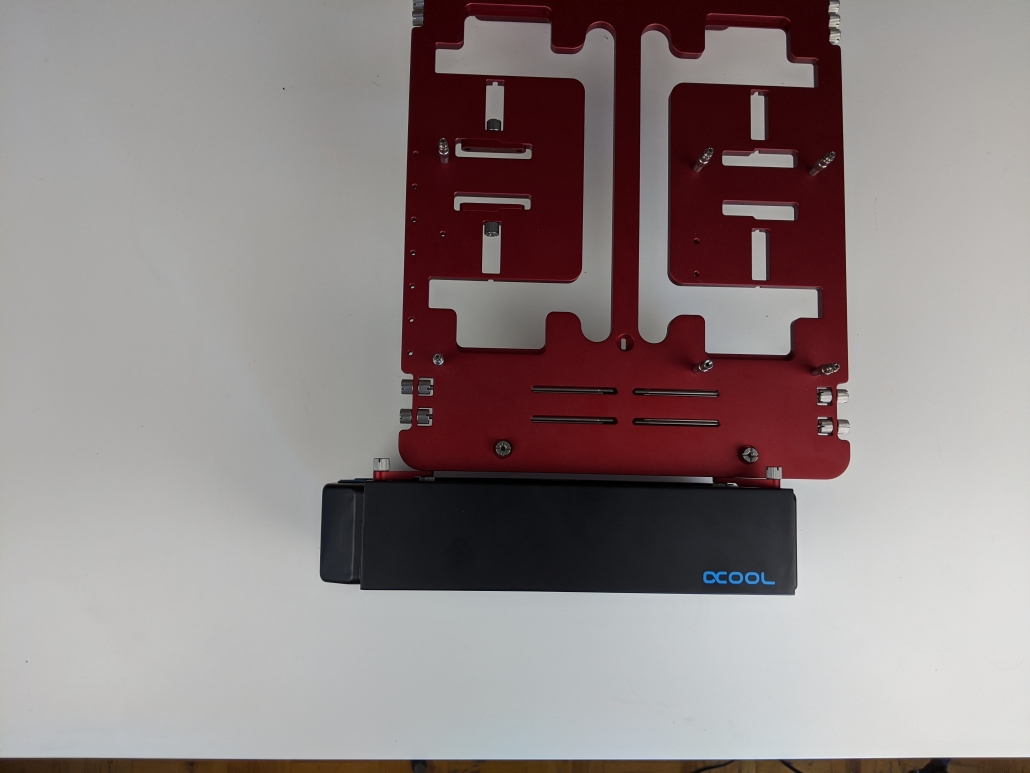
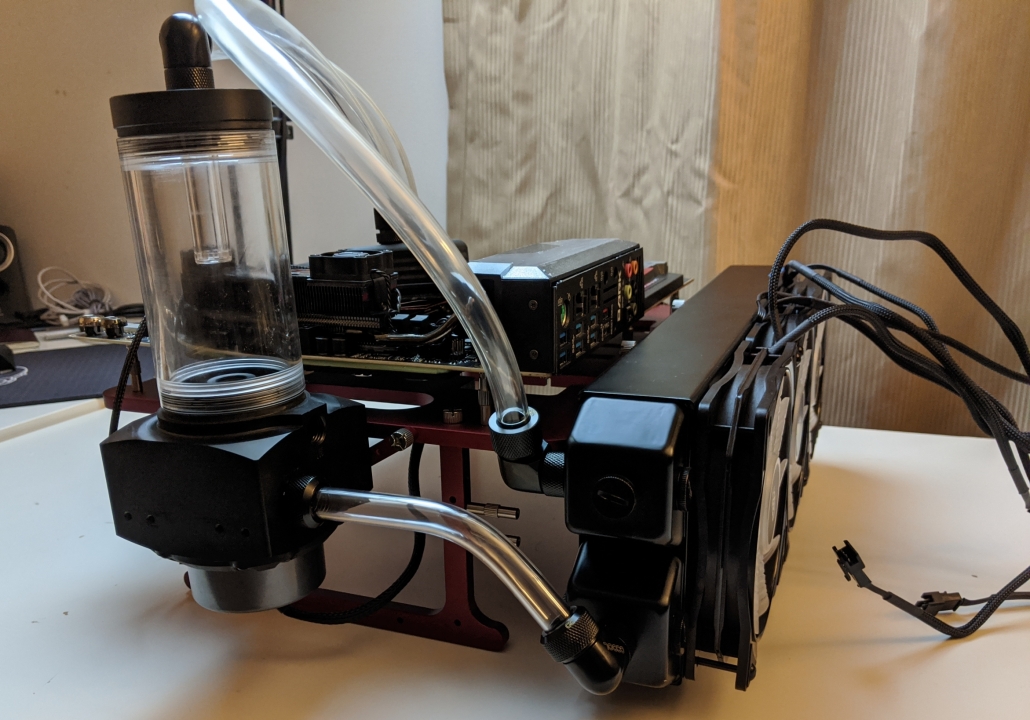
Facing the GPU / storage side
This one makes a lot of sense if your GPU is watercooled. Just above the storage space, there are 4 holes to attach the brackets. Like the PSU/handle side seen earlier, find the holes that fit the best your watercooling system!
Double All-in-One cooling in a breeze.
On the left side (behind the IO shield)
This setup is not recommended, as it easily blocks the motherboard IO and the GPU connectivity. This option is available on OBT v1 and v1.1.
There are two holes on the OBT edge behind the IO shield to attach your components. However, this mounting space is used mostly in Extreme Overclocking Setup when the GPU is on a different PCI-E slot and for industrial motherboards/testing systems.
Category 2 : Below the Open Benchtable frame
There are four different locations where you can install your radiator when you choose it to be under the OBT frame. There are two recommended layouts and two other locations possible.
Setting the radiator below means that your radiator is below your pump, in some configurations this can lead to bubbles in your loop.
At the top (PSU/handle location)
We wouldn’t really recommend this setup because it can easily obstruct the PSU’s plug. This is a good location for a tiny radiators, pump or VRM Cooling bracket.
Use the brackets to secure the radiator to the frame. Holes are located on the edge just above the PSU.
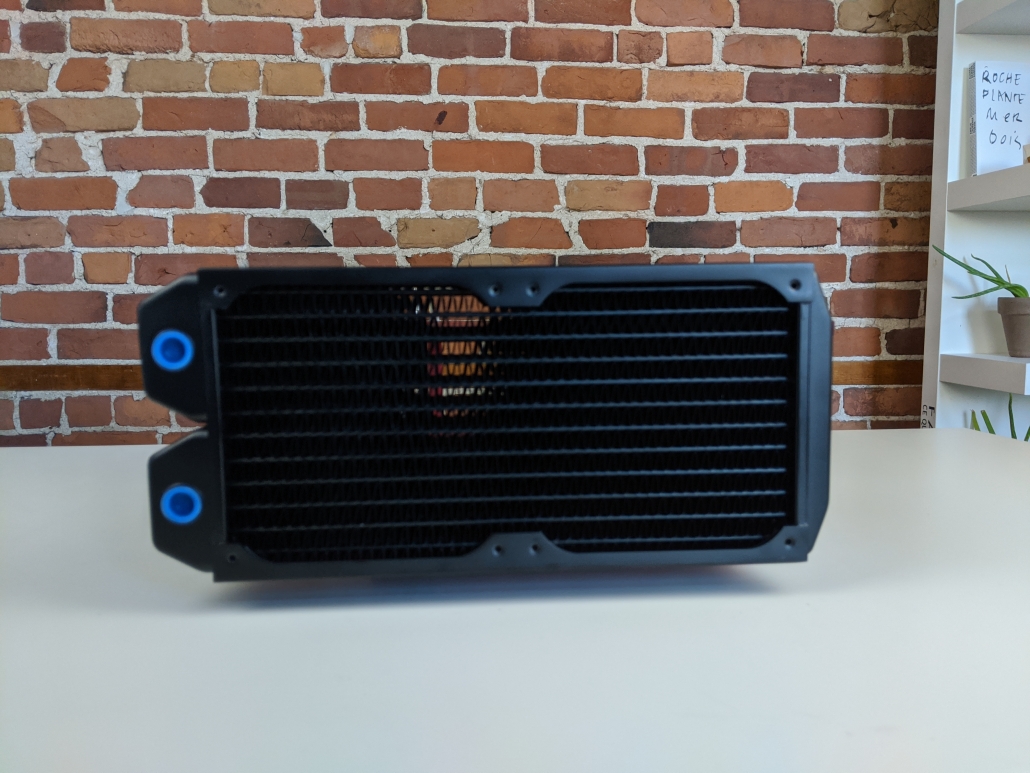
On the right side
This position is useful for long radiators, be creative with the brackets and positions.
With a combination of “Bigger-than-ATX” motherboards and large radiators this might not be possible. Nonetheless, this is a great location for long radiators, distro-plates or reservoirs.
At the bottom, facing the storage
In the same fashion as PSU/handle position, you can set your radiator facing the storage. The good part here is that there won’t be any conflicts with airflow nor plugs.
Adjust the bracket spacing based on your needs and component size.
On the left side, (under the IO shield)
You can attach the radiator on the IO side of your rig. This setup works best with thin radiators that use 120mm fans or smaller. This position is not recommended as some radiator size will conflict with the IO of your motherboard or GPU.
This can be used for your radiator or your pump depending on your creativity.
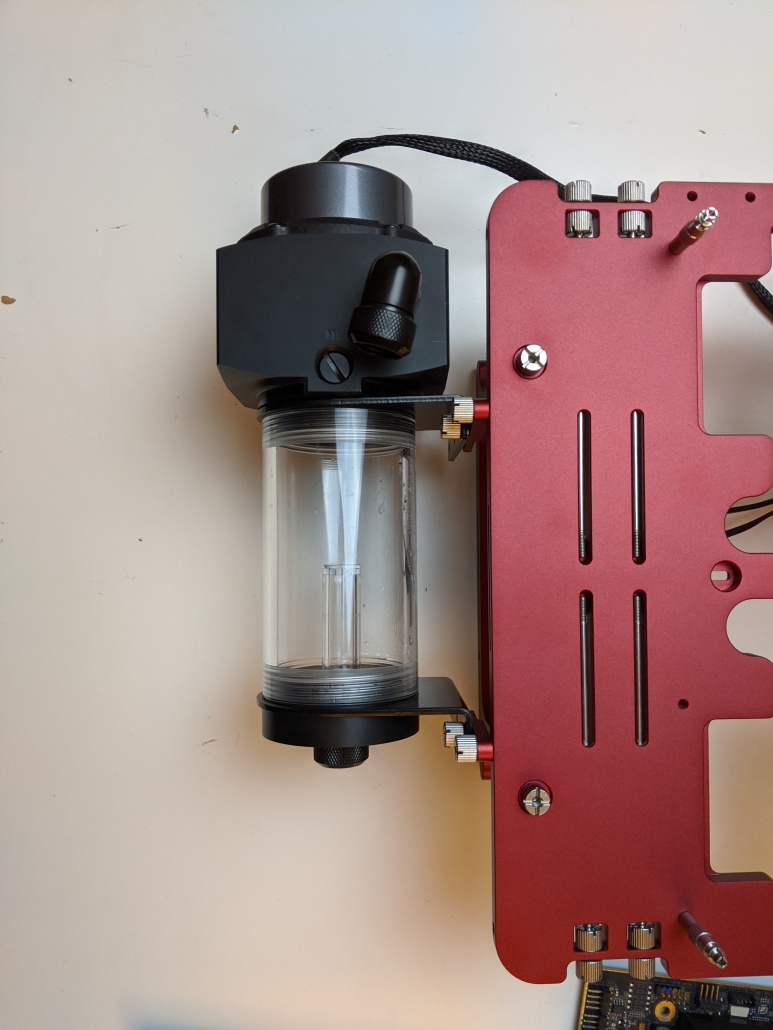
Mounting pumps or reservoirs
All the locations can accommodate watercooling pump, reservoirs or extra add-ons like the OBT Debug Card. Depending on your pump, the brackets are helpful to accommodate a large choice of models.
Build & Share
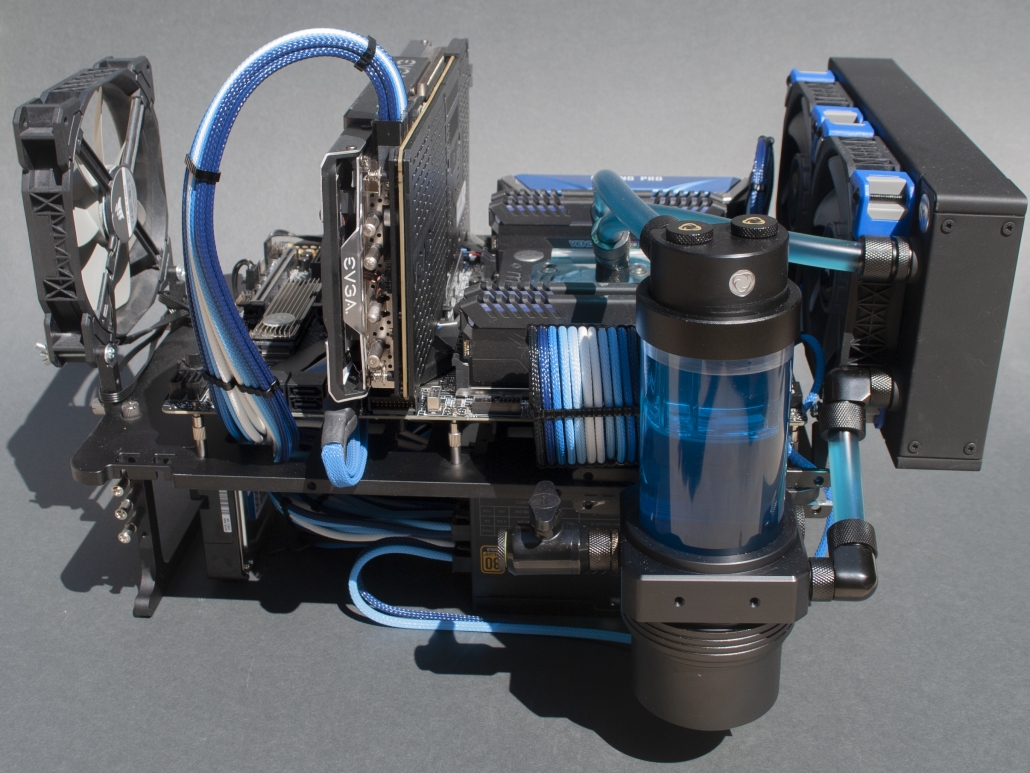
We love to see the OBT Community members building on the Open Benchtable.
Much to our delight NOCTUA showed a creative custom VRM fan bracket for the Open Benchtable earlier this year at the Computex 2019 trade-show. This is the story of the “what and why”, and how you can get one yourself.
Computex During Taiwan Summer Time
Computex is one of the most important tradeshows for technology and the PC hardware industry. It is held every year around the beginning of June in Taipei, Taiwan. Taiwan holds a special place in the hearts of many technology enthusiasts as it is the home of some of the biggest brands in the PC industry. Every year the Taiwanese companies, as well as a range of international companies, show off their new products during the week-long event. That week Taipei is a hot spot not only because of the innovation but, as many tech journalists will confirm, also because the humid summer weather.
Among the international brands is NOCTUA, an Austrian company world renowned for their premium CPU heatsink and fans. At Computex 2019 NOCTUA demonstrated an upcoming refresh of the chunky NH D15 CPU cooler.
NOCTUA NH D15 featured in Vertical Wall Mount
The VRM Cooling Challenge
NOCTUA used a high performance platform featuring an overclocked AMD Ryzen™ Threadripper™ 2990WX Processor to demonstrate the cooling capability of the NH-D15. While the CPU consumes over 435W, the CPU cooler is more than capable of handling the associated thermal challenge. However, as witnessed on other high-end desktop platforms, it’s the VRM that presents a real cooling challenge.
The VRM, or Voltage Regulator Module, are a group of electrical components that ensure efficient and stable conversion from the +5V or +12V input to the voltage used by the CPU. Contemporary CPUs will use any voltage in the range of +0.6V up to +1.5V. Additionally, the high core count CPUs will draw a lot of current especially during intensive workloads like 3D rendering. While the conversion process is not that complicated and has seen many decades of development, the conversion isn’t 100% efficient. The inefficiency is translated in, among other things, increased heat dissipation.
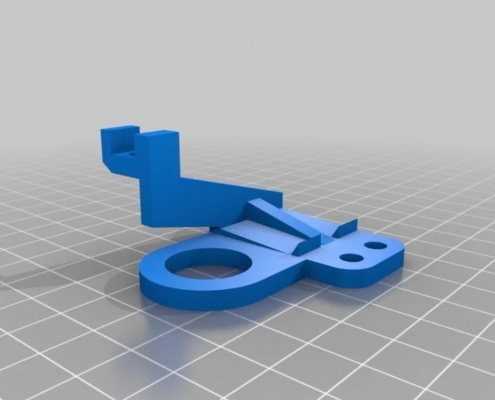
Noctua custom VRM fan bracket
VRM Fan Bracket To The Rescue!
With higher and higher power draw from the CPUs, VRM cooling is increasingly challenging. With our high-end CPU coolers, we often run into situations where the CPU is still well below its maximum temperature but VRMs are already throttling. Unfortunately, many of the heatsinks that motherboard vendors put on the VRMs appear to have been created with a key focus on visual design rather than best thermal performance, so sometimes, your best bet is to add some extra airflow. Thankfully, this is super-easy to do with the OBT, so when we created our demo system and discovered that the VRMs were running too hot, we quickly sketched a fan bracket, CNC-milled it and a few hours later we were ready to roll!
Jakob D. – NOCTUA
The simplest solution to ensure the VRM cooling solution can handle the extreme power conversion is to increase airflow over the heatsink fins. Of course, that’s a simple job for a company widely praised for its superior air cooling solutions!
The NF-A6x25 PWM VRM fans feature advanced aerodynamic design measures such as Flow Acceleration Channels and Noctua’s AAO frame. As such, the NF-A6x25 is a highly optimized, premium quality quiet fan in 60x25mm size. The PWM version sports Noctua’s custom designed NE-FD1 IC for fully automatic speed control via 4-pin fan headers and comes with a Low-Noise-Adaptor to reduce the maximum speed during PWM control from 3000 to 2100rpm.
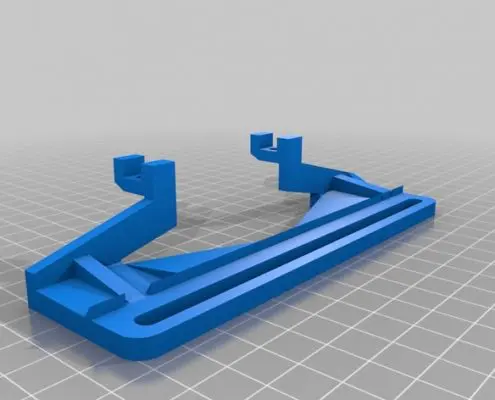
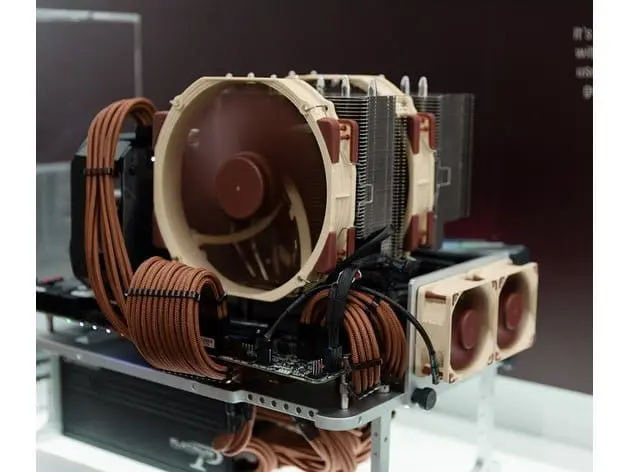
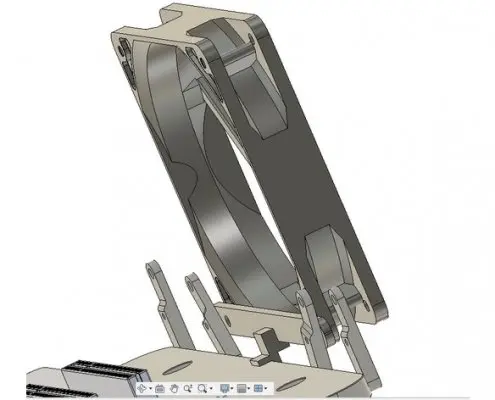
With the fan choice out of the way, the only thing left is to attach the additional cooling to the Open Benchtable. Using the open-source Open Benchtable blueprint, NOCTUA designed custom VRM fan bracket that supports up to two fans aimed directly at the motherboard VRM.
Two NOCTUA NF-A6x25 PWM mounted on the custom VRM fan bracket
Design Done Right
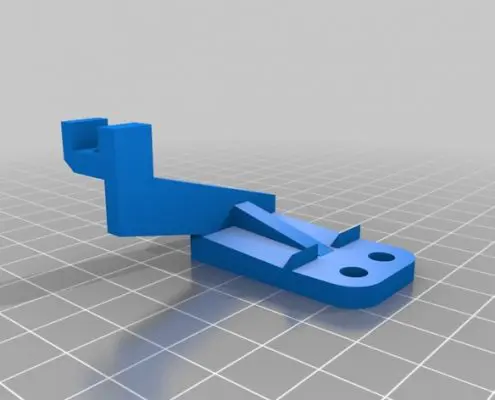
With a design-focused mindset as a core value, NOCTUA couldn’t “ghetto-mod” this Open Benchtable extension. So NOCTUA designed an aluminum bracket that matches the design and style of the Open Benchtable.
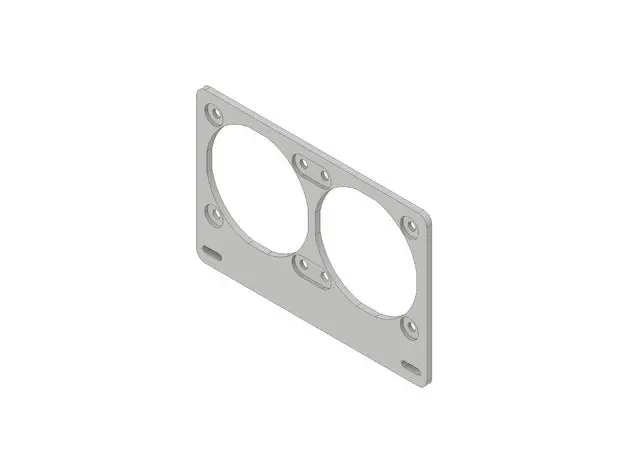
NOCTUA 2X 60MM FAN BRACKET render
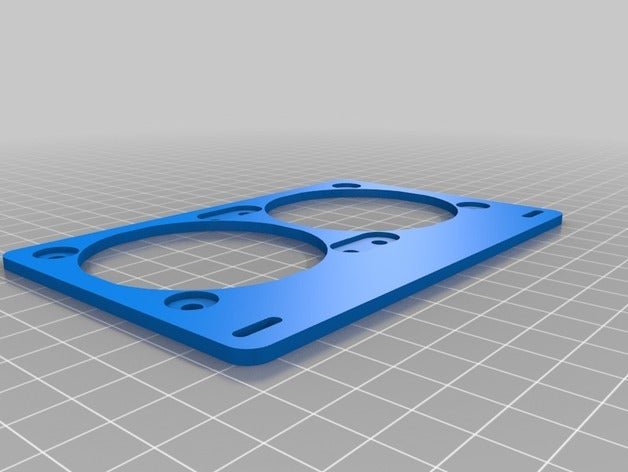
For Computex 2019, we CNC milled the bracket from aluminum, but it can also be 3D printed. The bracket has been designed for use with the Noctua NF-A6x25 series fans, which can be mounted to the bracket using the supplied NA-AV1 anti-vibration-mounts: https://noctua.at/en/nf-a6x25-pwm
Post Computex, NOCTUA published the blueprint of the custom VRM fan bracket. It is available in the community project section on openbenchtable.com.
Working with the Open Benchtable for our demo systems was pure bliss. As an engineering company, we have a special appreciation for products that are cleverly designed, where everything just falls into place and works as expected, even if you do something that goes beyond the usual scope of application. The same goes for the impeccable craftsmanship of the OBT, it’s rare to find a product that not only doesn’t have any sharp edges but is so well crafted that it’s actually a pleasure to touch and use.
Jakob D. – NOCTUA
Get Your Own Custom VRM Fan Bracket
There are two ways to get a hold of this custom VRM fan bracket. You can either 3D Print your own bracket with the files available on the community page. Or, you can order the kit directly from NOCTUA via the community page. NOCTUA’s kit comes with two NF-A6x25 fans and anti-vibration mounts.
We would like to thank Jakob and the team at NOCTUA for contributing to the Open Benchtable community and sharing their story in this blog post.
https://openbenchtable.com/wp-content/uploads/2019/11/noctua-2x60mm-open-benchtable-bracket-pics.jpg6751200Isaie Trouffman Simonnethttps://openbenchtable.com/wp-content/uploads/2017/06/logo-if-rd-330-300x107.pngIsaie Trouffman Simonnet2019-11-08 22:33:282019-11-08 22:38:35VRM fan bracket by NOCTUA – Community projects


 PKKShadow