[DIY] 360 Radiator Horizontal Stand
- Author: Iuakri
- License: Attribution 3.0 Unported (CC BY 3.0)
- Description: Custom Waterjet cut 360 Radiator Horizontal Stand
- Downloads: https://drive.google.com/drive/folders/1KPhFwbnHKHE4-XYSTFU8vjYqmy547Co2?usp=sharing
- Support thread: https://community.hwbot.org/topic/184774-projectdiy-360-radiator-horizontal-stand/
Project Description
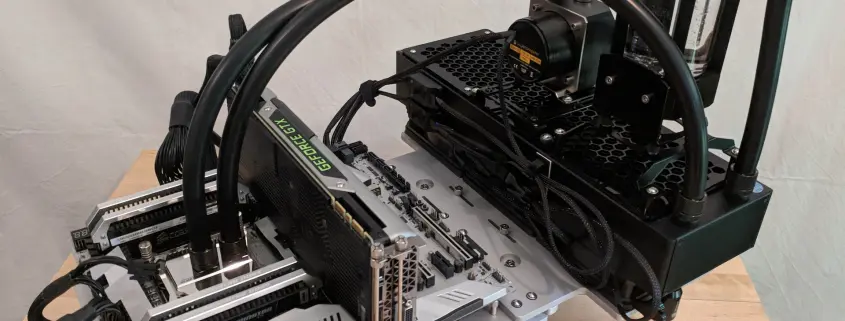
This project was born with my interest in creating a custom loop for the Open Benchtable.
Requirements
- Must work with E-ATX motherboards
- Best setup for filling and draining the loop (no horizontal reservoir)
- Good access to all the custom loop components
- If the pump needs to be replaced, no need to dismantle the loop (no combo reservoir pump)
- Must support the weight of the custom loop components
- If the OBT SSD support can no longer be used, the Radiator Stand must have a SSD support.
- Stand must support a thick radiator
Before I had an AIO attached to the back of the OBT, the reason why the Horizontal Stand is coupled to the front of the OBT and not to the back, is to provide great access and maintenance to the custom loop parts.
The idea was simple, improve the concept of a radiator grill and extend it to the OBT.
After investigation, in order to withstand the weight of the custom loop and to be coherent with the OBT design, the material choice was aluminium.
CNC services are too expensive for one off batches, laser cut is too aggressive to the material and can leave burn marks, so waterjet cut seemed to be the best bet.
Source files
- .AI – Adobe Illustrator CC 2018 master file with 0.1mm line thickness
- .DWG – Autocad exported from Adobe Illustrator
- .DXF – Autocad model exported from Adobe Illustrator
- .PDF – format is 420×297 eg A3 paper, can be printed before sent to production
- .PDF with the dimensions used
- .EPS – Adobe encapsulated script
Depending of where the part is produced, the companies will request either .DWG or .AI.
I am not a 3d software specialist, so I designed the part in Adobe Illustrator. .DWG exported from Adobe Illustrator, the vector points are not 100% perfect, it is up to the Company that will produce the part to clean the vectors for a better production.
I have an OBT v1, and I did the part before OBT v1.1 was released. The source files for OBT v1 have been tested and assembly to the OBT is perfect. Checked the source for OBT v1.1 and the mounting holes appear to have been shifted 5 mm. I have produced different source files for the OBT v.1.1 but could not test the designs, since I do not have an OBT v.1.1.
For owners of the OBT v.1.1 that are interested in this part, make sure you print the part in A3 thick paper and check that the part can be assembled to the OBT before producing the part. Let us know if any issues are encountered.
For other radiator sizes, there is a folder with untested designs for v1 for 420, 480 and 560 sizes. Since it is untested, best to print and prototype to check the radiator fits the stand, and stand fits in the OBT before sending to production. The untested folder only has .AI, .DWG and .DXF files.
1 – Top Radiator Grill
Requirements:
- Must be good for airflow
- Must protect the top part of the radiator
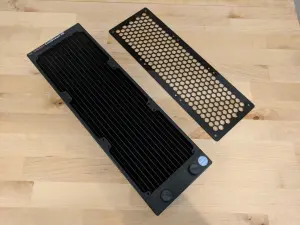
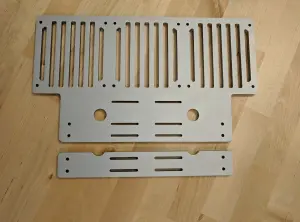
2 – Radiator Stand after waterjet cut
The part stains are the natural oxidization of the material. Either a metal polish could be used to better protect the material and make it look coherent, but it would not last long, or anodizing the part would give a better protection and no maintenance in the future.
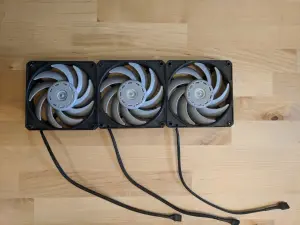
3 – Fans choice and custom sleeving
Static pressure fans, but which ones? After investigation and looking at DazMode youtube video comparing static pressure fans, Nidec Servo GentleTyphoon 120mm 2150 RPM PWM were chosen. These fans do not have sleeving, so this was my first custom sleeving mod.
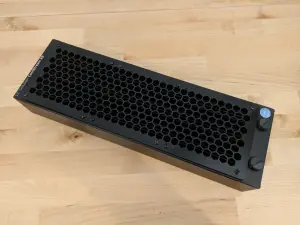
4 – Radiator Stand after anodizing service
The Company that did the anodizing service also pre-treated the material and removed imperfections.


5 – Screw sizes
To attach the Radiator Stand to the OBT – 6-32 X 1 ¼ screws
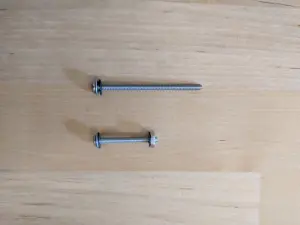
To attach the Radiator to the Radiator Stand – 6-32 X 2 ¼ screws (The screw size will differ depending of the custom loop setup used, eg fans height, shrouds, washers, will need to be accounted for to get the correct screw size to not damage the radiator)
Video
No video. Suggest a video.
Pictures


-

- Luakri’s 360 radiator mount


Change log
- 06/27/2018 – version 1.0 released
- 10/06/2018 – added extra pictures, New Loop design, same v1.0 accessory

